Resources
Welcome to our resources page, where you can find information and documentation about our theme and plugin.
Show Pro Documentation
In 2020, we launched a completely new version of Showthemes which is more powerful, easier to use, and produces more beautiful designs than ever before.
Show Pro now is an all-in-one solution for designing and customizing your website design to fit your needs. No more sifting through templates and having to choose only one design. Our theme provides you with all the tools and options to place the control in your hands. Below we have listed the framework for each area of the theme that can be customized for your vision. These options are listed under Appearance > Customize in your WordPress dashboard:
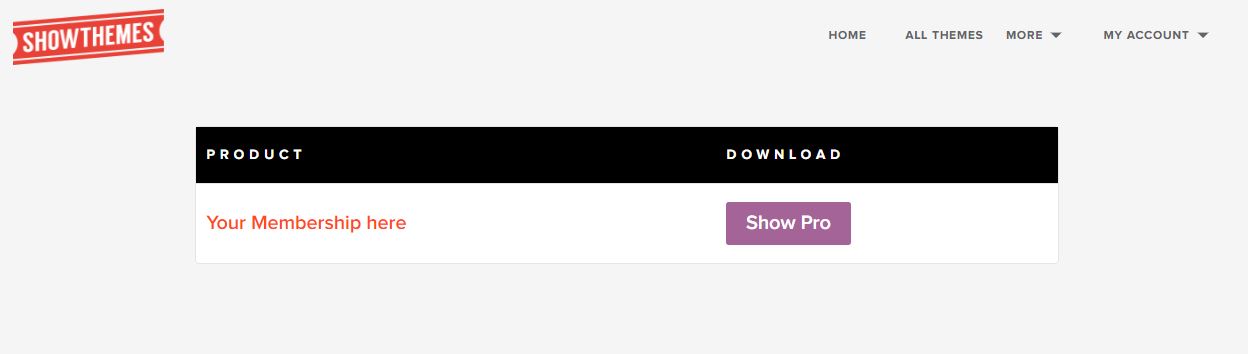
DOWNLOAD THE THEME FILE
Go to your Showthemes member’s area, login and download the latest version of your theme.
Zip File If you are using Safari, it is set up to open unzipped files, please, try the following
- Open Safari
- Click Preferences
- Under the General tab, uncheck the option Open “safe” files after downloading.
You can also try downloading the zip file using another browser.
INSTALL Show Pro
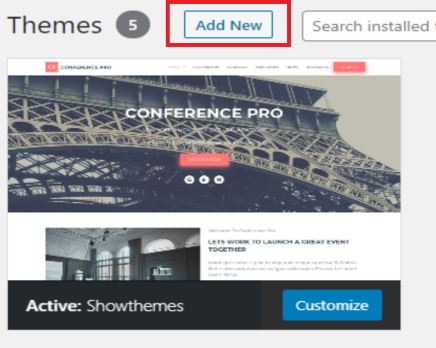
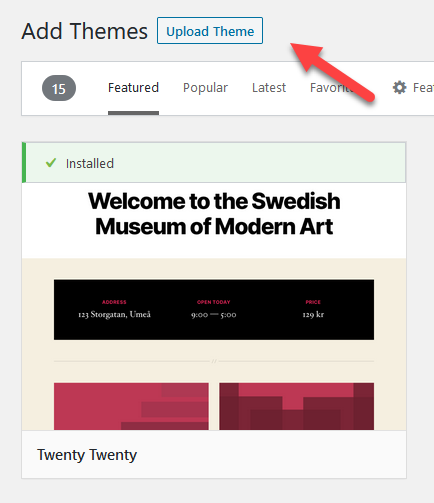
1- Login into your WordPress dashboard. Go to Appearance > Themes
2- Click on “Add New”
3.- Click on Upload Theme
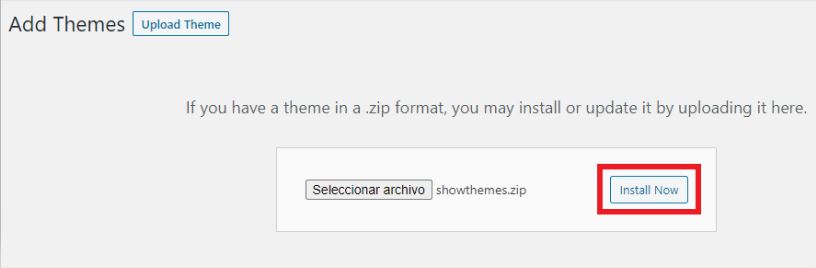
4.- Choose the zip file recently downloaded from your account member’s area, click on “Install Now”.
Note: It will take some time.
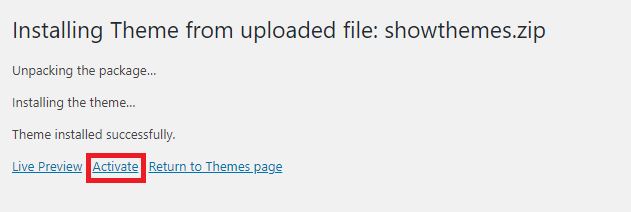
5.- Click on “Activate”.
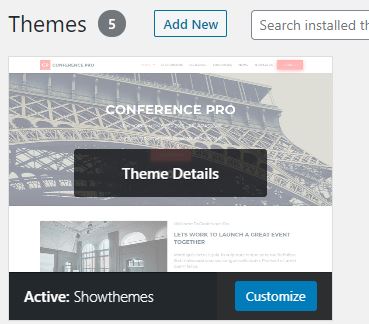
6.- You will be able to see Show Pro theme installed and active.
CHOOSING A THEME DESIGN
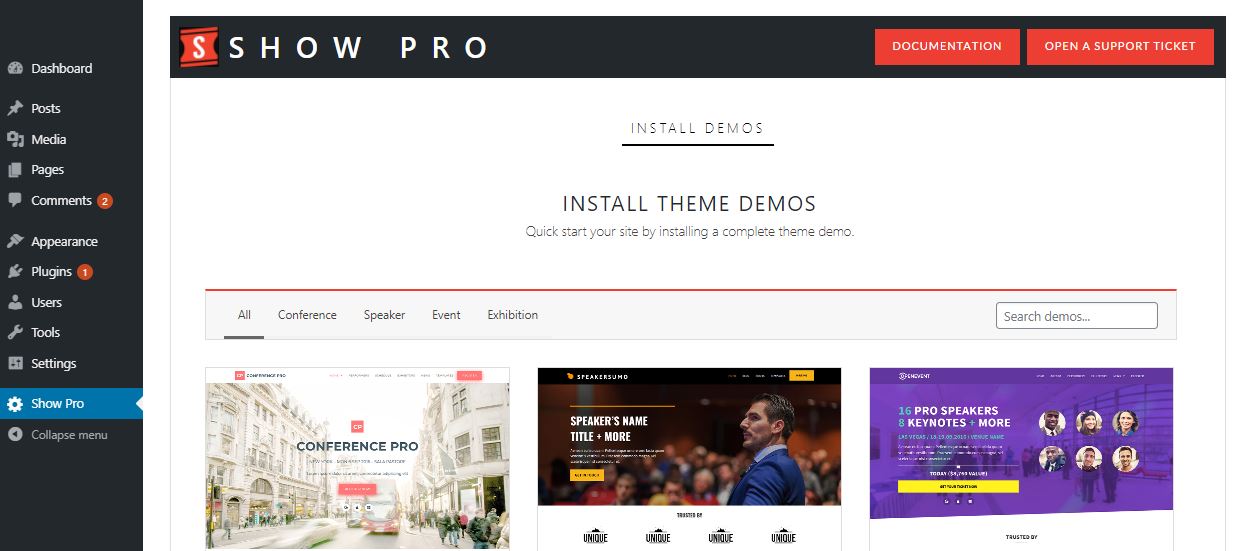
If you are using Show Pro, you have a big selection of ready to use Theme Designs. In our legacy theme, we used to call these “Presets”. To select your theme, go to the Show Pro Link in your WordPress dashboard.
Please, note that Show Pro is a new theme; if you want to migrate your site to this theme, the recommendation is to start fresh and import the blog post only.
HOW TO EXPORT AND IMPORT THEME PRESETS
IMPORTING BUILT-IN DEMOS
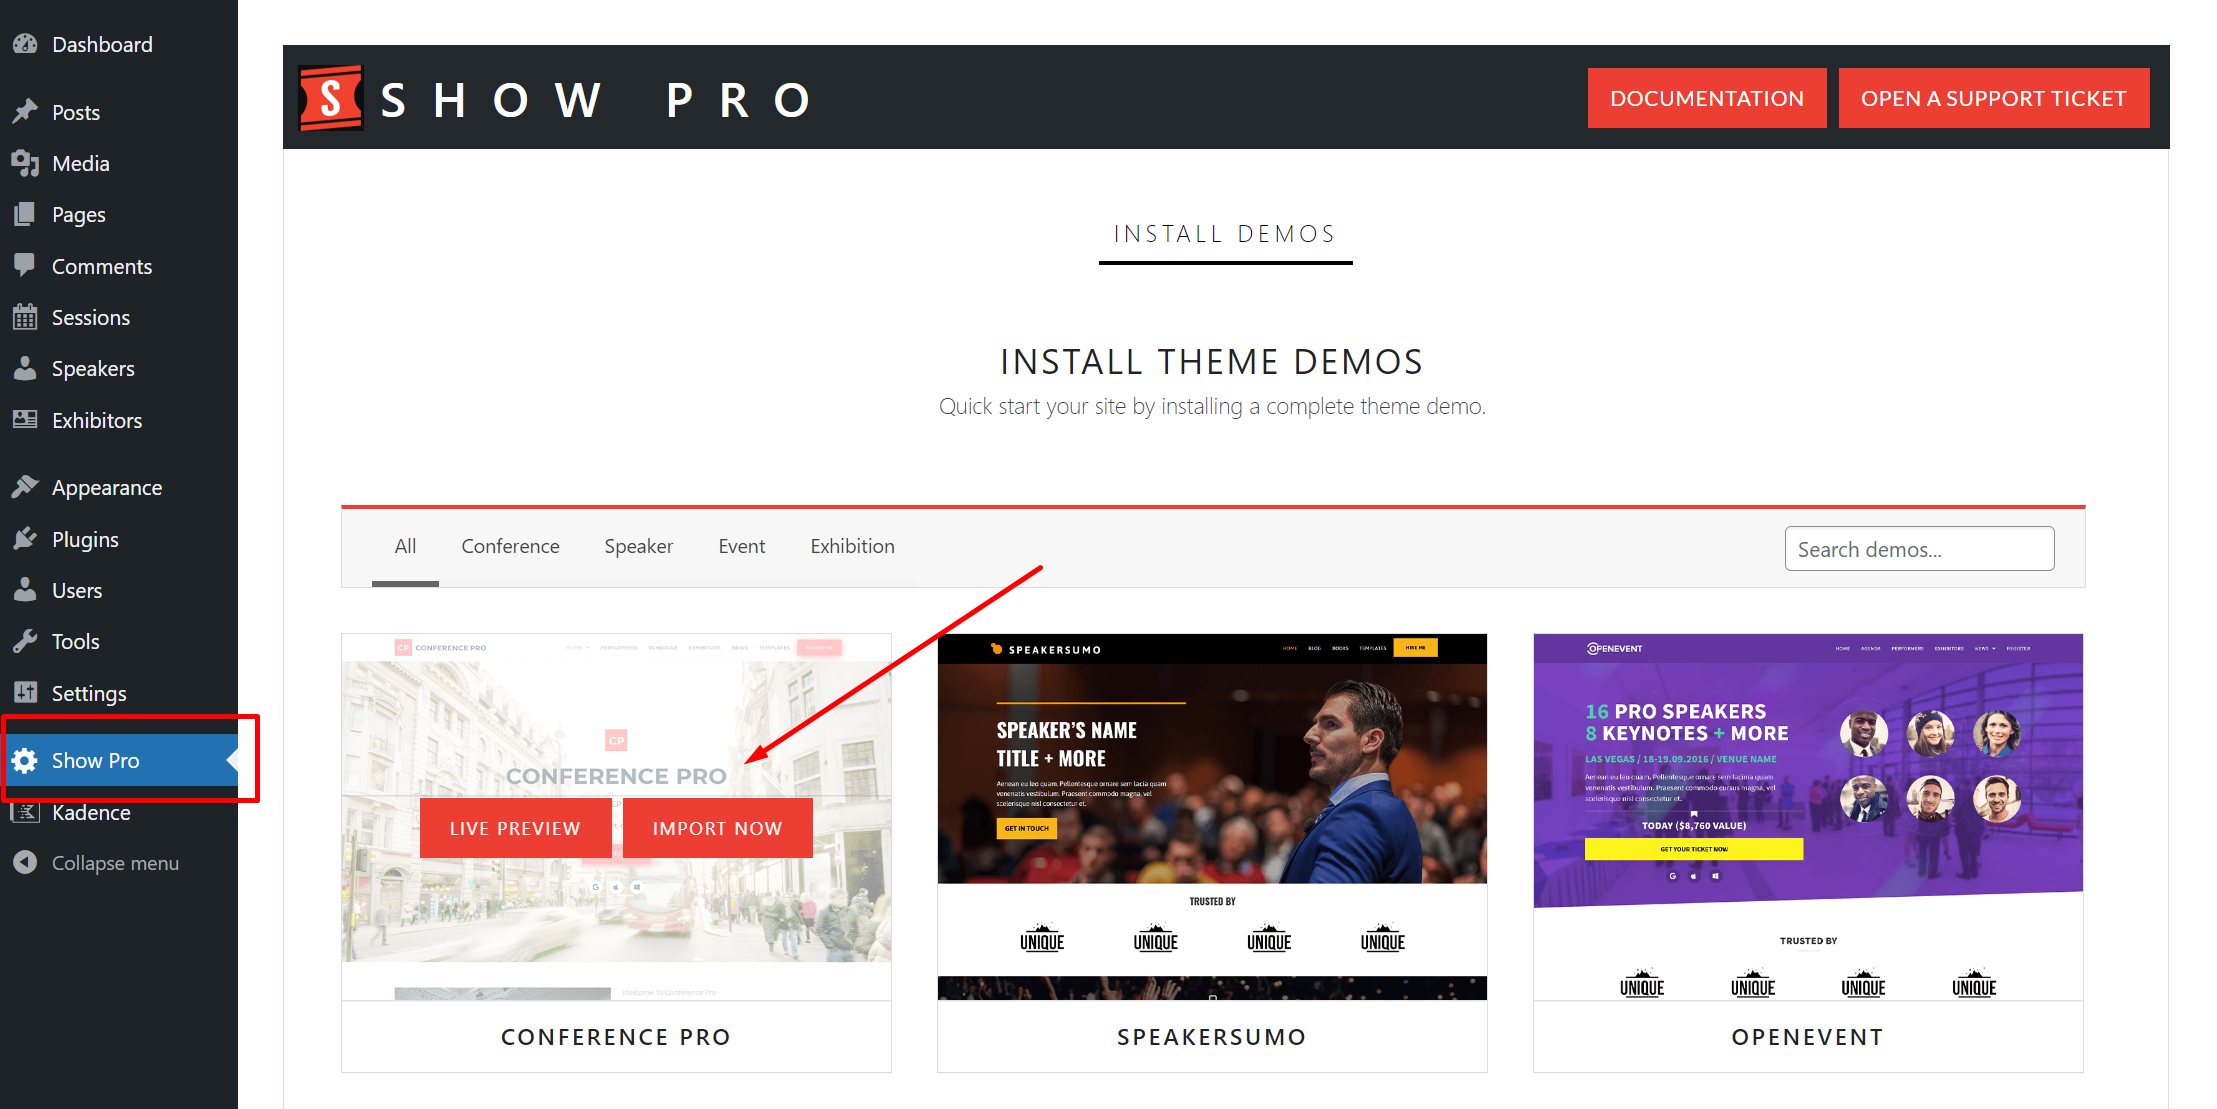
Show Pro comes with a dozen beautiful starting demos that you can import, use, and work with.
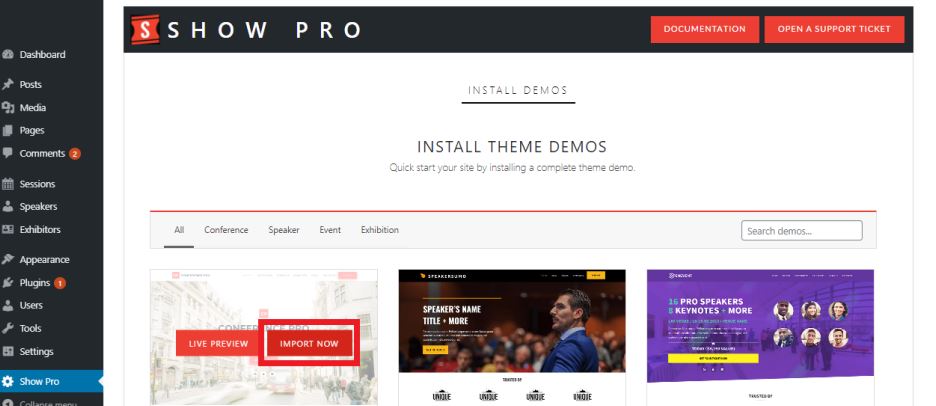
To import a design, go to your Show Pro theme setting tab on the main menu in your WordPress dashboard. You will see a list of screenshots. Hover over any screenshot and click the Import Now button to import that demo.
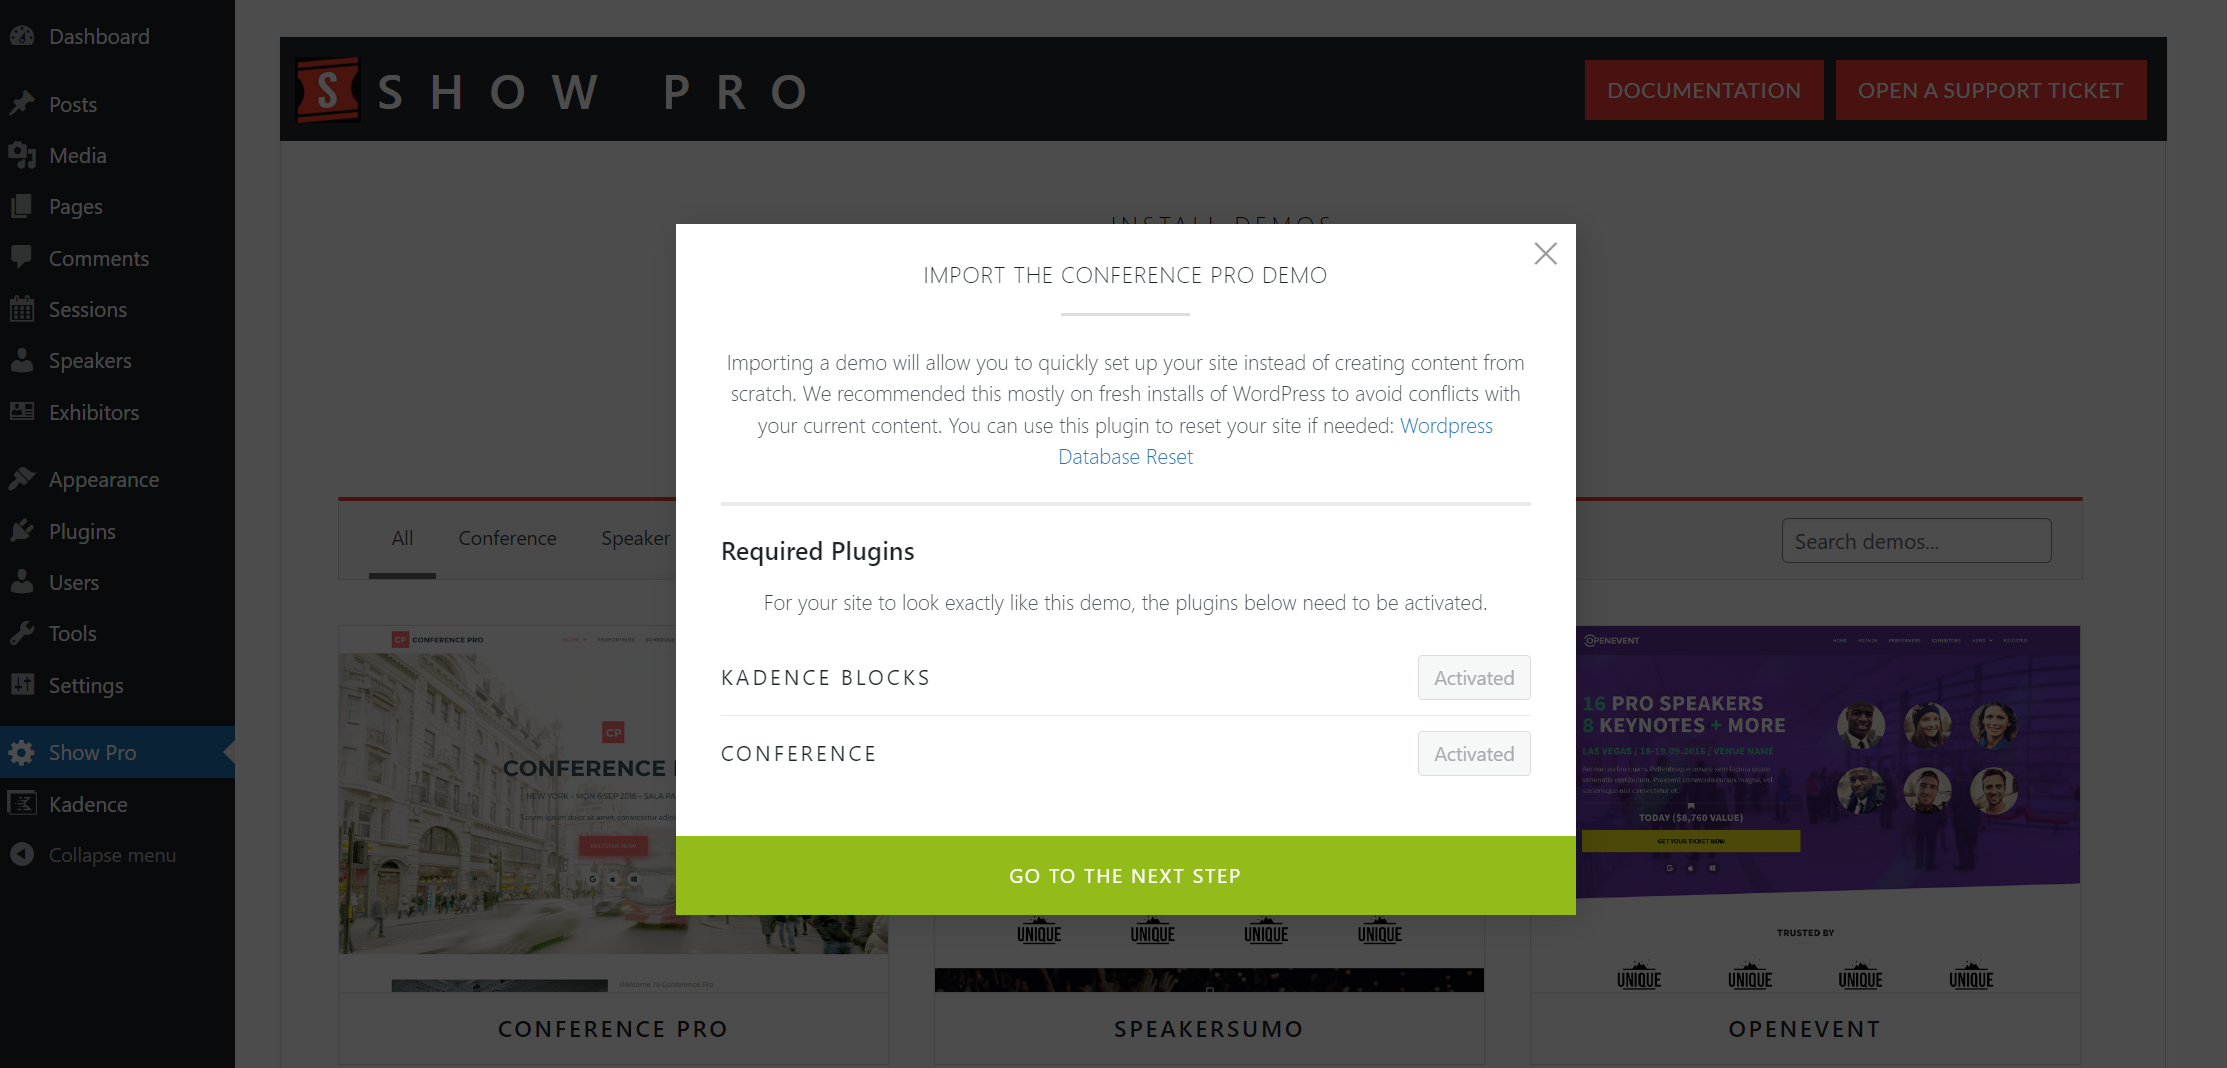
SELECT WHAT YOU WANT TO IMPORT
By default, when you import a demo, Show Pro will import the ENTIRE demo – design, content, galleries, and all. However, you can choose which of those elements you want to import.
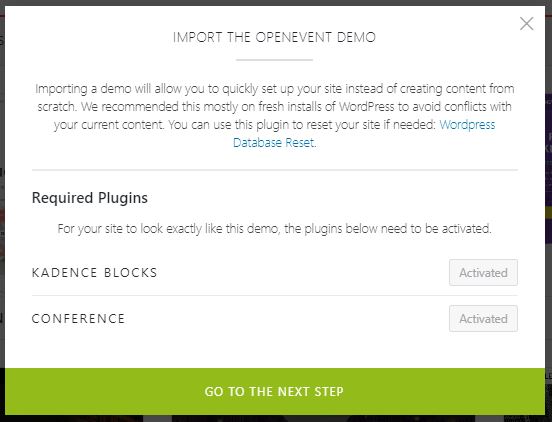
After the Required Plugins page, you’ll see a page that lists the different components of each demo. Just select the check boxes for each element you want to import, or uncheck those you do not want. They include:
- Import Content. If this option is selected, Show Pro will import a full set of pages and posts similar to the live demo on Showthemes’s website. That includes home pages, gallery pages, contact and about pages, and blog posts. If you import these and don’t want them after, you can always delete the import pages.
- Does not affect existing content. Please note when importing demo pages and posts, your existing content will NOT be affected. You can do this safely.
- Duplicate content. Please note that if you import content multiple times, it will re-create the content each time. You’ll end up with duplicate pages and posts that you’ll need to delete.
- Import Design. A Show Pro design is, in essence, just a just a batch of specific customizer settings. When this option is selected, Show Pro will import the customizer settings, and thus design, for your demo.
- Import Widgets. If this option is selected, Show Pro will import demo widget content.
Note: (Duplicated content) Please note that if you import content multiple times, it will re-create the content each time. You’ll end up with duplicated pages and posts that you’ll need to delete. You will also need to setup your home page to be the new one, your blog page and menus. Don’t alarm if after importing, your home looks the same as before since it is using your previous preset’s home, you just need to change it to use your new preset’s home page.
EXPORTING AND SAVING YOUR DESIGNS
Once you’ve imported our demos, you can then customize Show Pro’s design as much as you like. Most of this customization will be done by working with Showtheme’s customizer settings.
We strongly recommend that when you have a design that you like or want to keep, you export it to keep it as a backup.
To export your design, navigate to Appearance > Customize > Settings Import/Export, and click the export button. Show Pro will generate a .dat format file with all your settings.
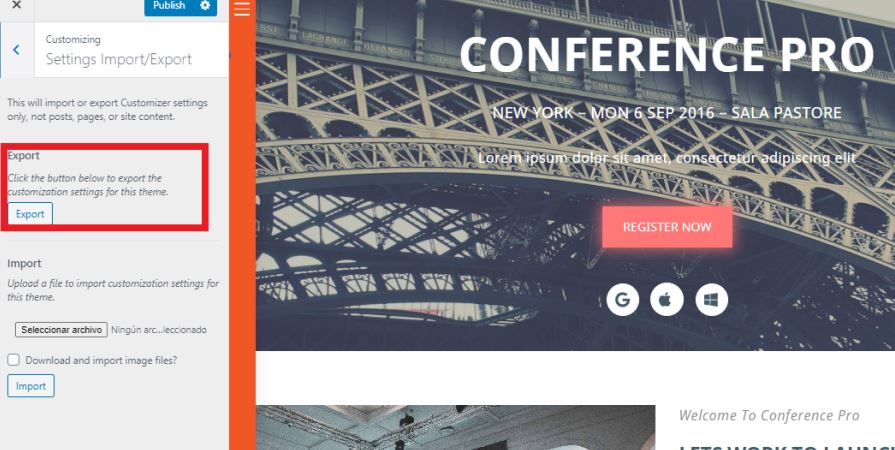
To re-import one of your designs, just go to the same tab, click the import button, and select your file.
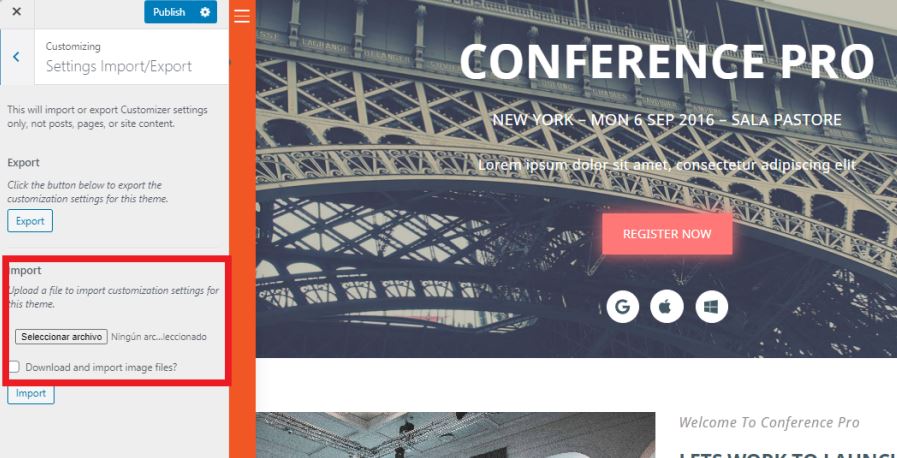
Note: We recommend exporting your design after you make the occasional style edit to your site.
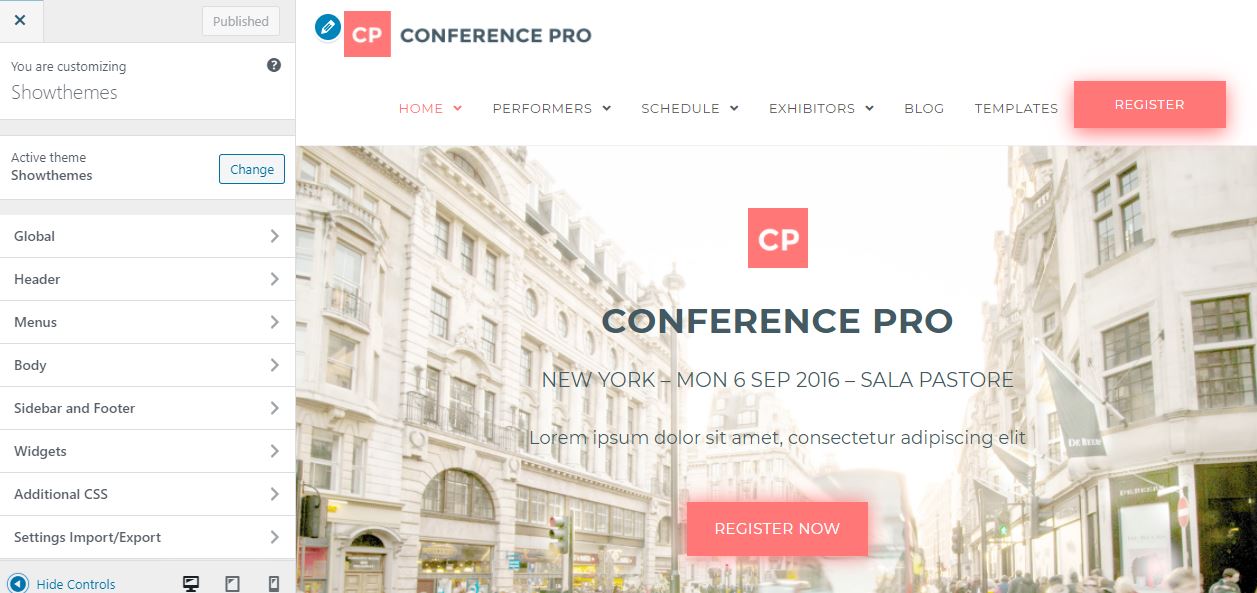
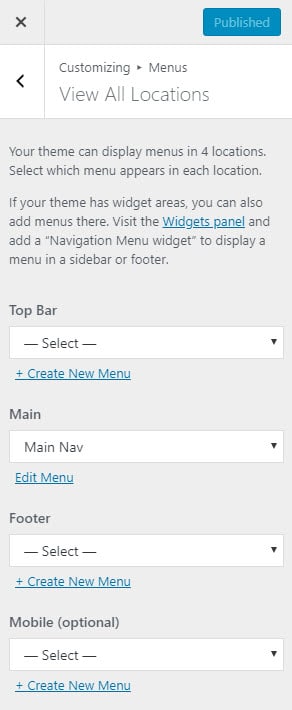
Assigning your site menu
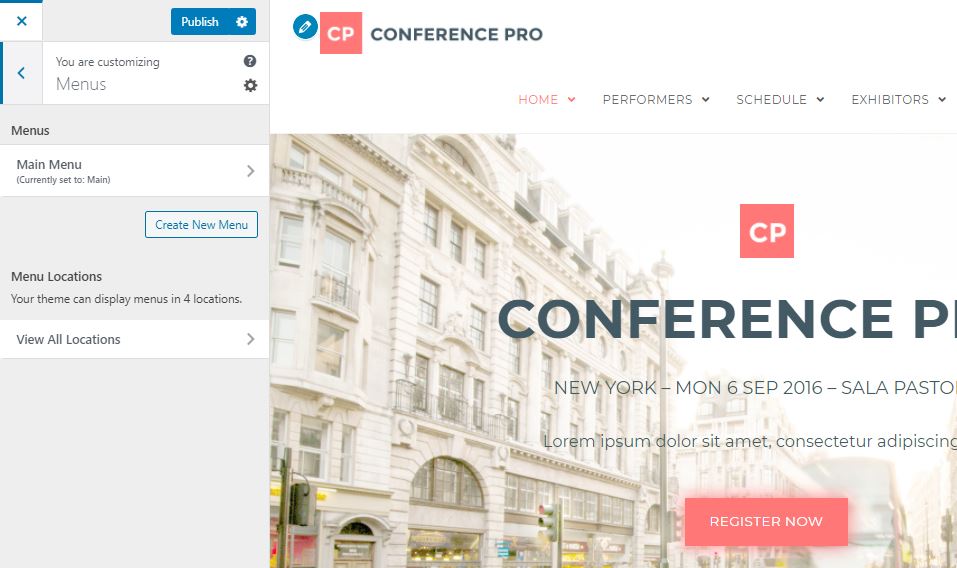
Navigate to Appearance > Customize > Menus to set your site navigation menu to your main header section of your site, and/or add it to your footer or top bar.
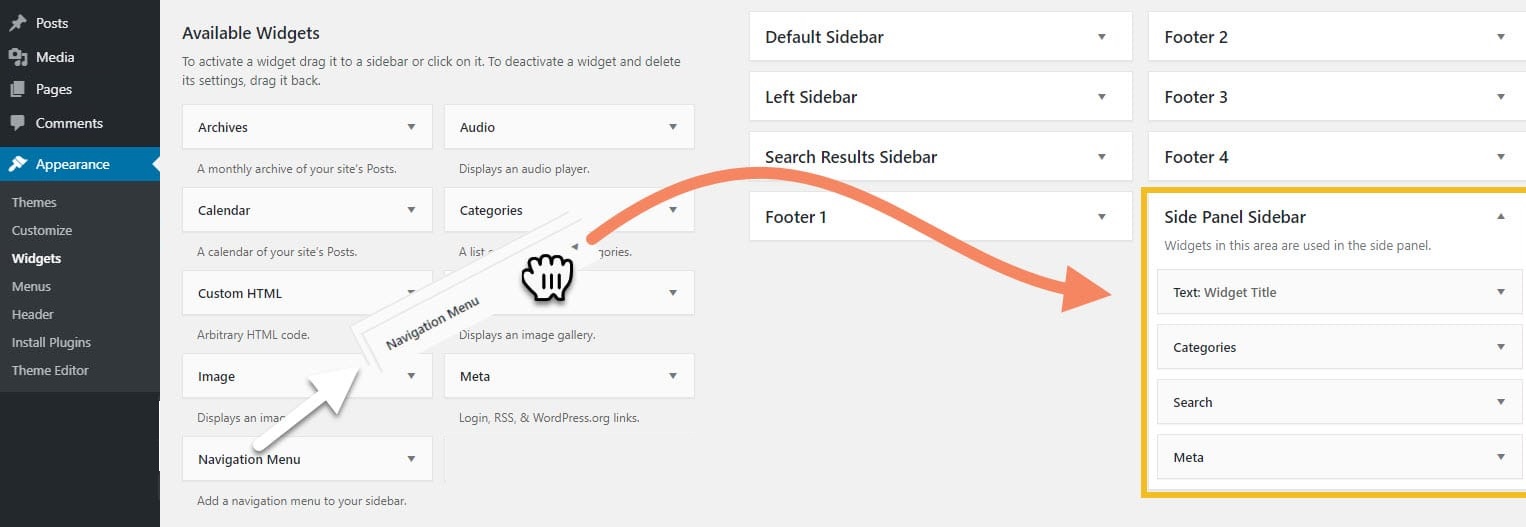
How to add widgets to sidebar and footer
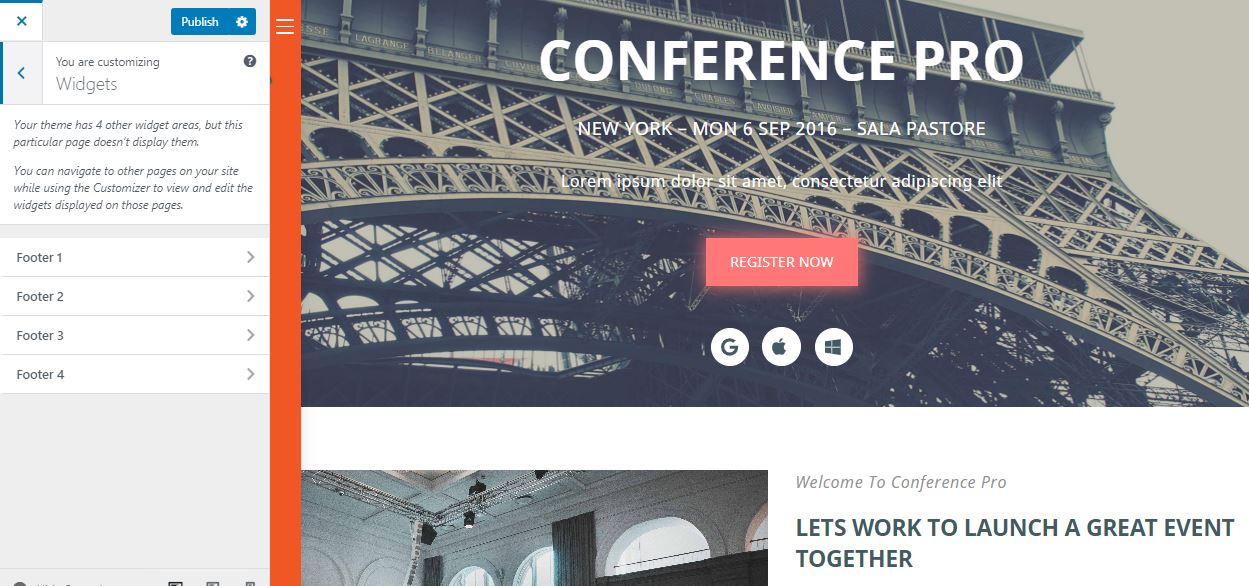
Navigate to Appearance > Customize > Widgets to add / edit the widgets you’ve added to your sidebar, footer, or side panel. You can manage the widgets from here, or through the WordPress dashboard > Appearance > Widgets:
What Is Css And How To Add It
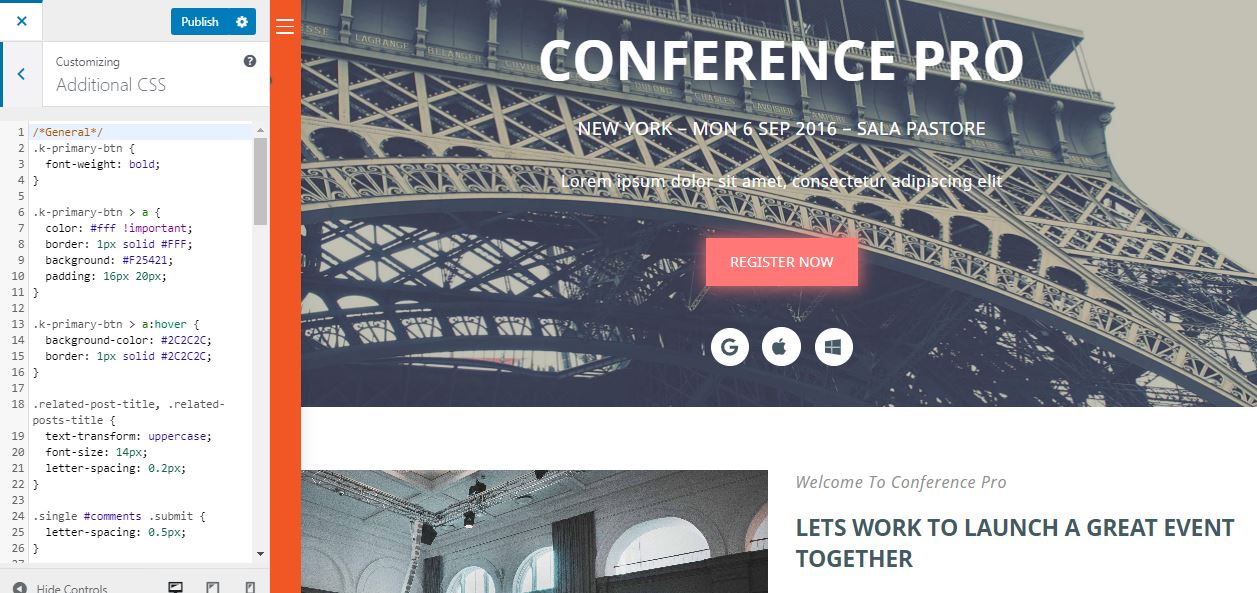
Navigate to Appearance > Customize > Additional CSS to add custom CSS to your site design. This requires knowledge of CSS coding. This convenient stylesheet is useful for adding additional styling that you otherwise don’t find within our theme options.
Conference Plugin Documentation
To get started:
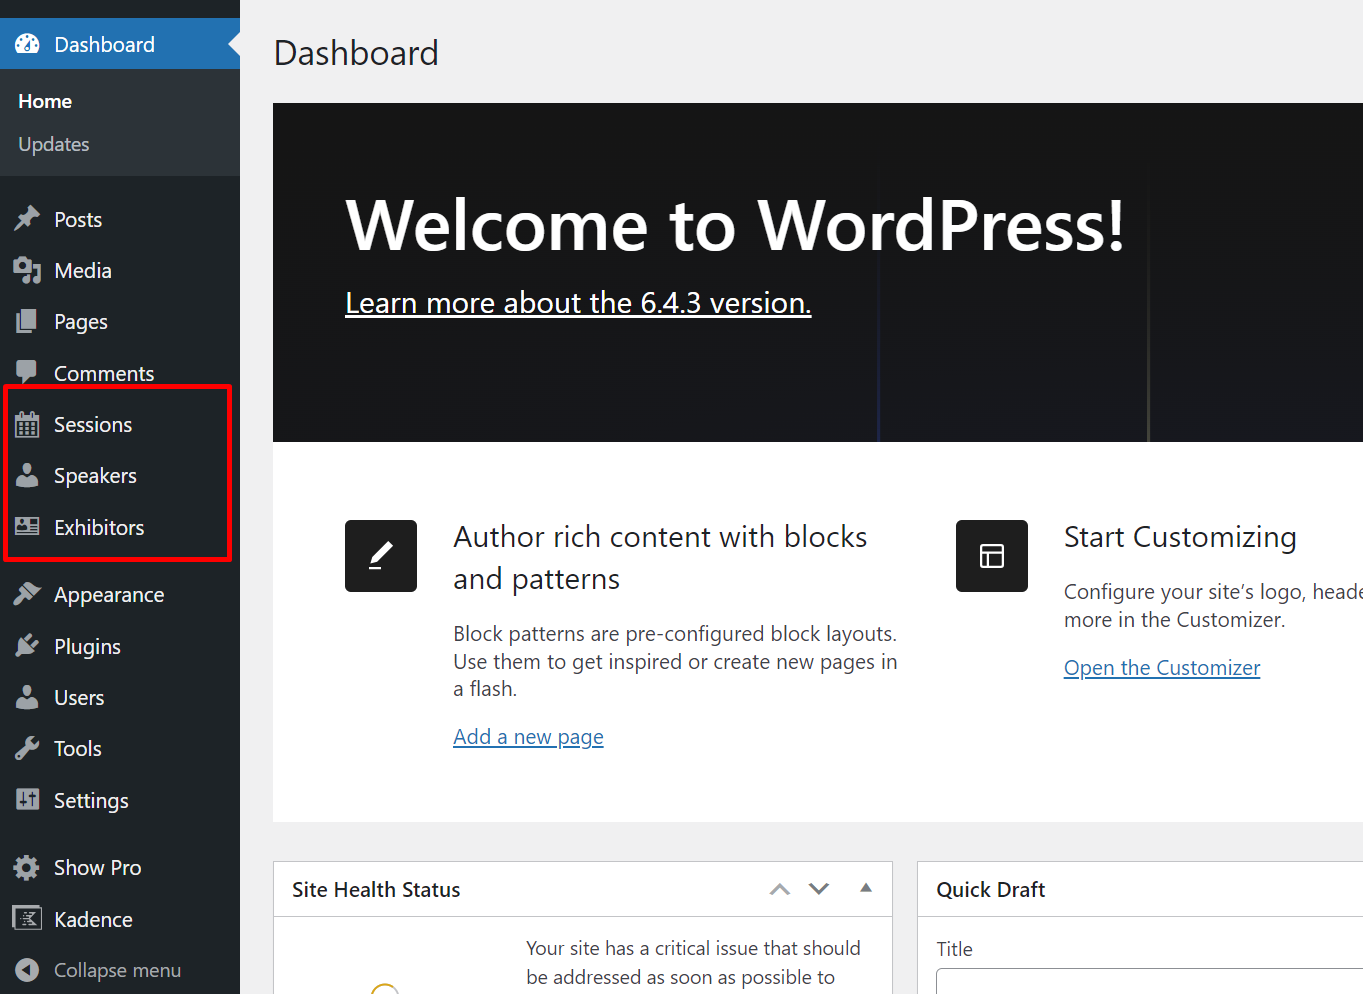
1. ADD YOUR SESSIONS, SPEAKERS, AND EXHIBITORS
When you install the plugin, you will see new menu items for Sessions, Speakers, and Exhibitors. Just click Add New, and fill out the content, fields, and featured image. When you publish, each Session, Speaker, or Exhibitor will be visible on the front end.
2. DISPLAY LISTS OF SESSIONS, SPEAKERS, AND EXHIBITOR
To display a list of sessions, speakers, or exhibitors, go to any page and insert a Sessions Block, Speakers Block, or Exhibitors Block. Each block has a few options to customize the layout.
3. ADD TICKETS
If you want to sell tickets, create an EventBrite account and add your tickets there. Follow EventBrite’s instructions to embed a ticket purchase interface in any post or page.
If you are also using Show Pro, our theme offers the ability to import complete, exact copies of our demos. Just go to the ShowThemes Pro page from your admin main menu, and click to import one of the demos.
The import process will also install the Conference plugin if it’s not already installed, and will import demo Sessions, Speakers, and Exhibitors, including all needed pages.
This is by far the easiest way to get started adding event content.
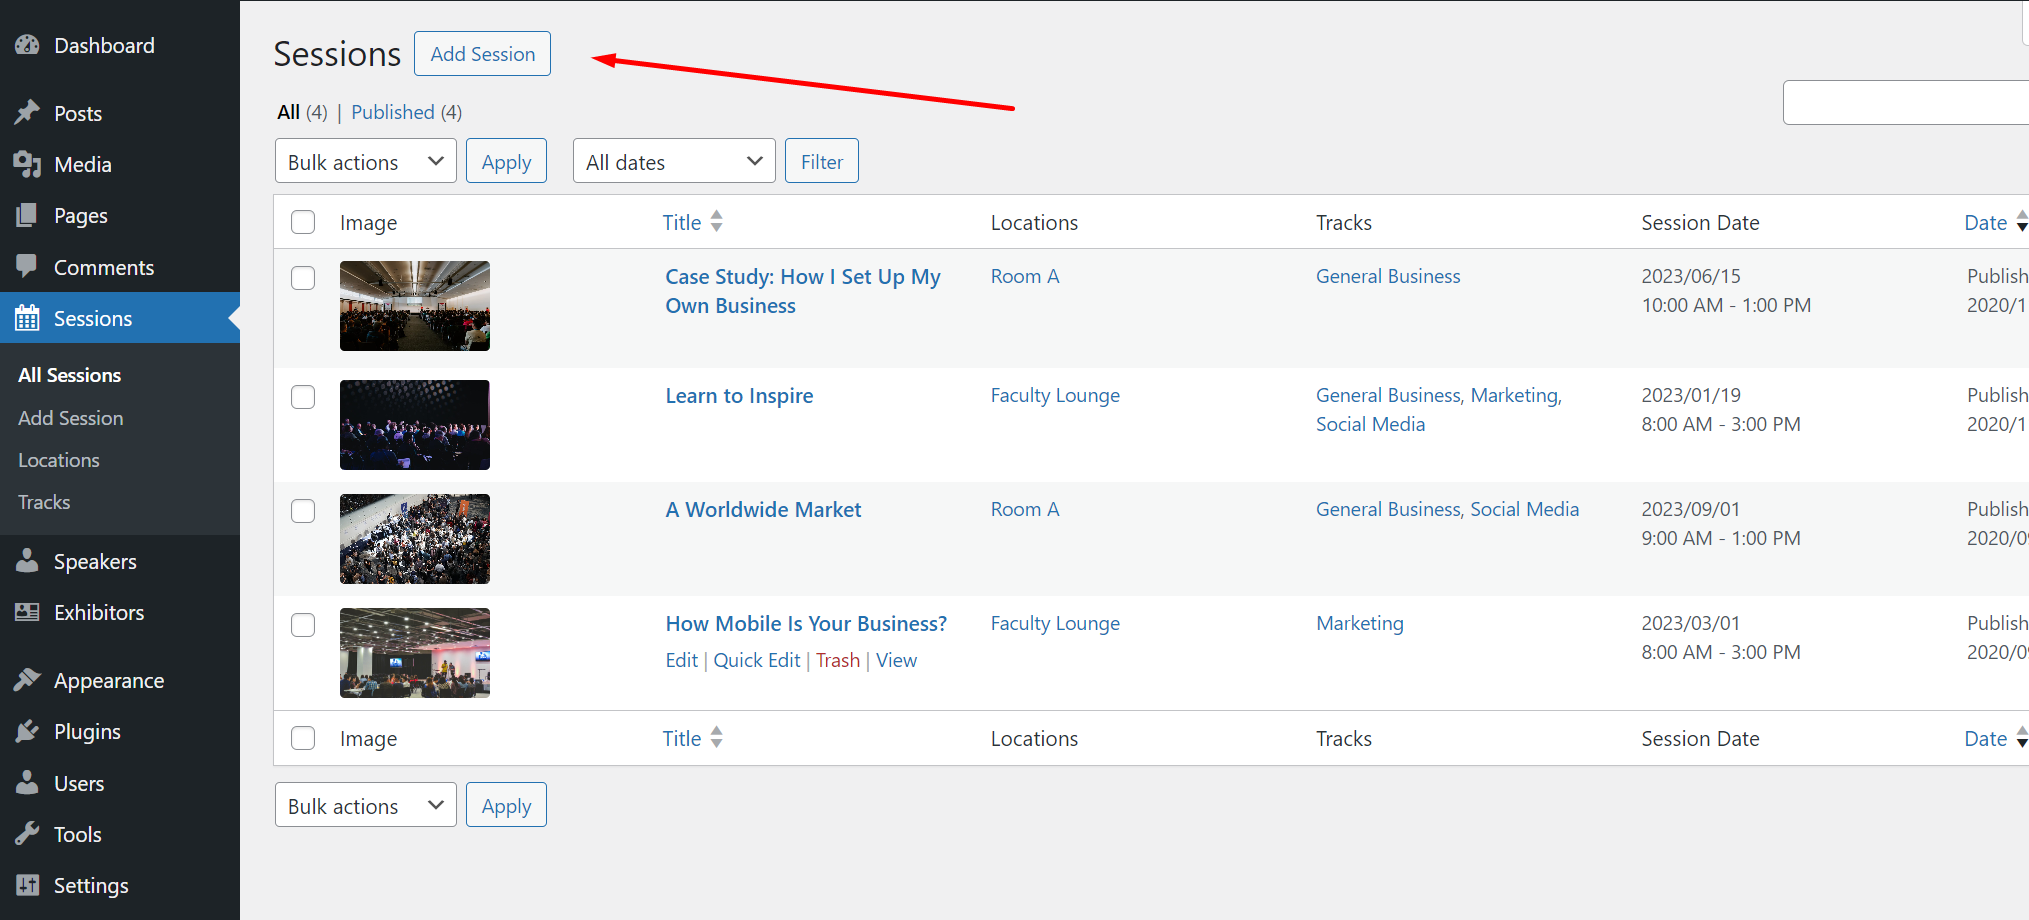
To add a Session, from your WordPress dashboard, click on Sessions > Add Session from the main menu. Then add the following details for your Session:
SESSION NAME. Add your session name as the Page title.
SESSION DESCRIPTION. Add a description in the main content area of the post (via the block editor). You can make this as short or as long as you like, and can use all the usual functionality of the WordPress block editor.
THE FOLLOWING FIELDS ARE BELOW THE MAIN CONTENT AREA.
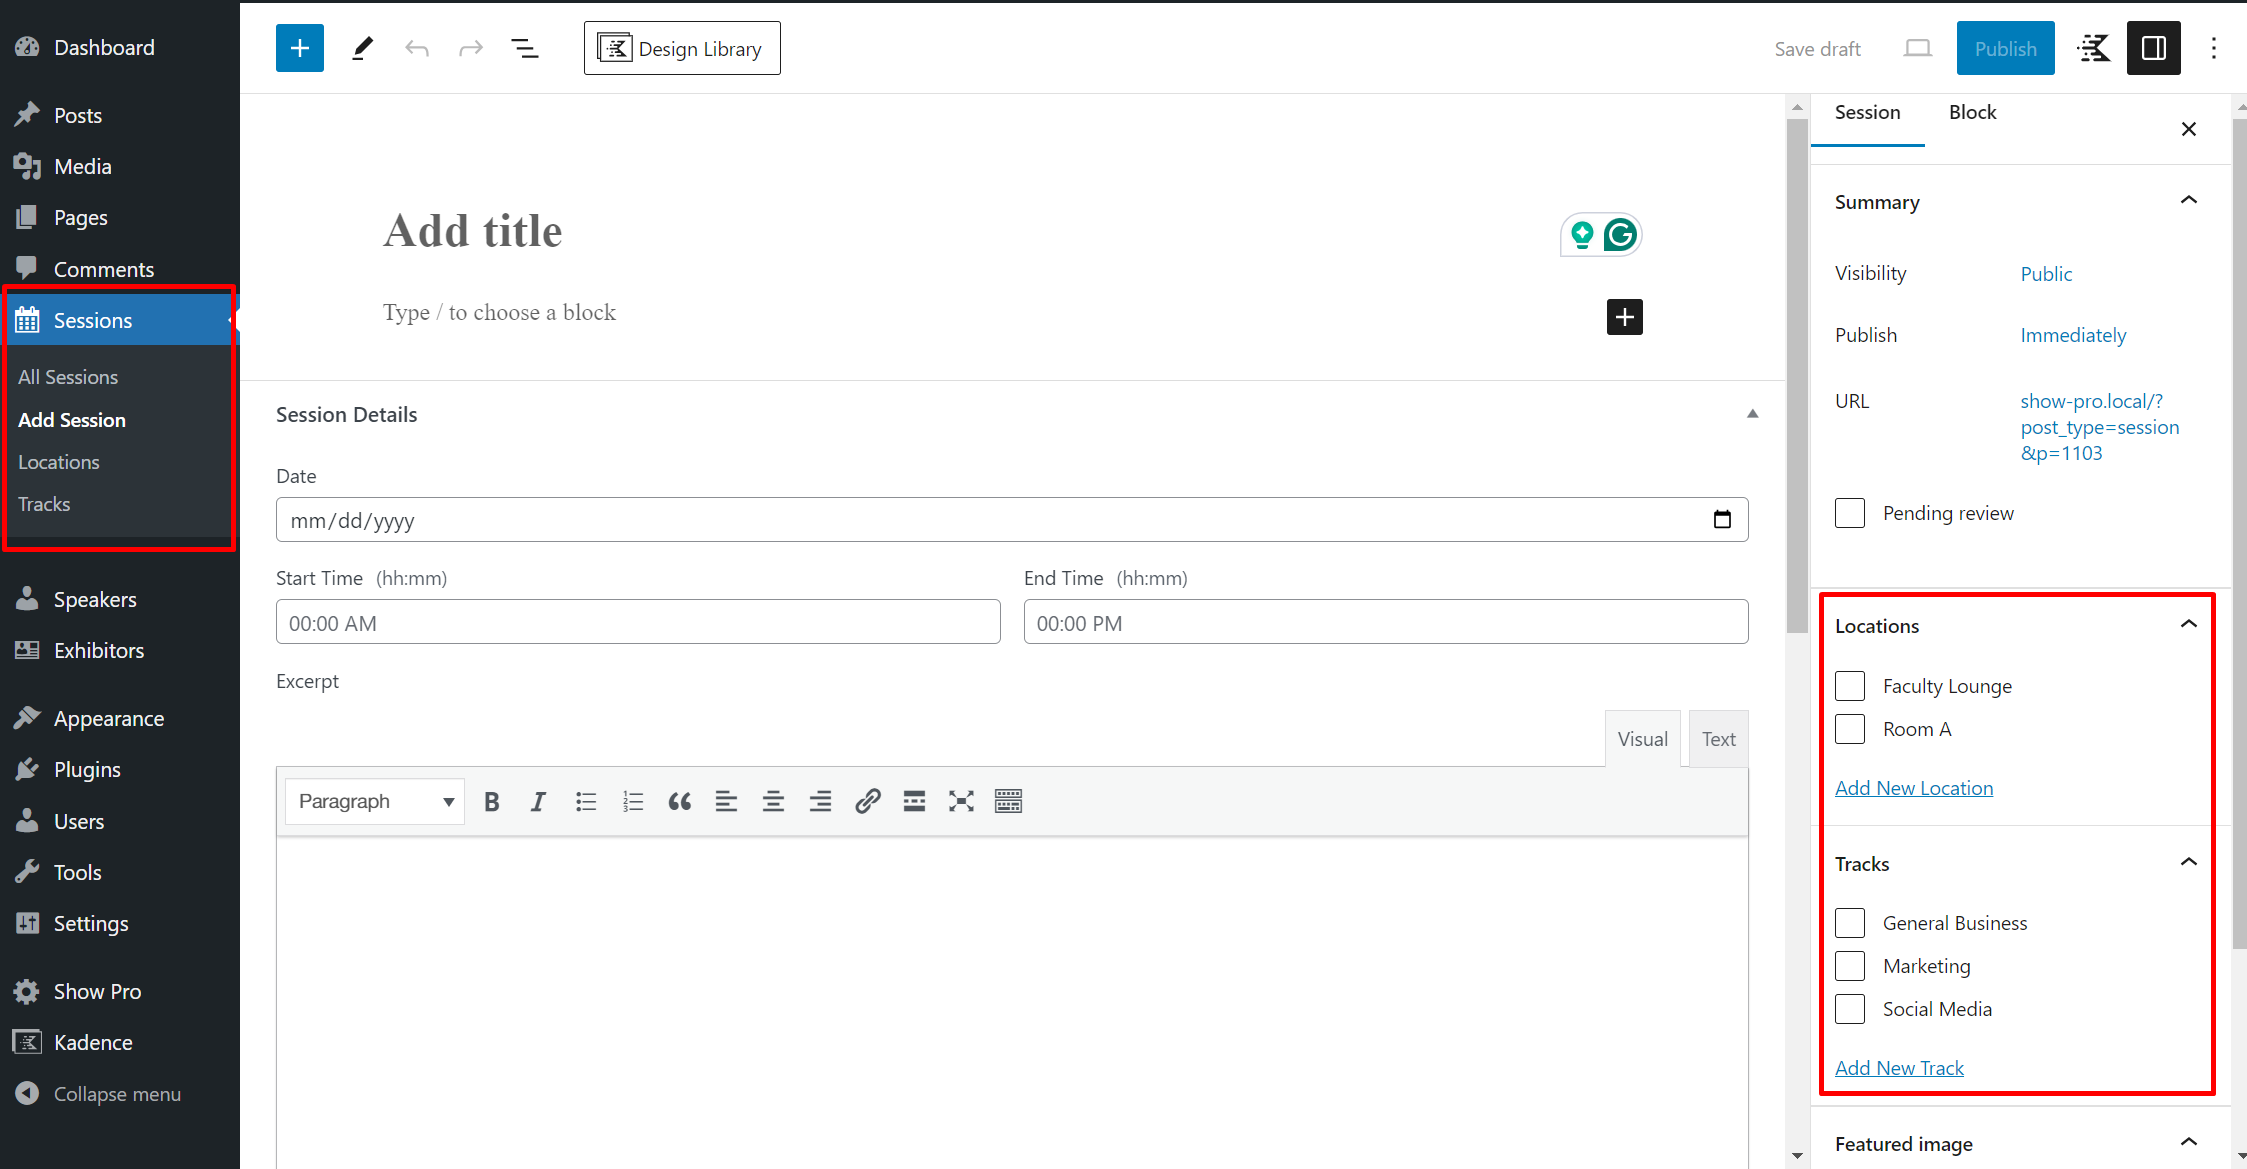
SESSION DATE. Add the date of the session. This field has formatting that will help you format the date correctly.
SESSION START AND END TIMES. Add the Session start and end times. Again, follow the formatting suggested in the input field.
SESSION EXCERPT. Enter a Session excerpt, a short summary of the session content or purpose.
SESSION FEATURED IMAGE. Don’t forget to add a featured image to the page. This isn’t necessary, but the formatting of the session page, and your overall session lists and schedules, will look much better of a featured image is added.
SESSION SPEAKERS. You must add Speakers (see below) before you can add them to your session. Assuming you’ve done that, click the link to add Speakers to your session. A popup window will show all available speakers. Click the ones participating in this session and save.
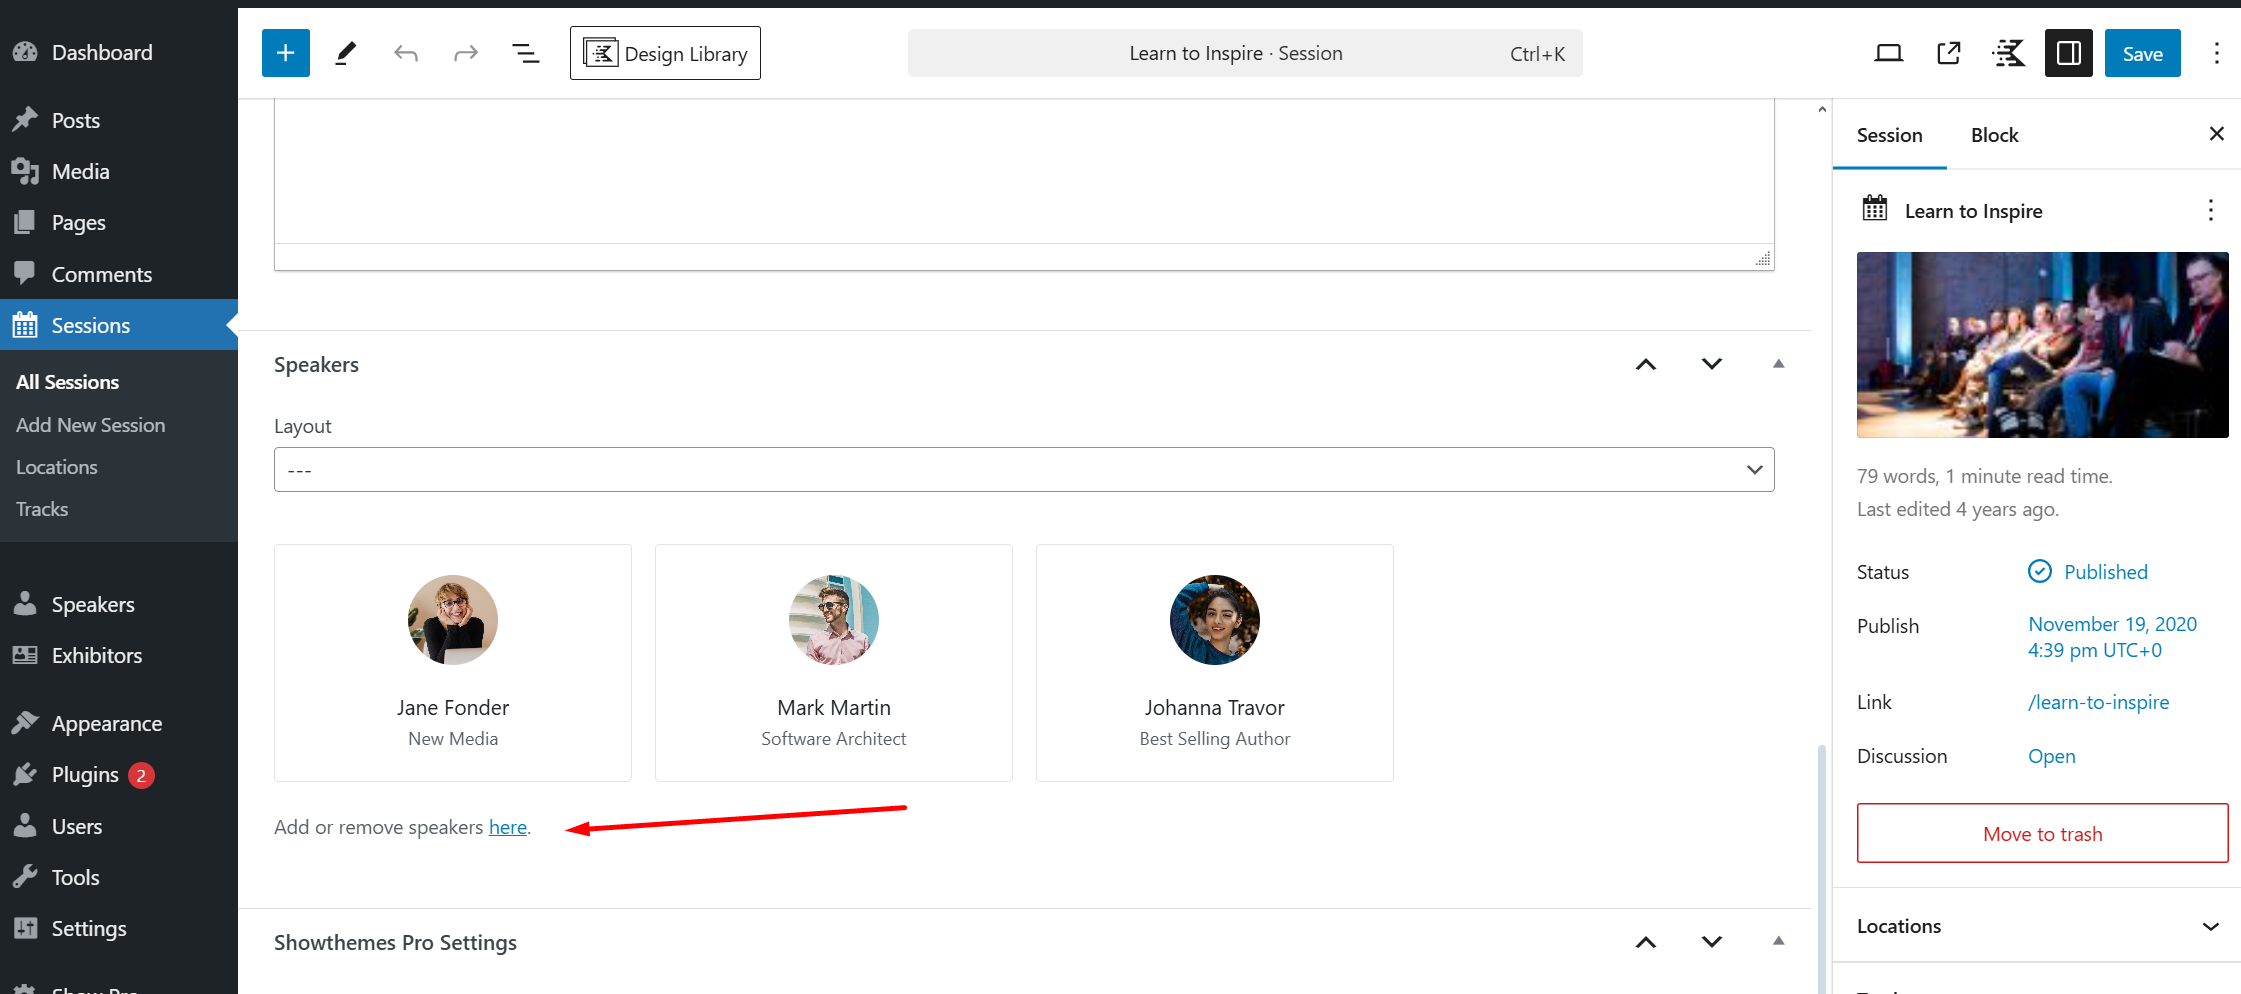
You can also change the layout of the speakers on the single sessions page. It’s set to overlay-ii by default.
THE FOLLOWING ARE ON THE PAGE SIDEBAR.
LOCATION. Many conferences have specific areas where sessions take place, such as Ballroom #1 or Ballroom #2 or Room 123. On the side bar, add the location for this session. If you’ve already added locations they will already show up here, and you can just click them.
TRACKS. Many conferences have multiple Tracks for their session. On the side bar, add the Track for this session. If you’ve already added Tracks they will already show up here, and you can just click them.
VIEWING A SESSION PAGE
Once you publish your Session, a page will automatically be created on the front end with all the session details. The URL for each session is:
www.domain.com/sessions/the-name-of-your-session.
DISPLAYING YOUR CONFERENCE SCHEDULE
Once you have created the Sessions for your event, you can display a full conference schedule.
To do so, insert a Session Block on any page or post, and customize using the settings. See details on Blocks below.
To add Speakers, click on Speakers > Add New from the main menu.
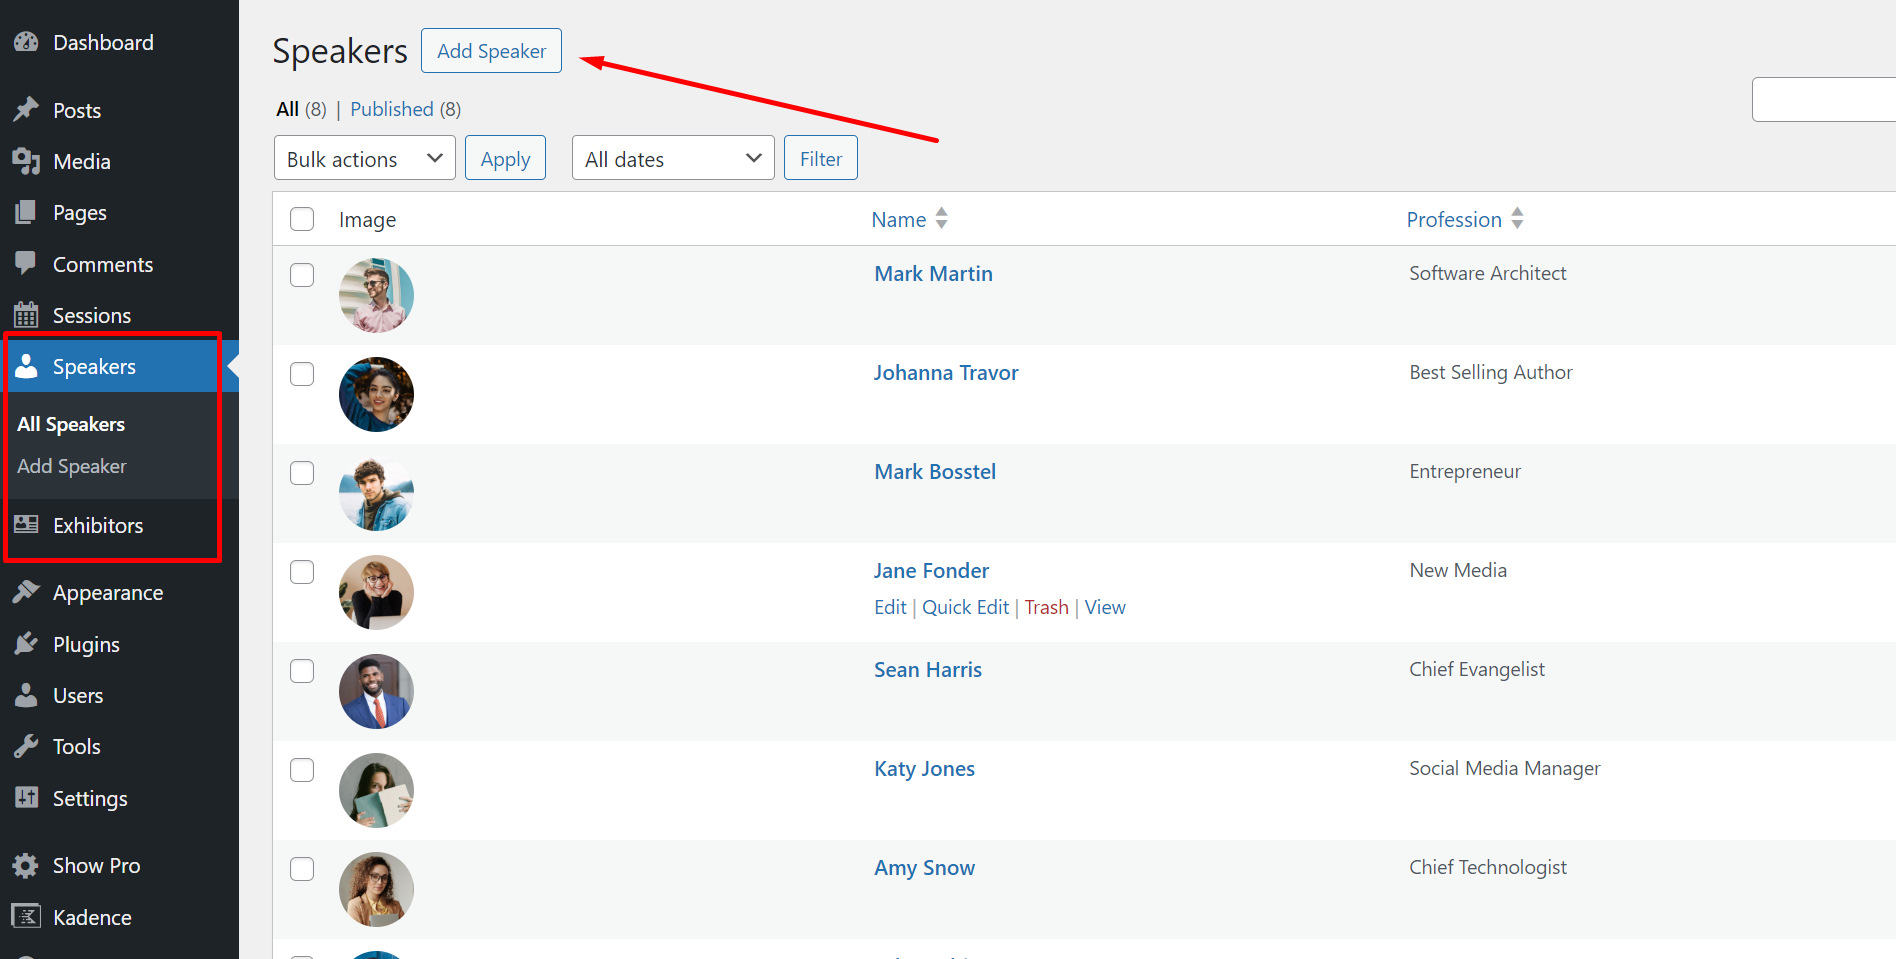
From this page, add all of the following. Again, note that the name and description are added via the normal page title and content area. Below those are separate settings where you’ll add additional speaker details.
SPEAKER NAME. Add your speaker name as the Page title.
SPEAKER BIO/DESCRIPTION. Add a description or bio in the main content area. You can make this as short or as long as you like, and can use all the usual functionality of the WordPress block editor.
THE FOLLOWING FIELDS ARE BELOW THE MAIN CONTENT AREA.
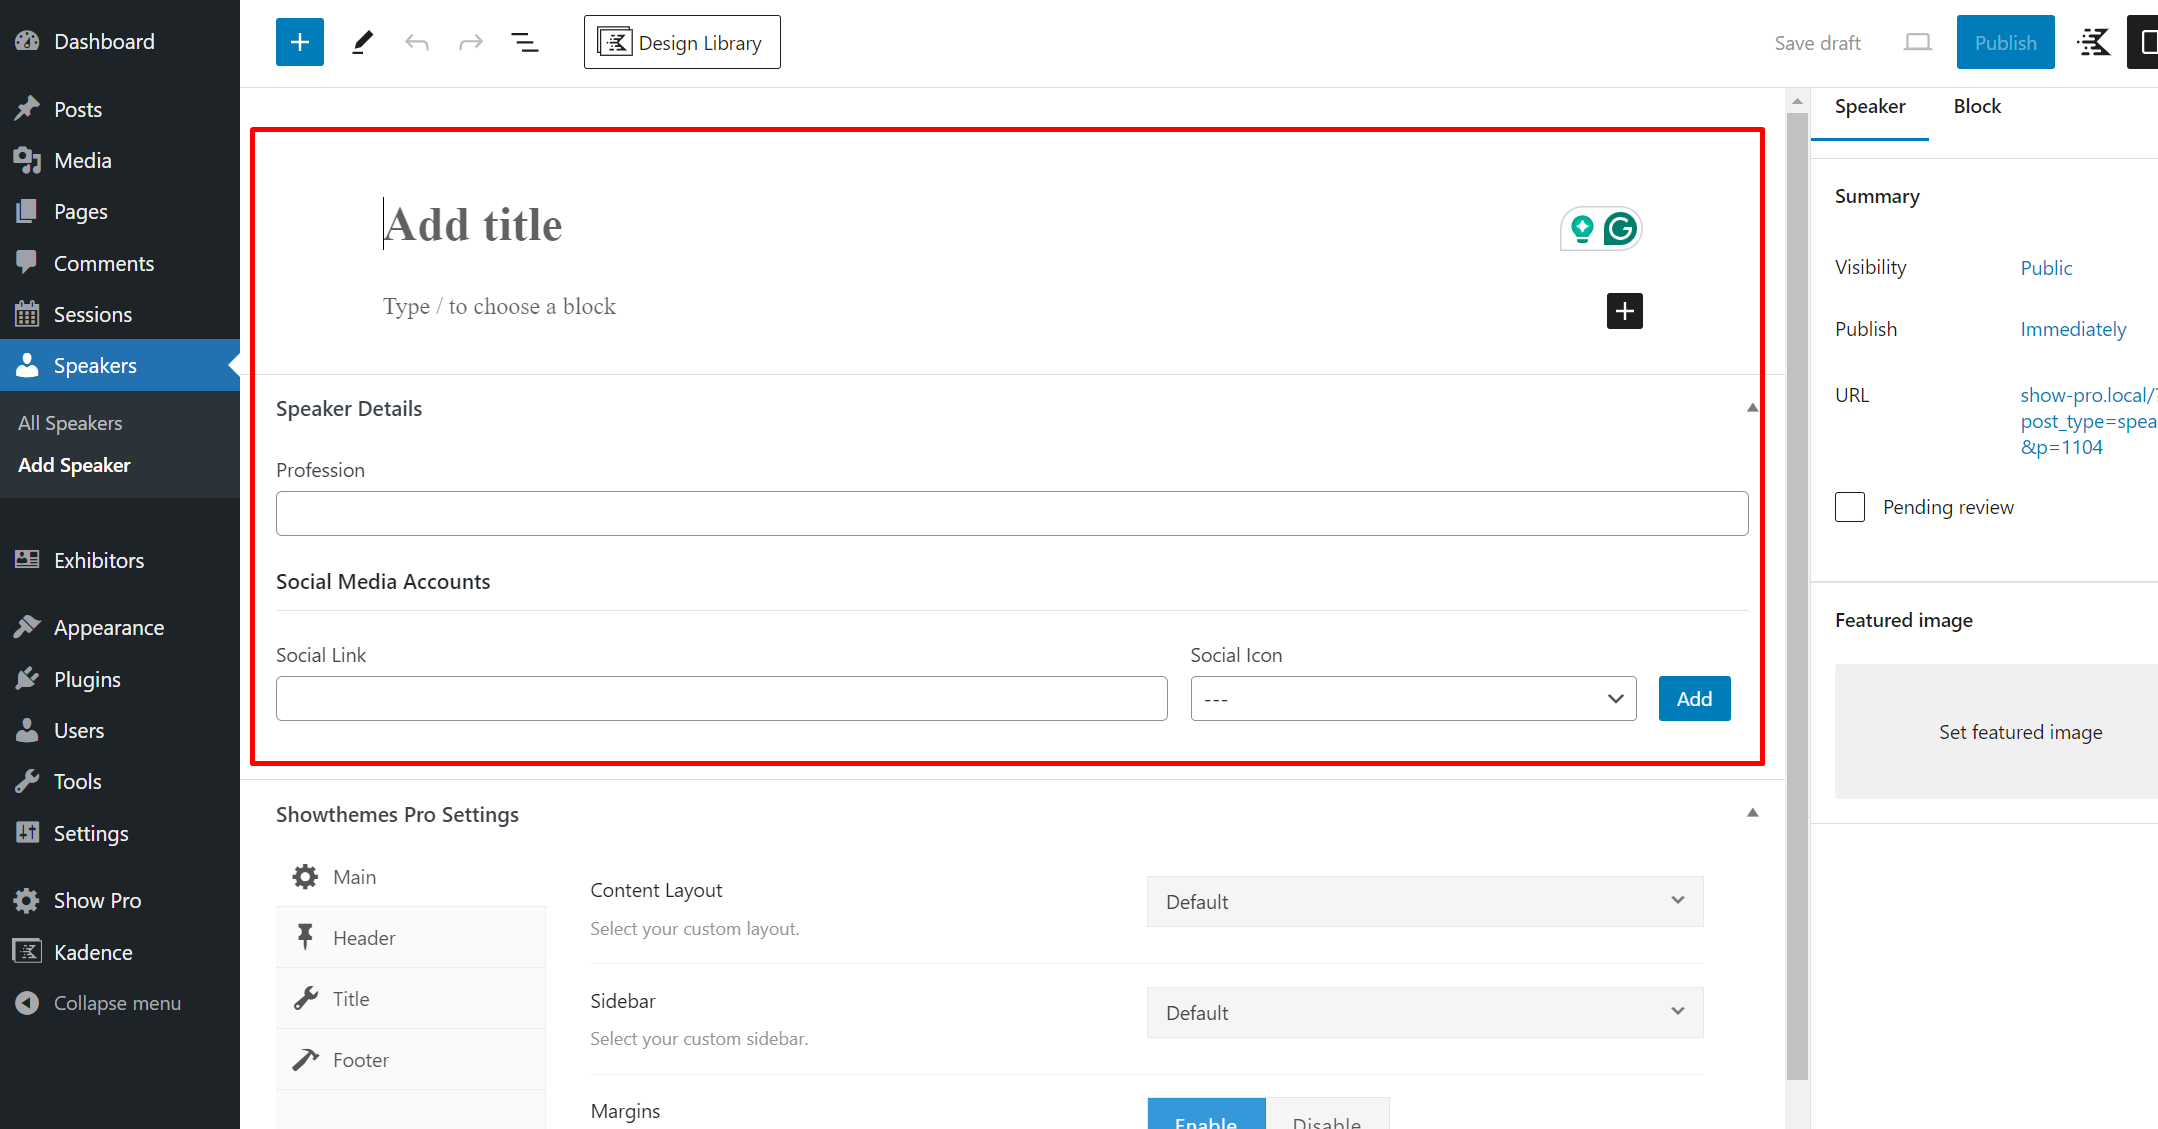
SPEAKER PROFESSION. Add your speakers title or profession.
SPEAKER SOCIAL MEDIA ACCOUNTS. Add any social media accounts for your speaker. First add the urls to their account (such as https://www.twitter.com/speakername). Be sure to include the https:// part of the url. Then add the icon for which ever account you are adding. The options are Twitter, Facebook, Linked In, Instagram, Pinterest.
SPEAKER IMAGE. Add a photo of speaker by adding it as a featured image to the page.
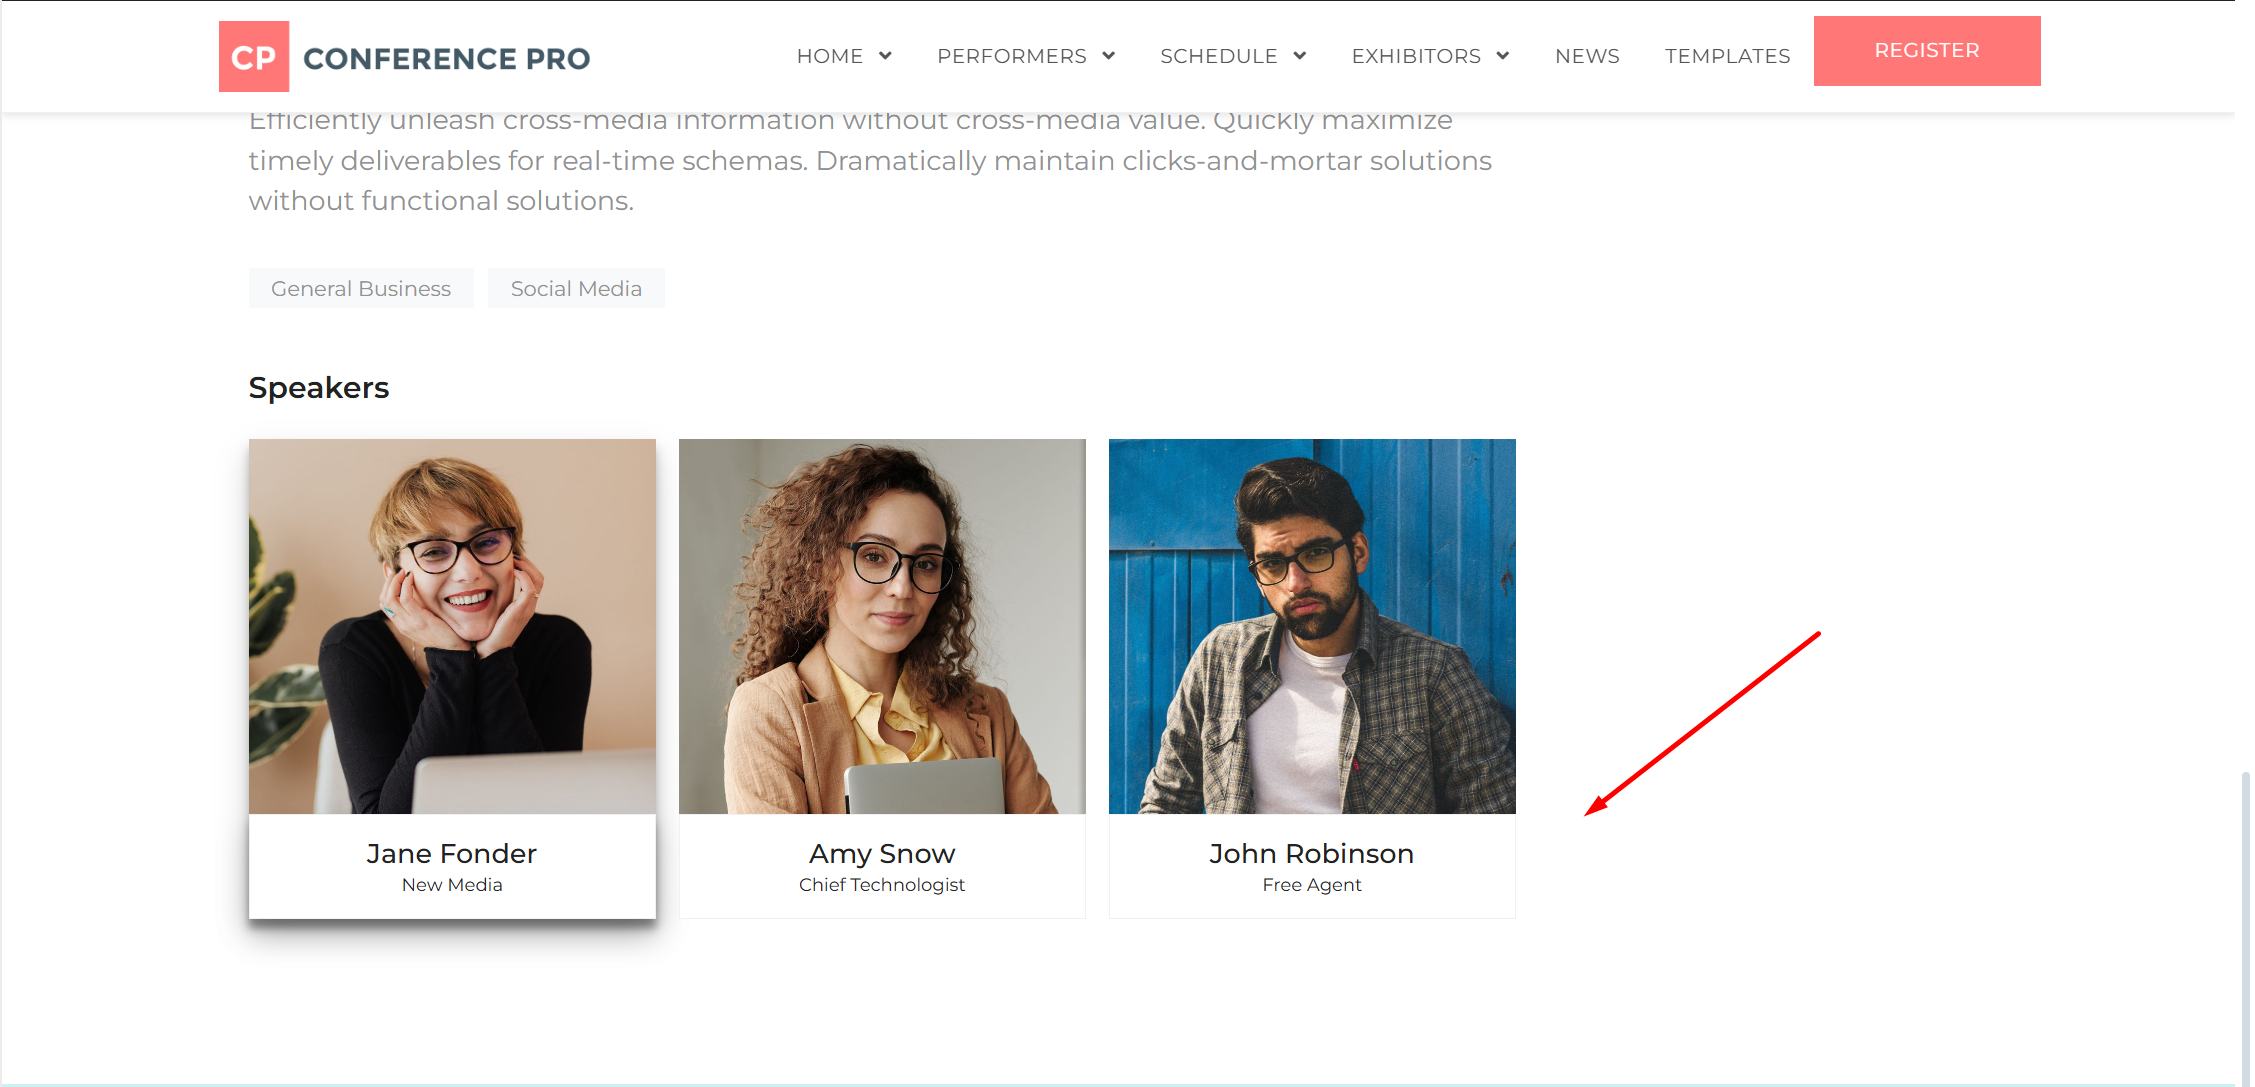
VIEWING A SPEAKER PAGE
Note that once you add a Speaker, a page will automatically be created on the front end with all the Speaker details. The URL for each Speaker is:
www.domain.com/speakers/speaker-name.
DISPLAYING A LIST OF SPEAKERS
Once you have added your Speakers, you can display a list of Speakers. To do so, insert a Speakers Block on any page or post. See details on Blocks below.
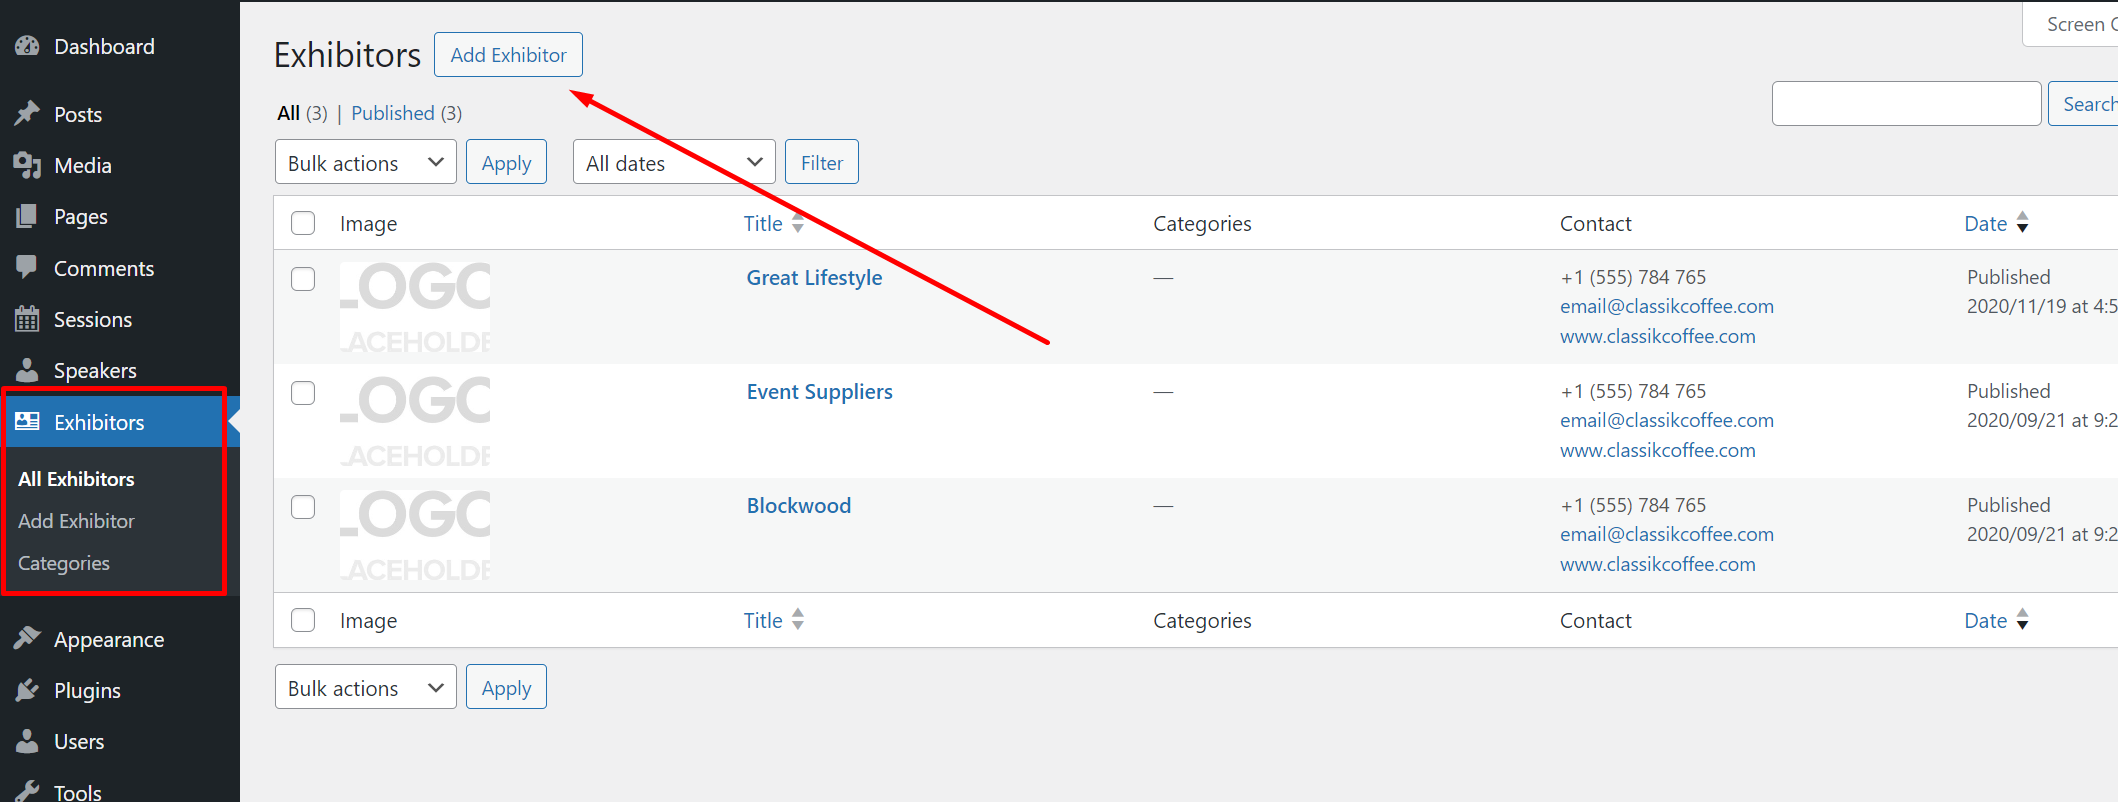
To add a Sponsor or Exhibitors, click on Exhibitors > Add New from the main menu.
As with Sessions and Speakers, you’ll add an Exhibitor name and description using the normal page title and content area, and then fill out other details below the content area.
EXHIBITOR NAME. Add your speaker name as the Page title.
EXHIBITOR DESCRIPTION. Add a description or bio in the main content area. You can make this as short or as long as you like, and can use all the usual functionality of the WordPress block editor.
THE FOLLOWING FIELDS ARE BELOW THE MAIN CONTENT AREA.
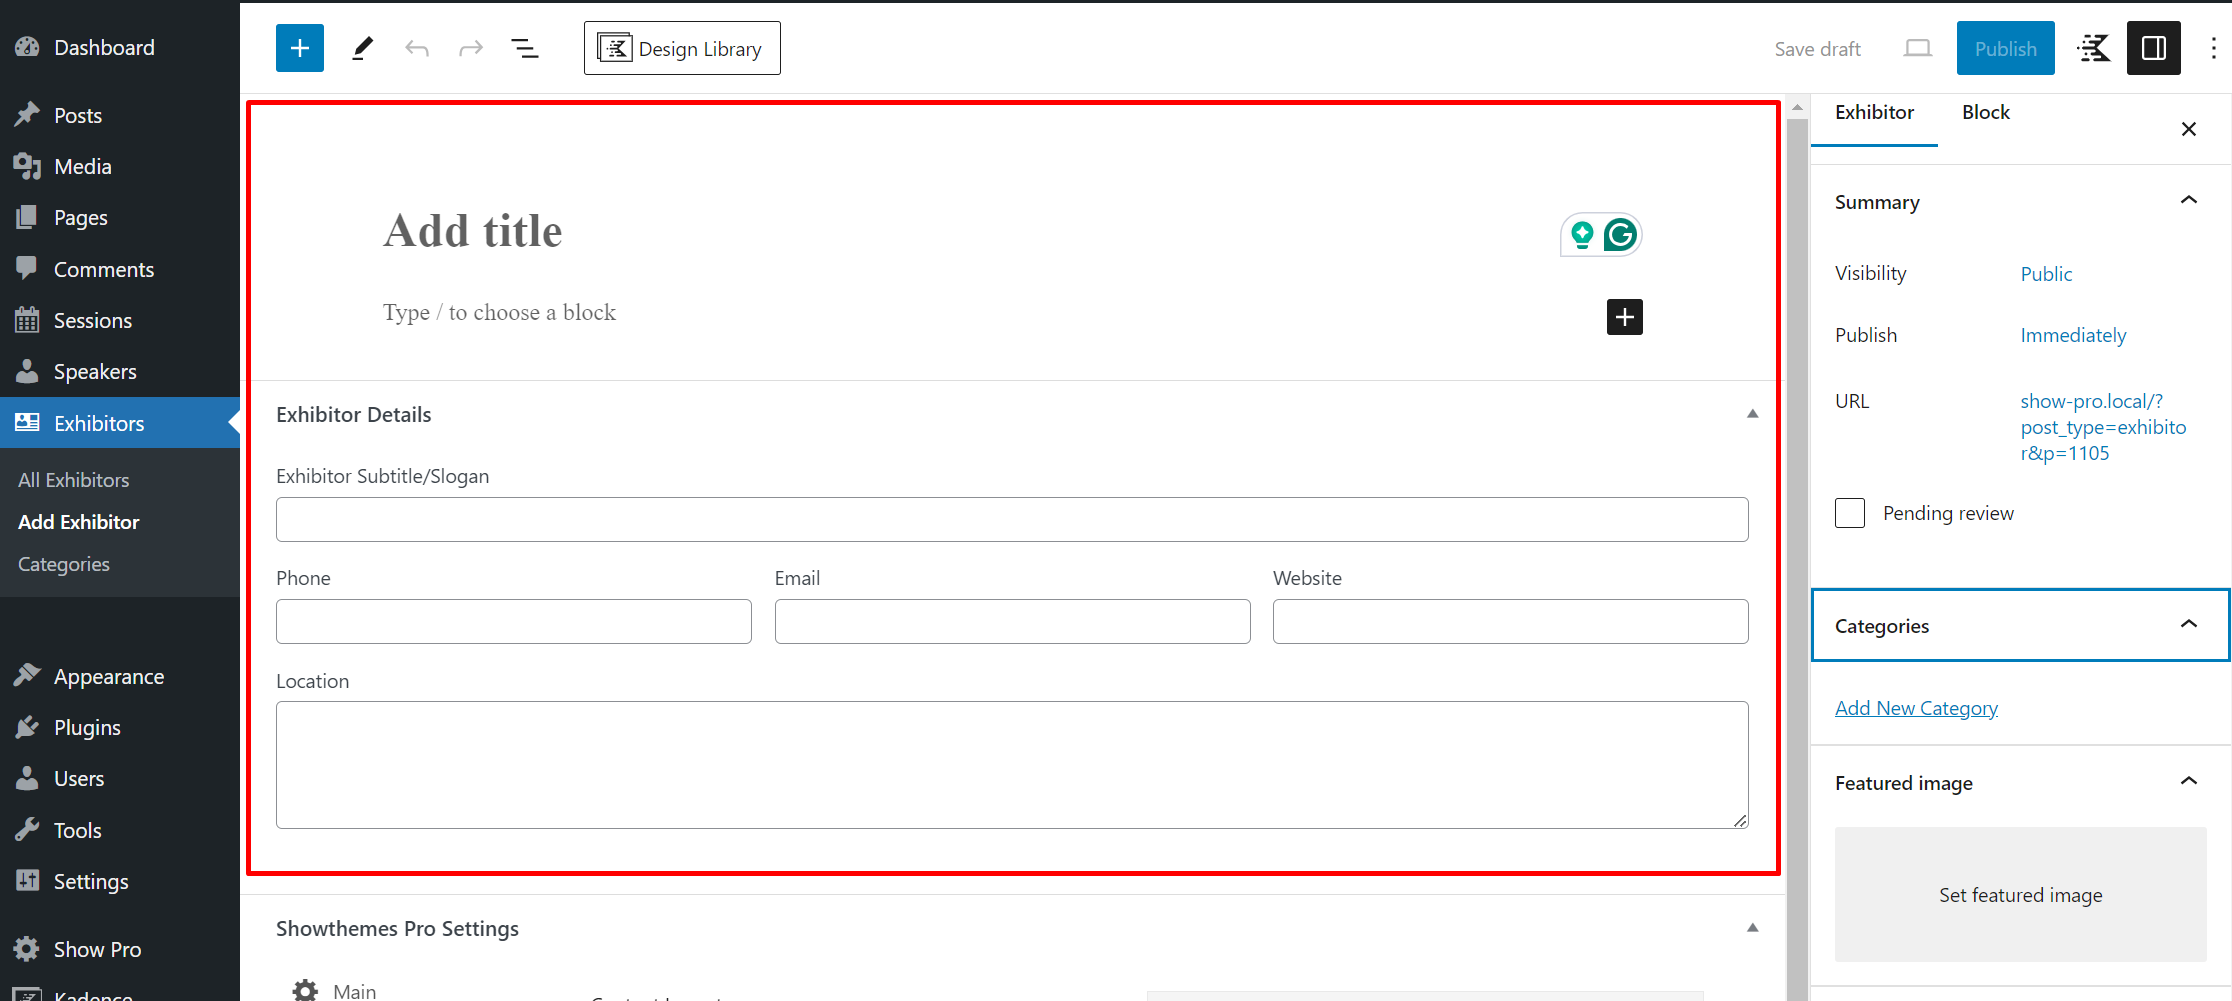
EXHIBITOR PHONE, EMAIL, WEBSITE, AND LOCATION. Add the speaker’s phone, email, website, and/or location. None of these fields is required. For the website, be sure to add it using https:// at the beginning, such as https://www.myexhibitor.com.
EXHIBITOR IMAGE. Add a photo for the Exhibitor by adding it as a featured image to the page.
VIEWING AN EXHIBITOR PAGE
Note that once you add an Exhibitor, a page will automatically be created on the front end with all the Exhibitor details. The URL for each Exhibtor is:
www.domain.com/exhibitors/exhibitor-name.
DISPLAYING A LIST OF EXHIBITORS
Once you have added your Speakers, you can display a list of Speakers. To do so, insert a Speakers Block on any page or post. See details on Blocks below.
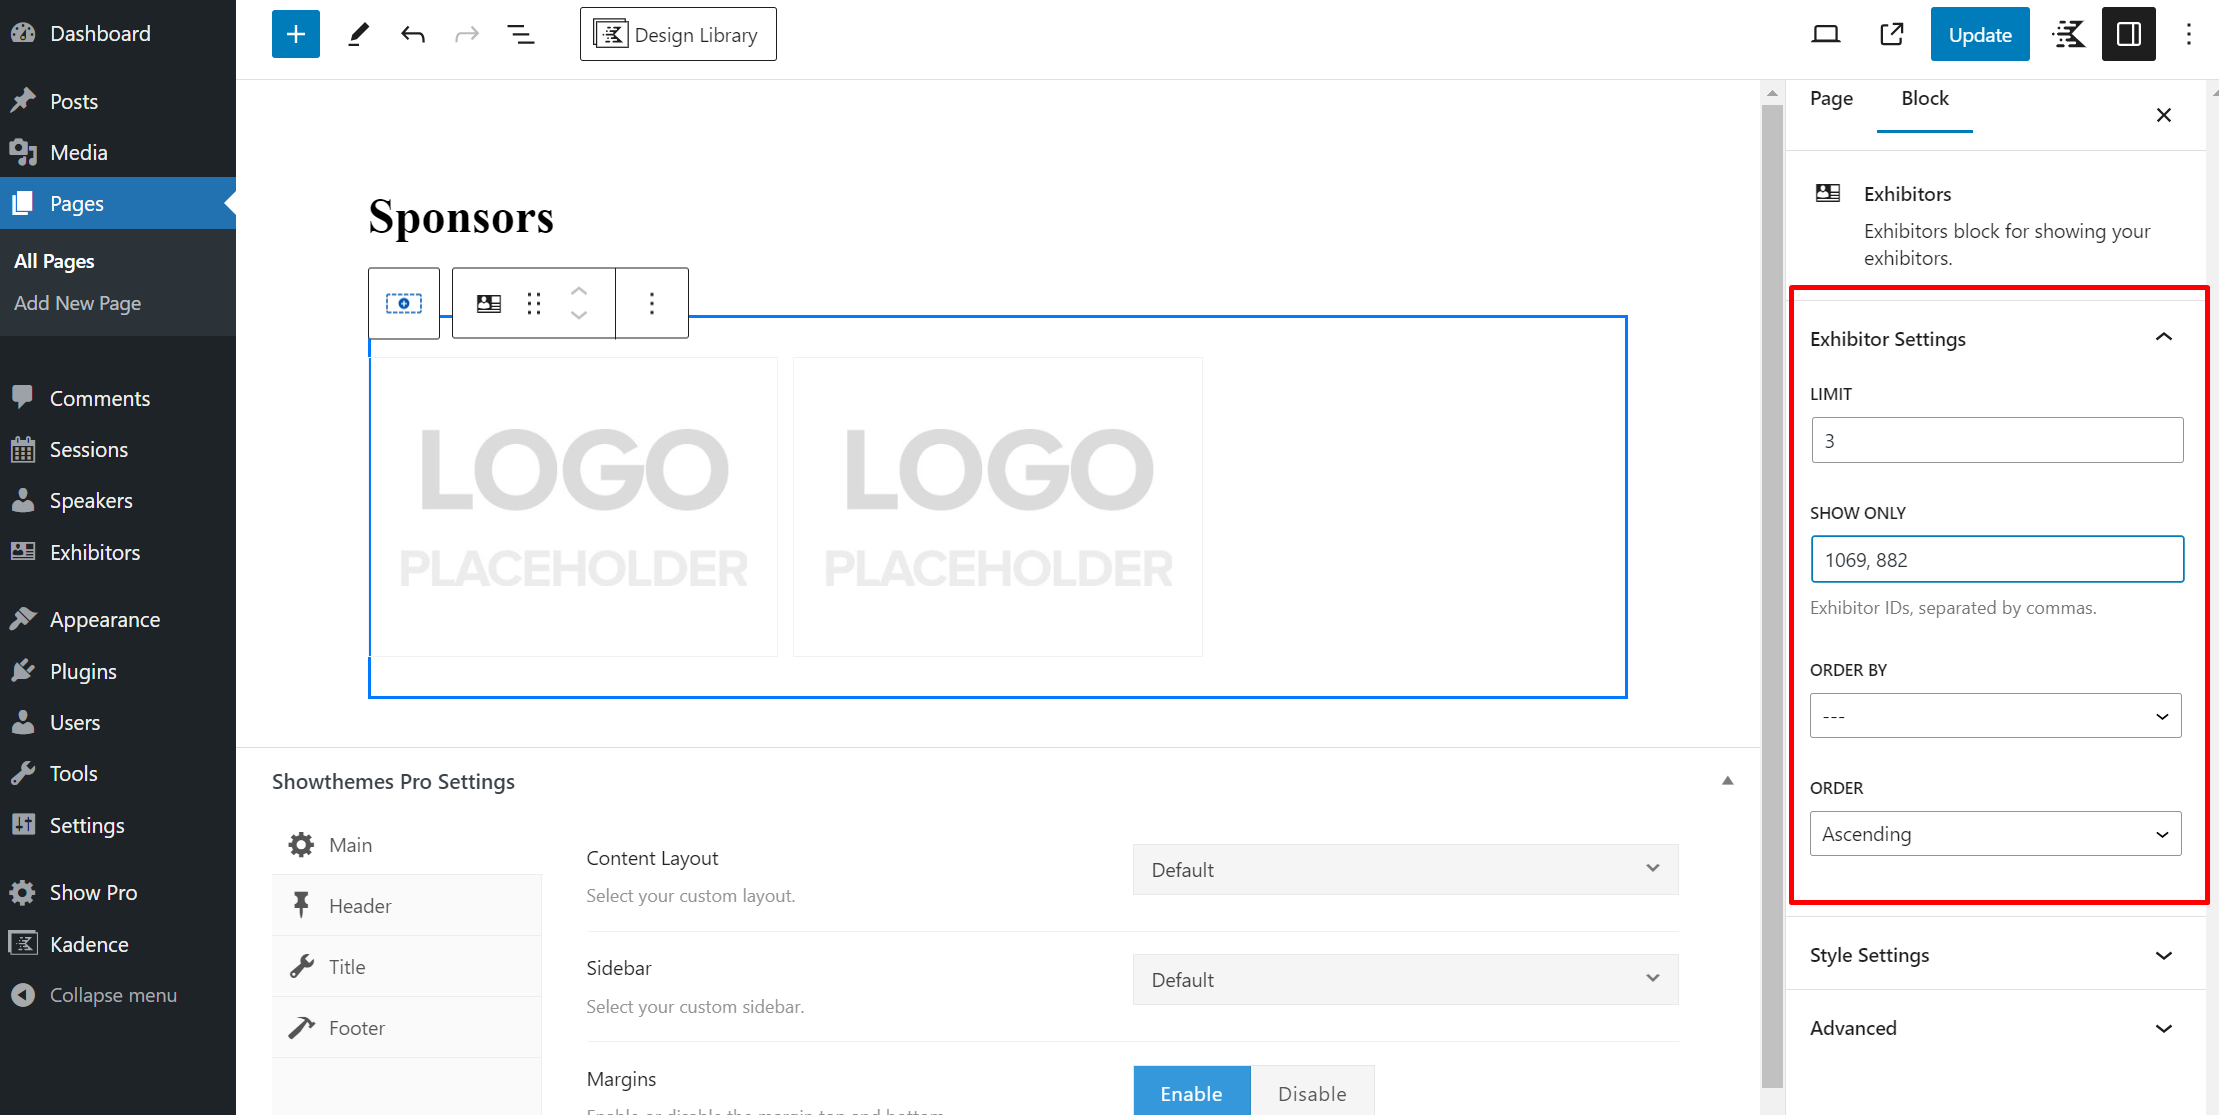
SHOWING ONLY A SPECIFIC LIST OF EXHIBITORS
To order by IDs, add each ID separated by a comma. You can find exhibitor IDs when you hover over the exhibitor edit link in the admin panel.
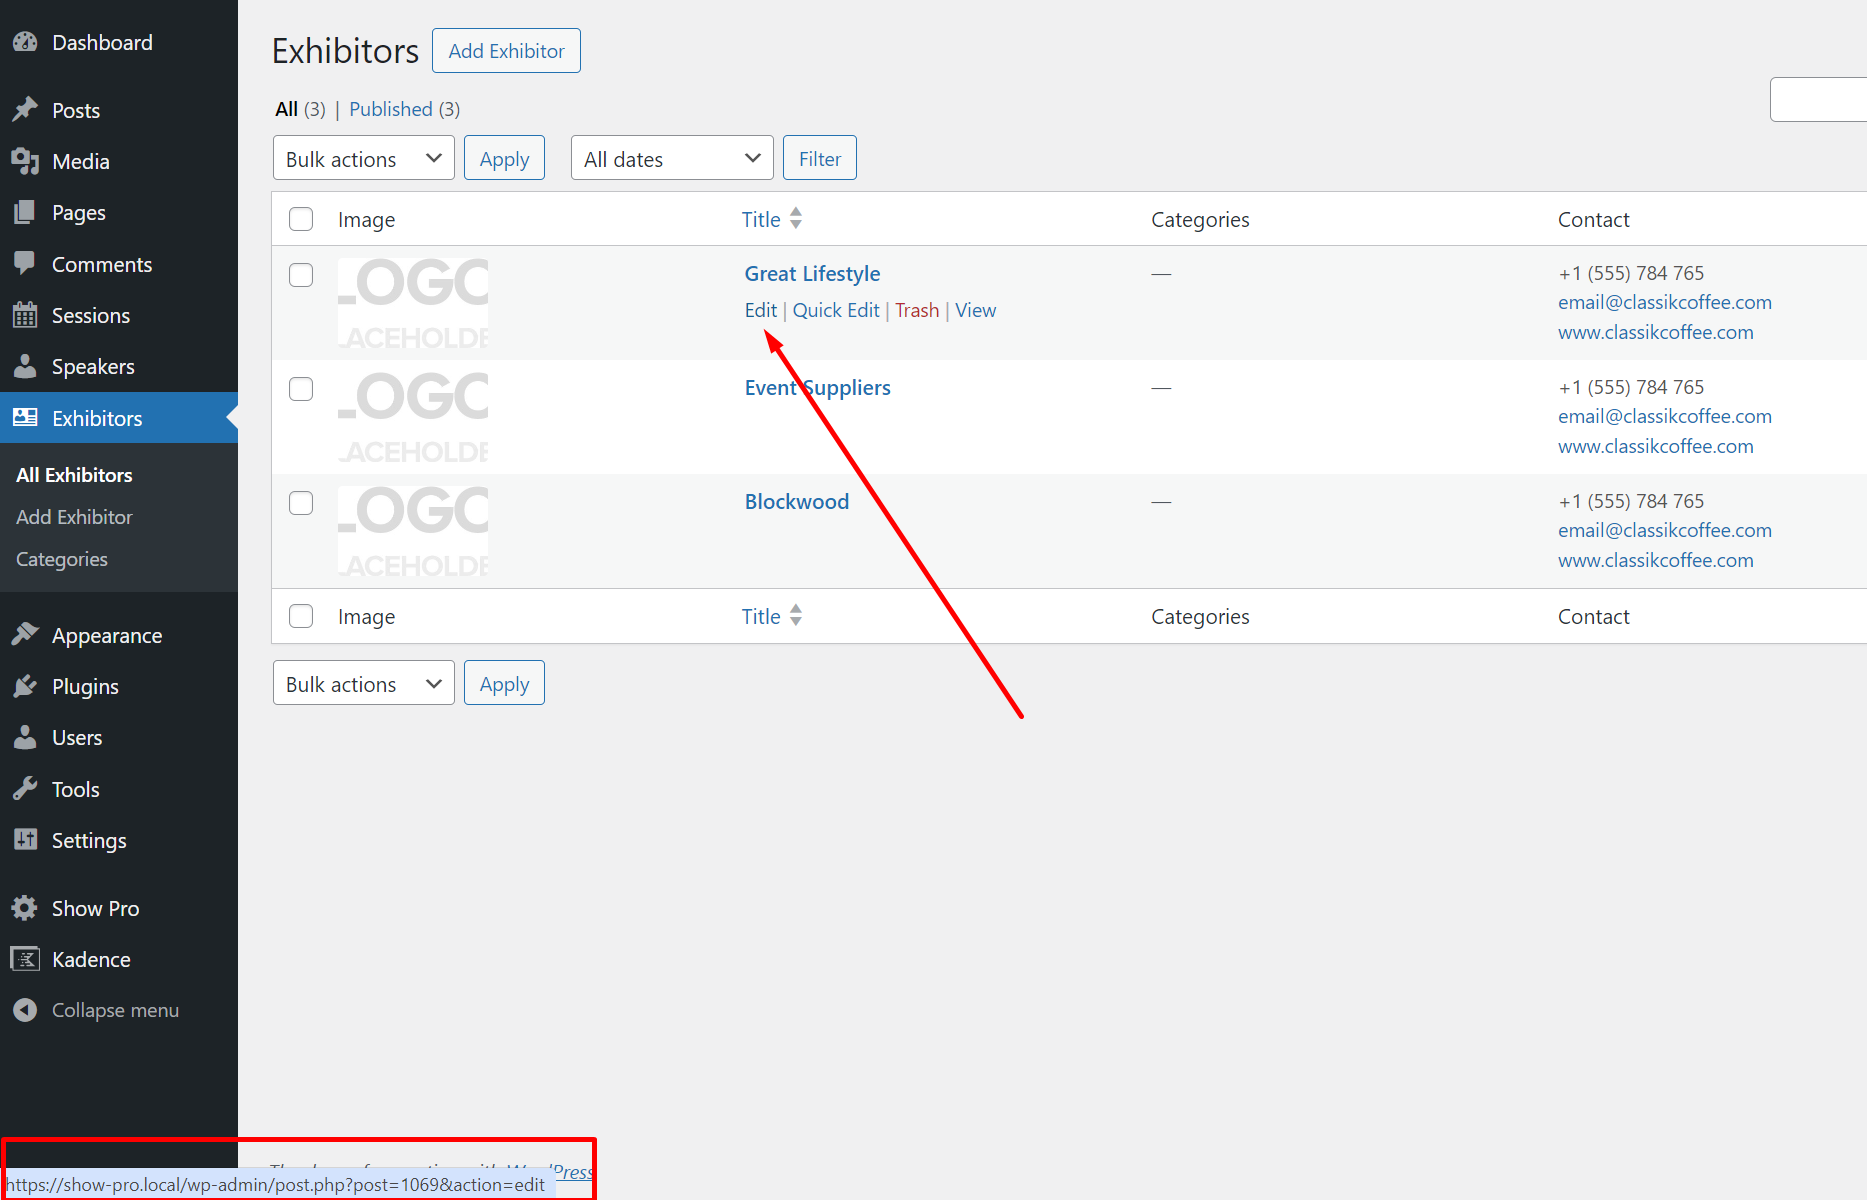
Enter each ID separated by commas into the show only field leaving everything else as default.
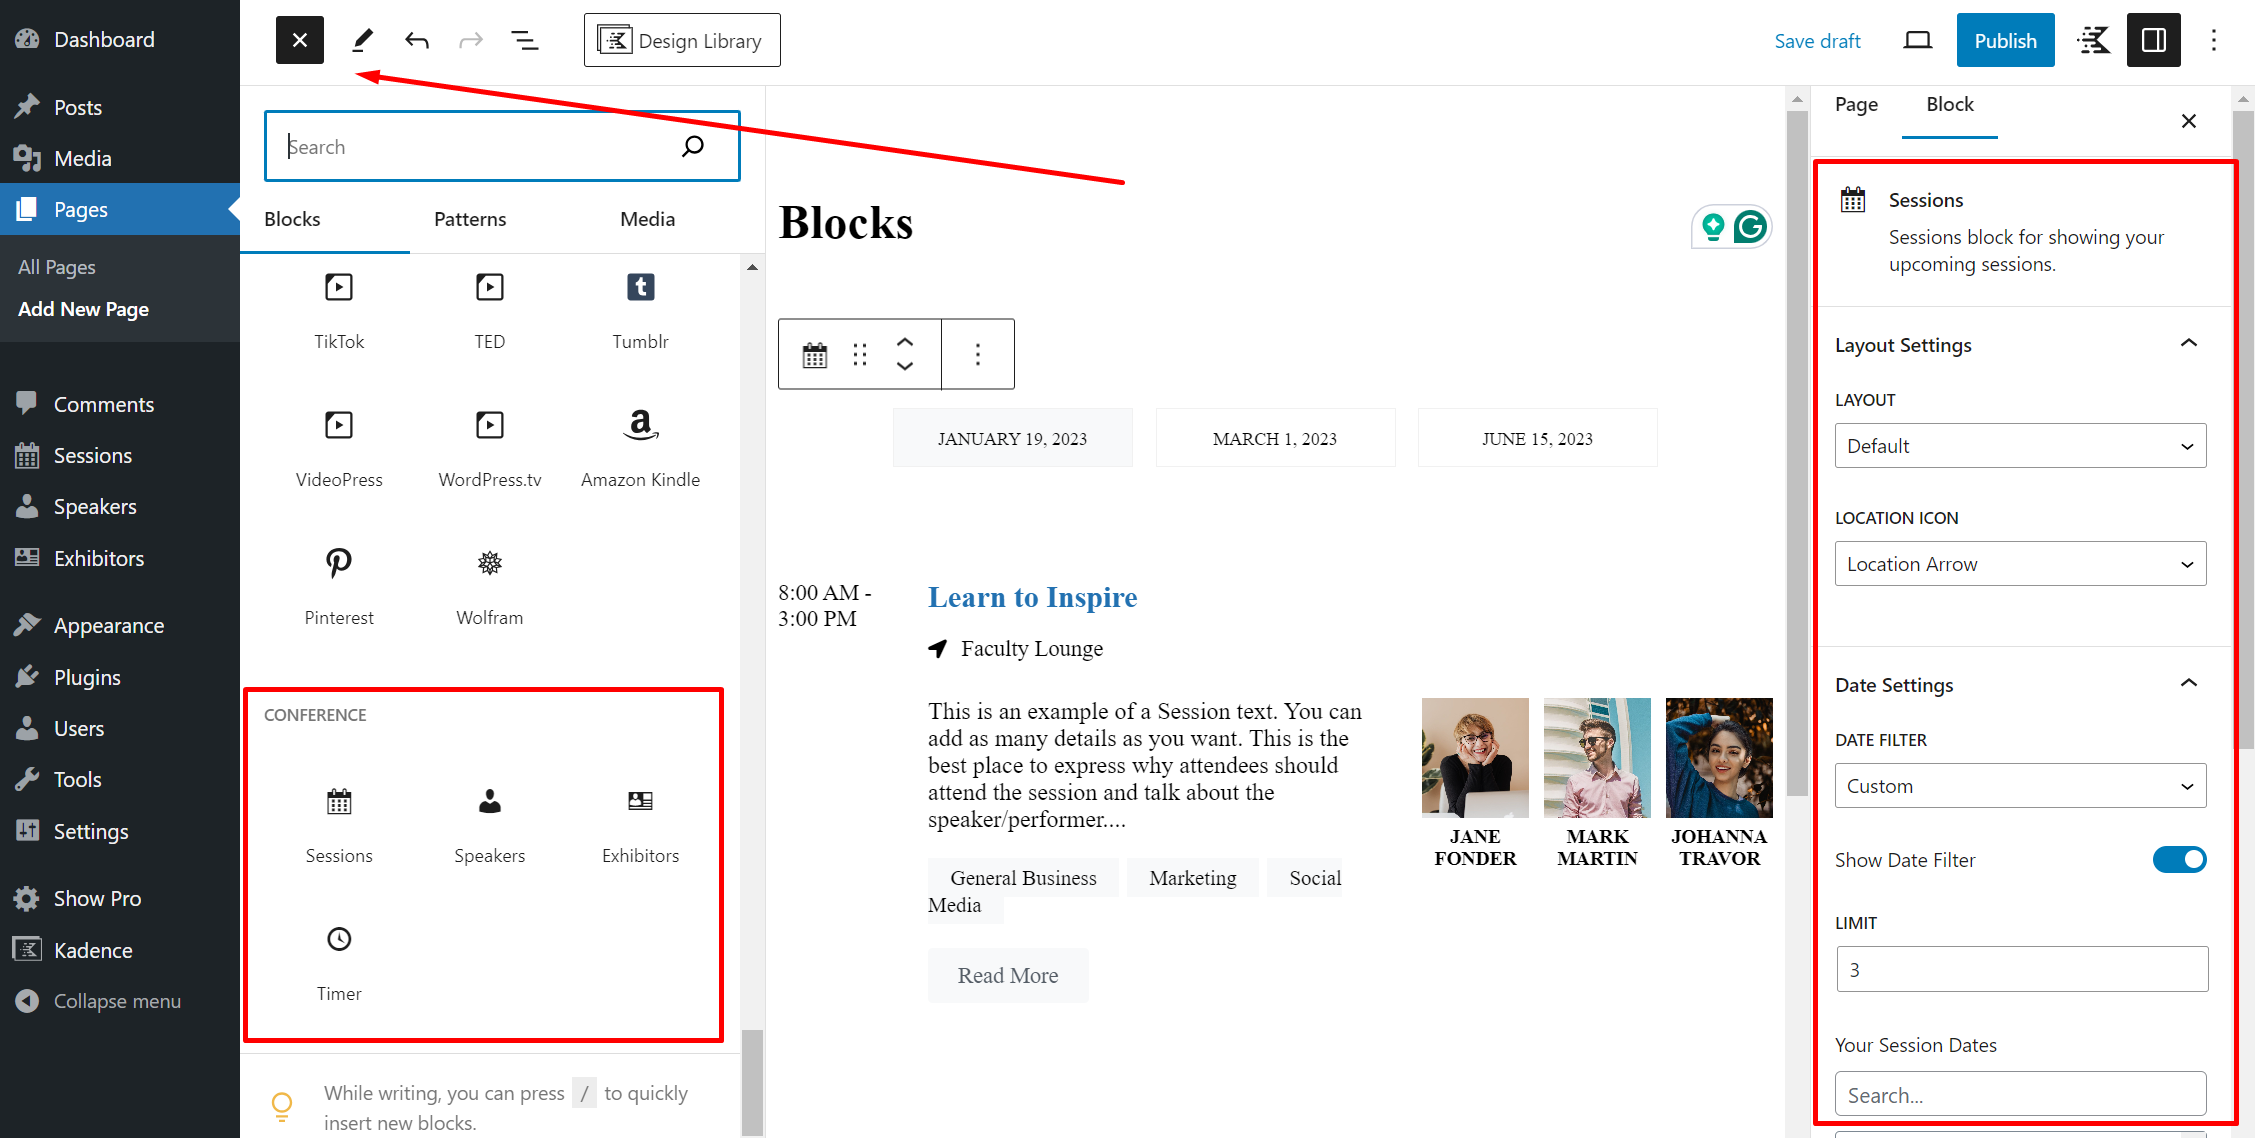
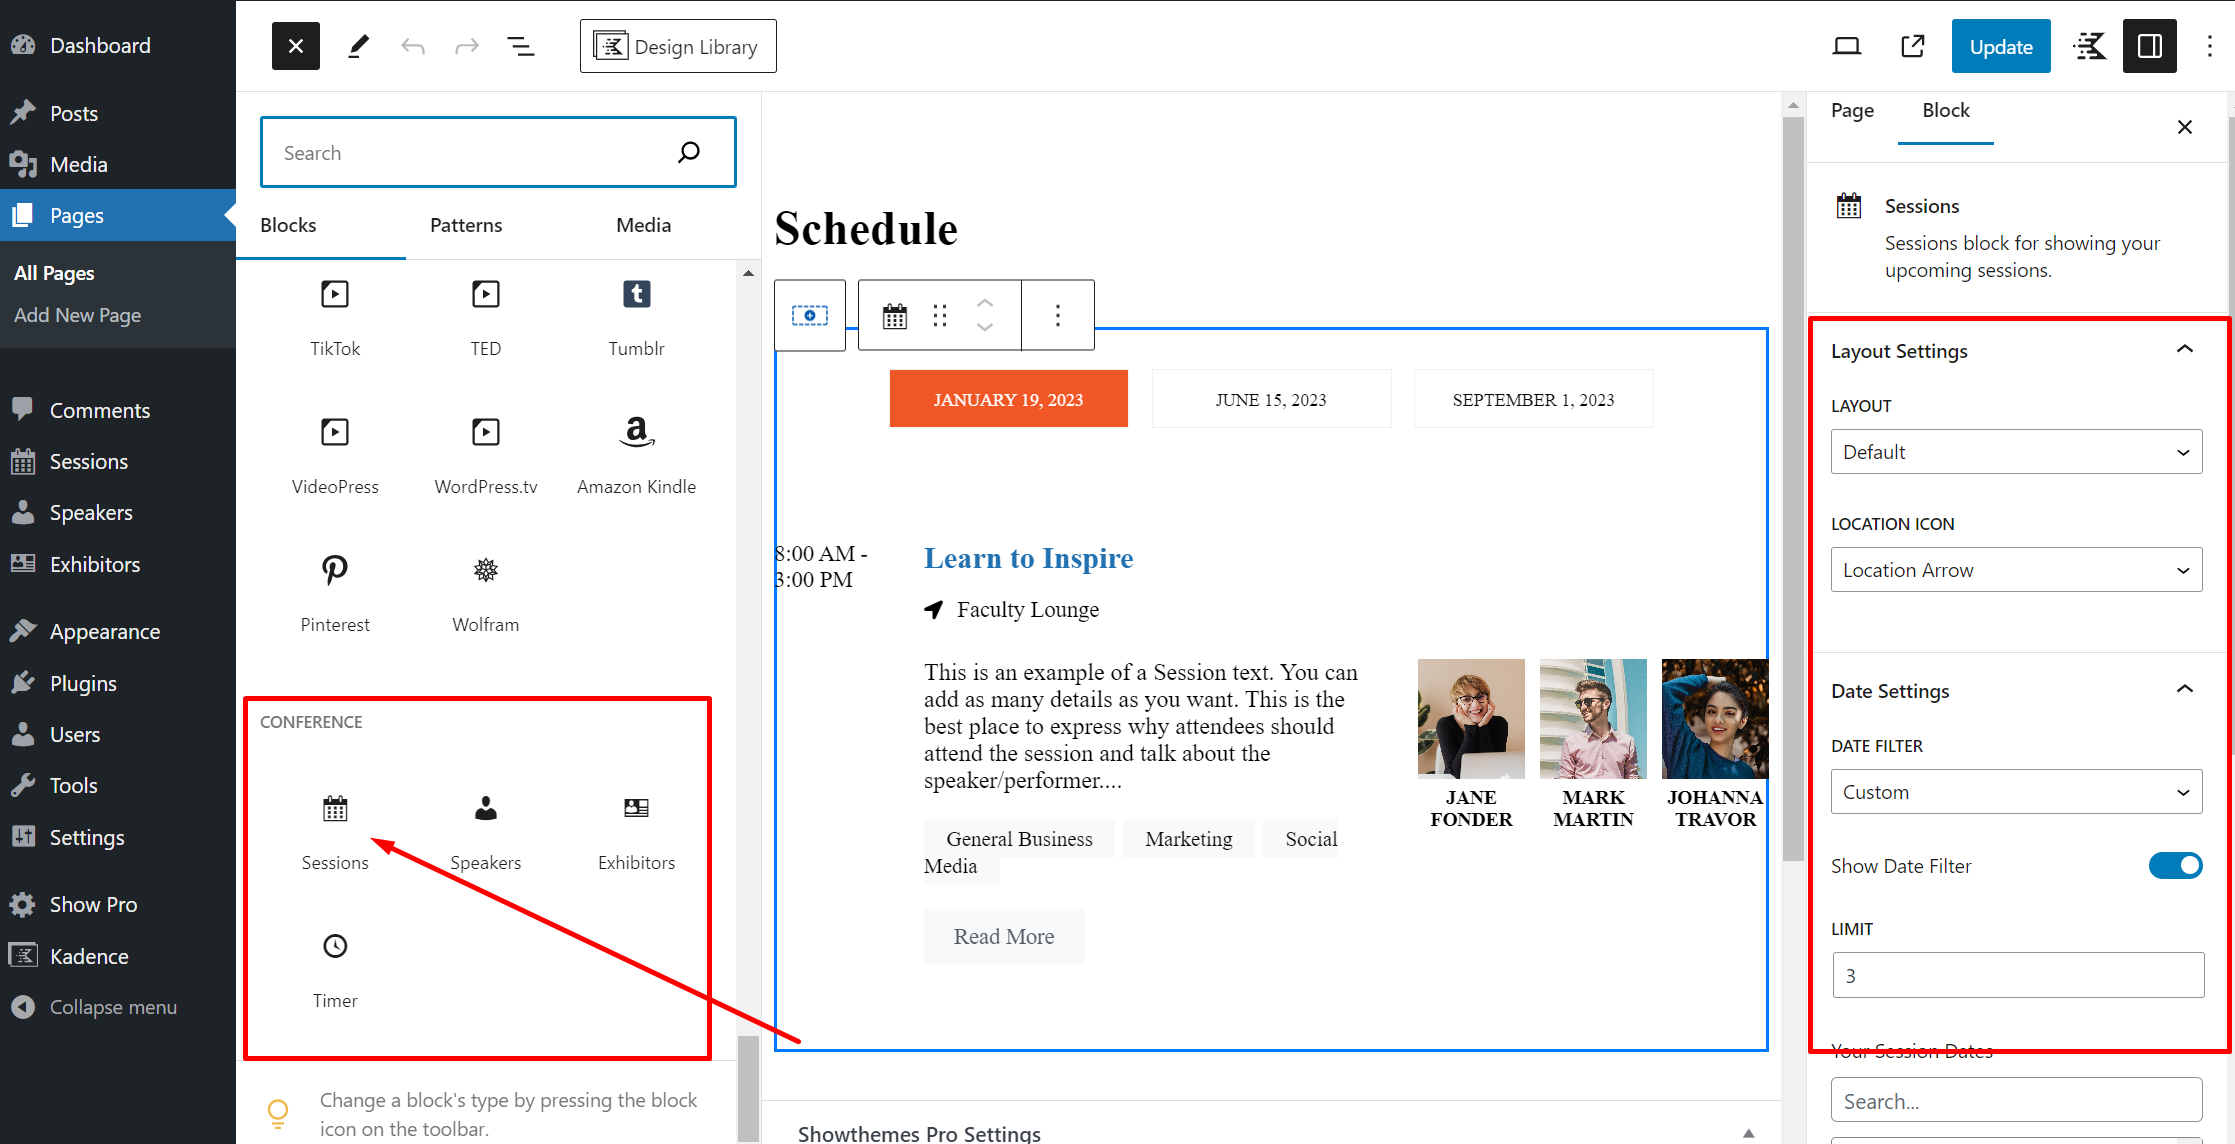
The Conference Plugin offers four blocks: Sessions, Speakers, Exhibitors, and Timer.
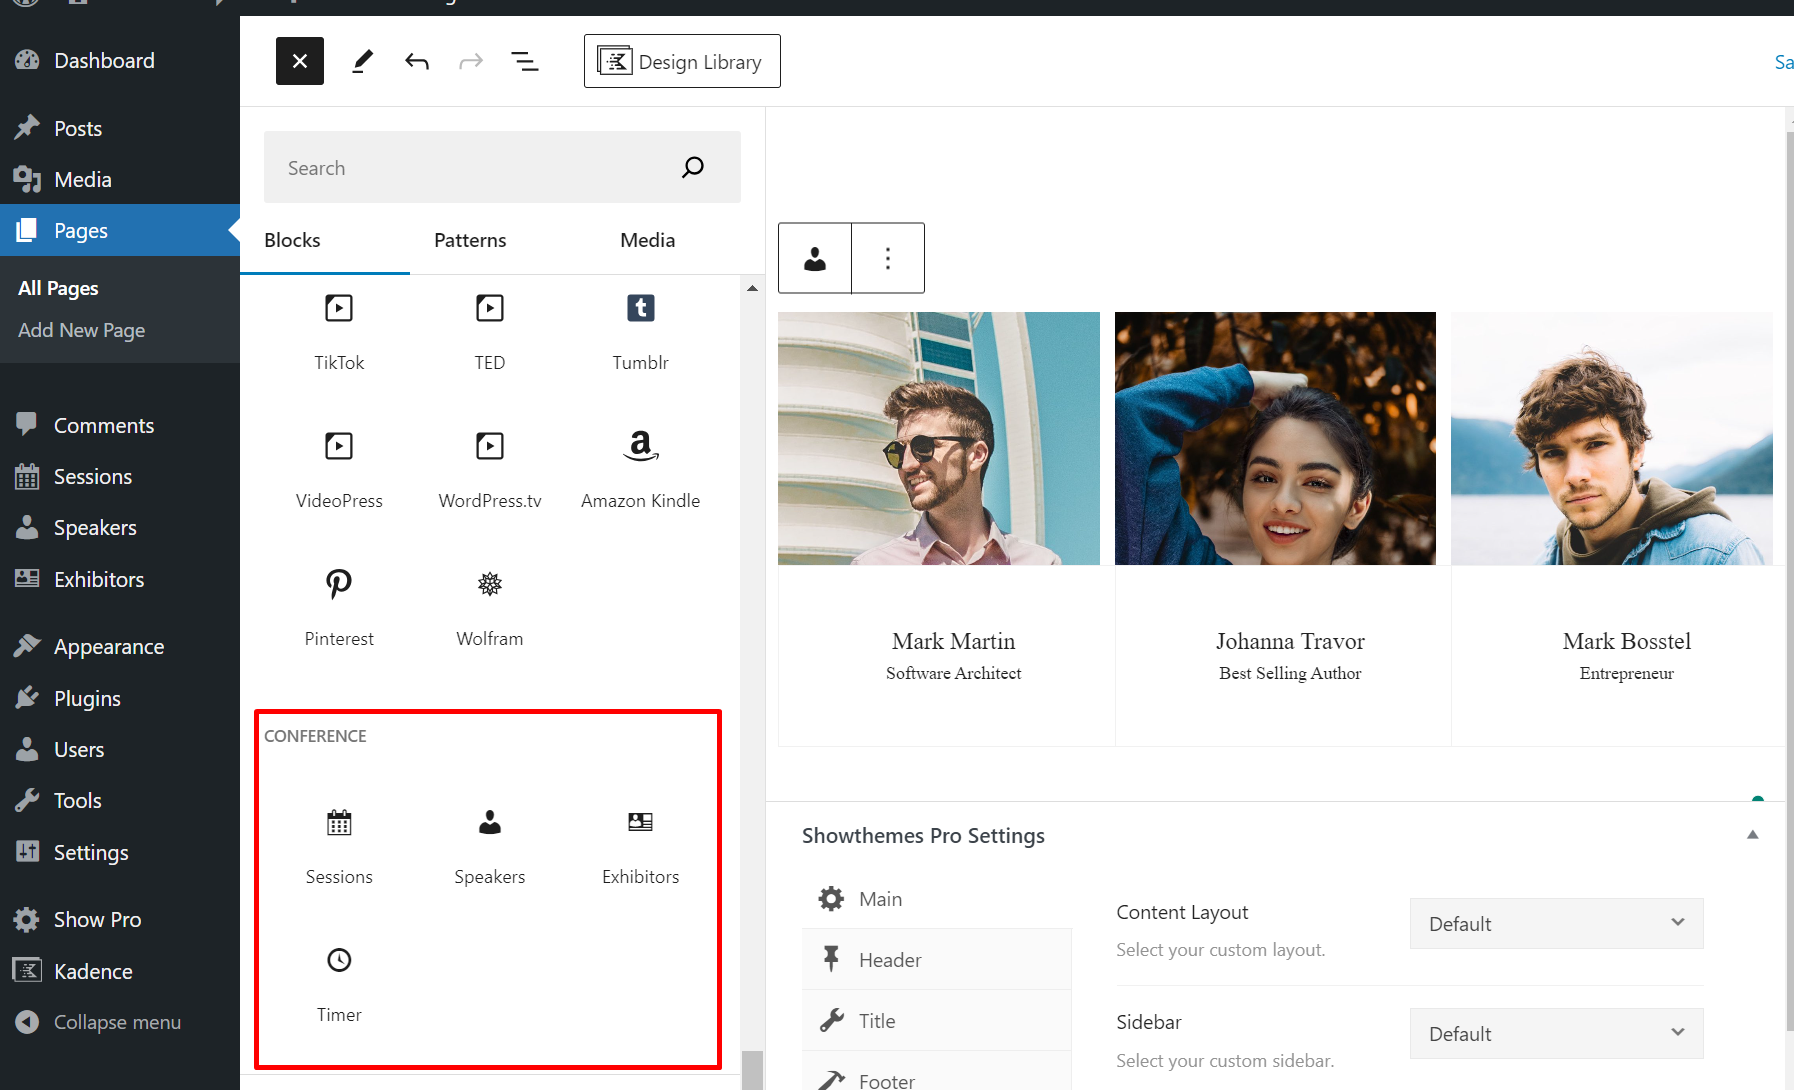
To add a block, go to any page or post and click the icon to add a block – like you would any other block. Choose the block you want and adjust the block’s settings as desired. Each of these blocks is simple and straightforward.
SESSIONS BLOCK
This will add a list of Sessions. You can show a tabbed filter for your sessions by date, limit the number of Sessions shown, show only specific Sessions by adding the page IDs of your desired Sessions, and customize a few styling components for the sessions.
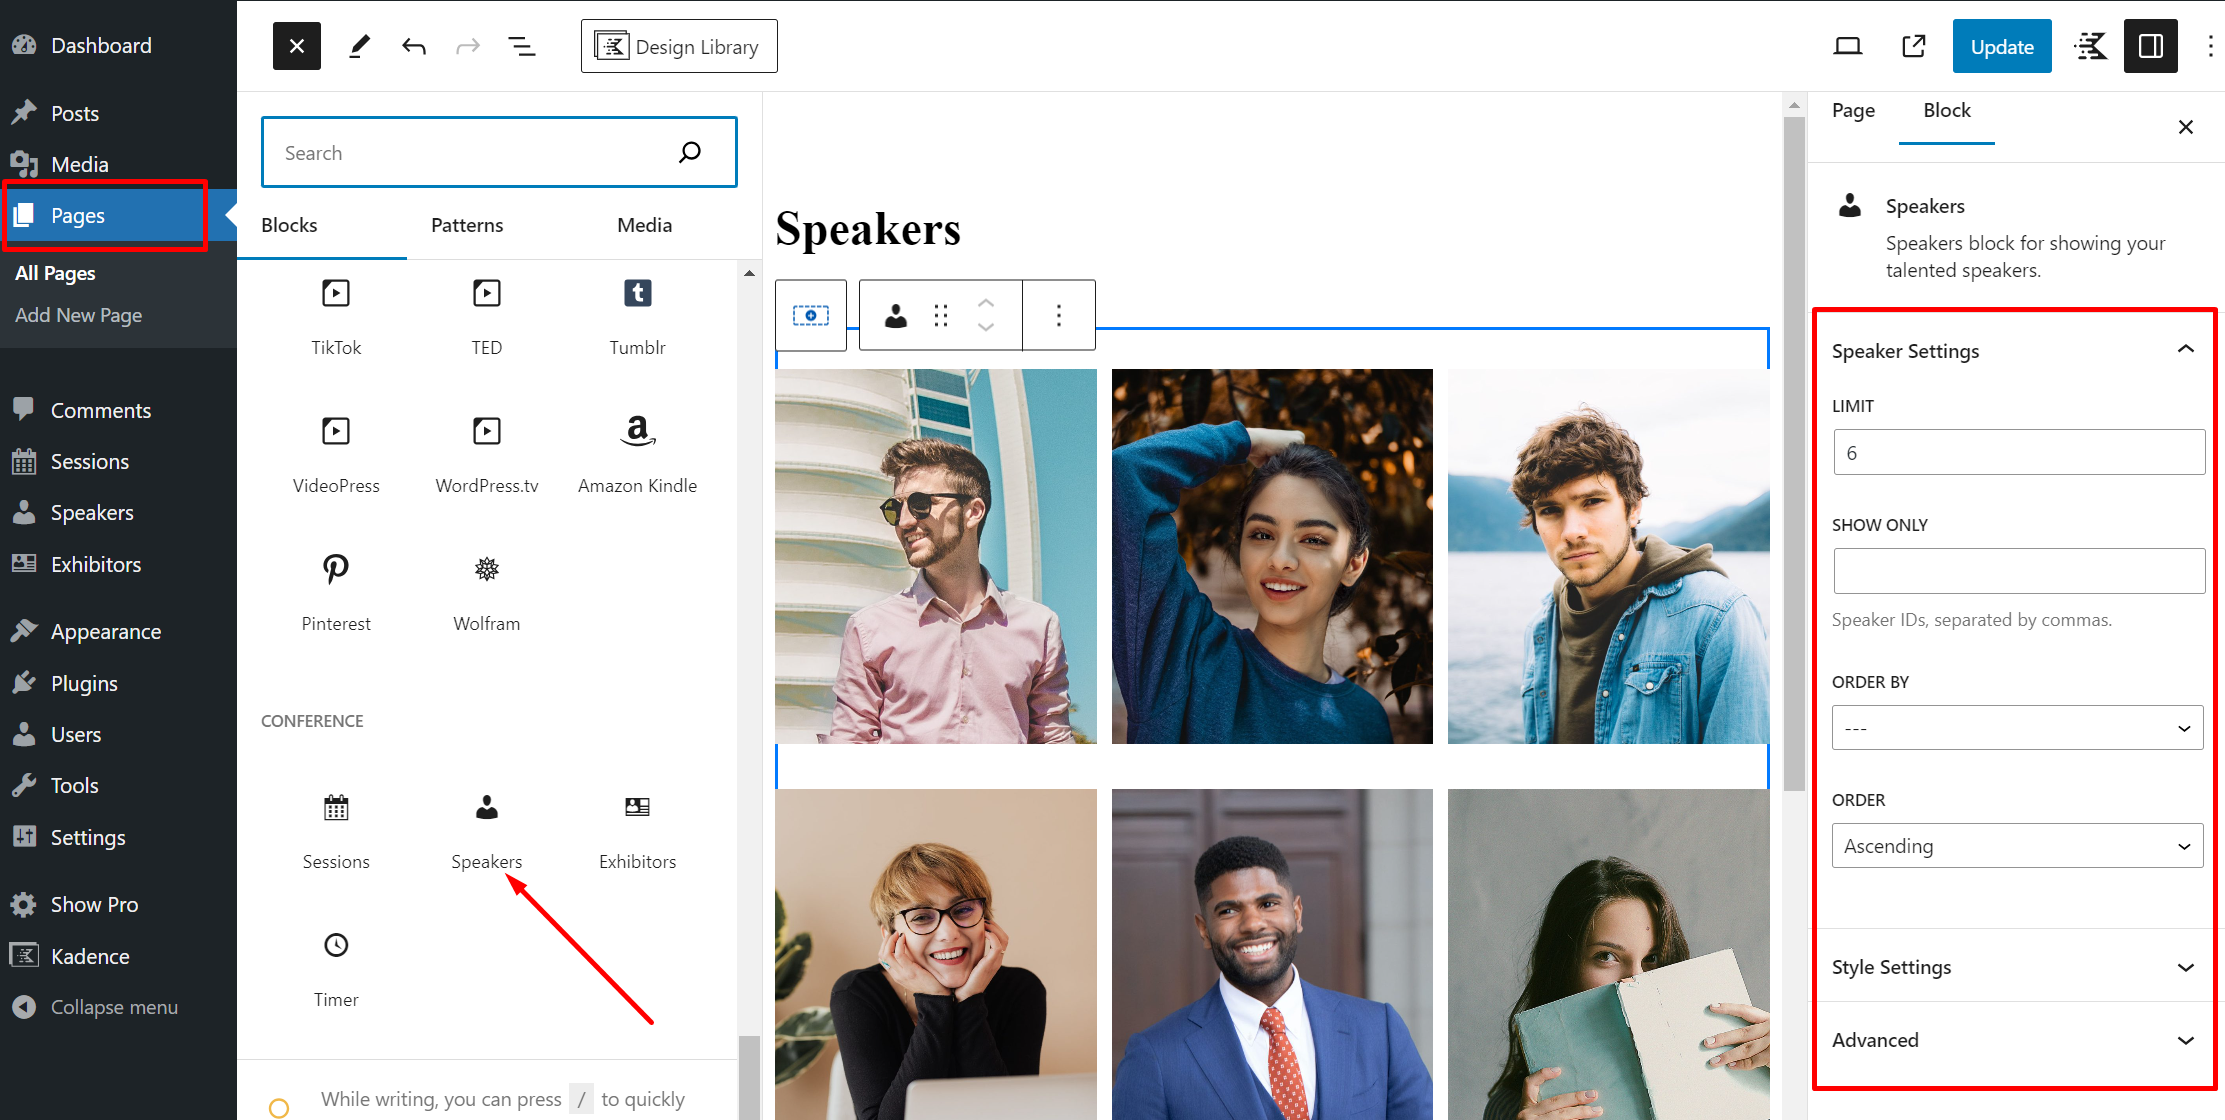
SPEAKERS BLOCK
This will add a list of Speakers. You can limit the number of Speakers shown and also show only specific Speakers by adding the page IDs of your desired Speakers.
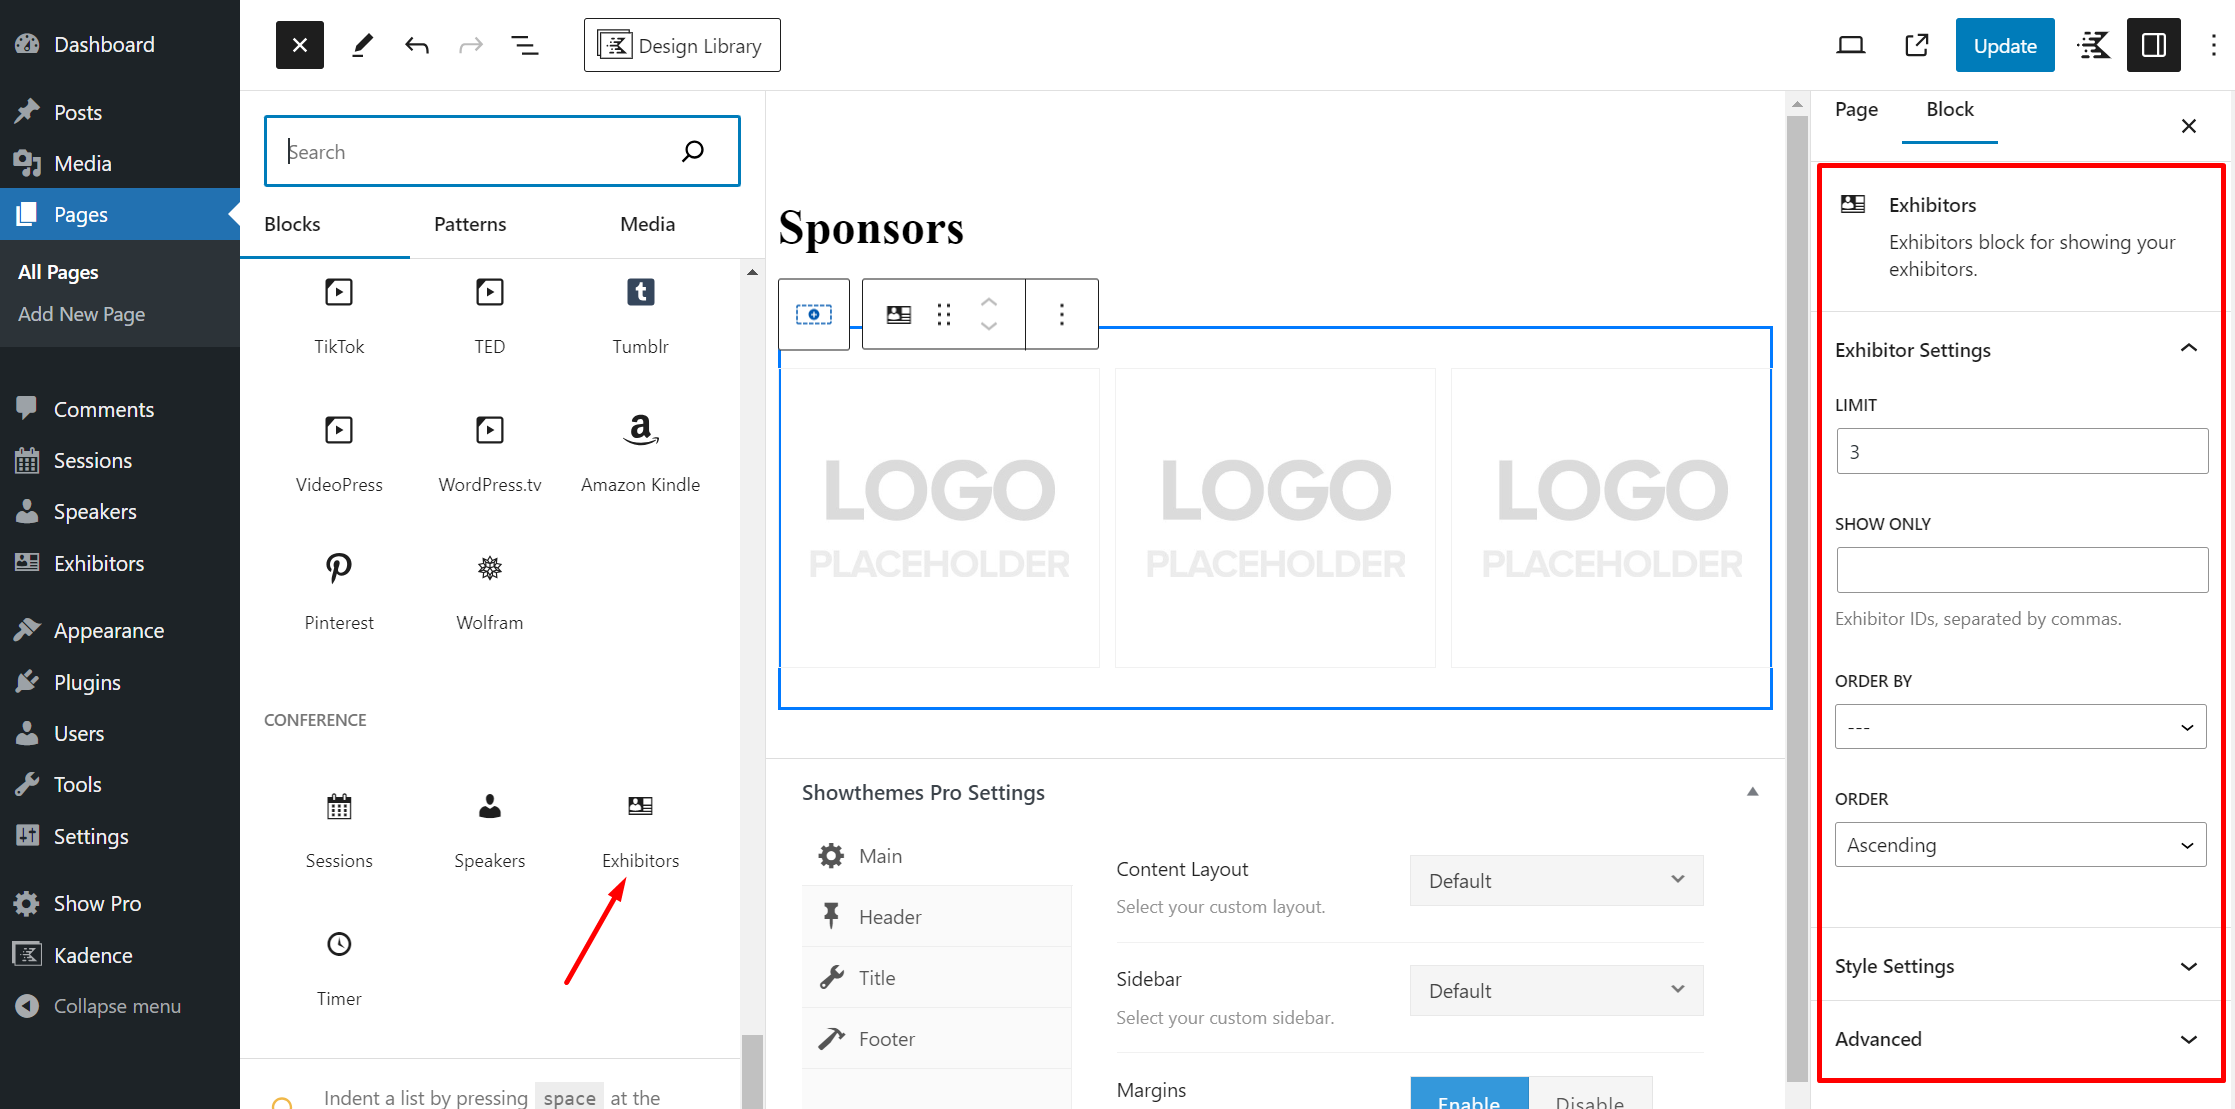
EXHIBITORS BLOCK
This will add a list of Exhibitors. You can limit the number of Exhibitors shown and also show only specific Exhibitors by adding the page IDs of your desired Exhibitors.
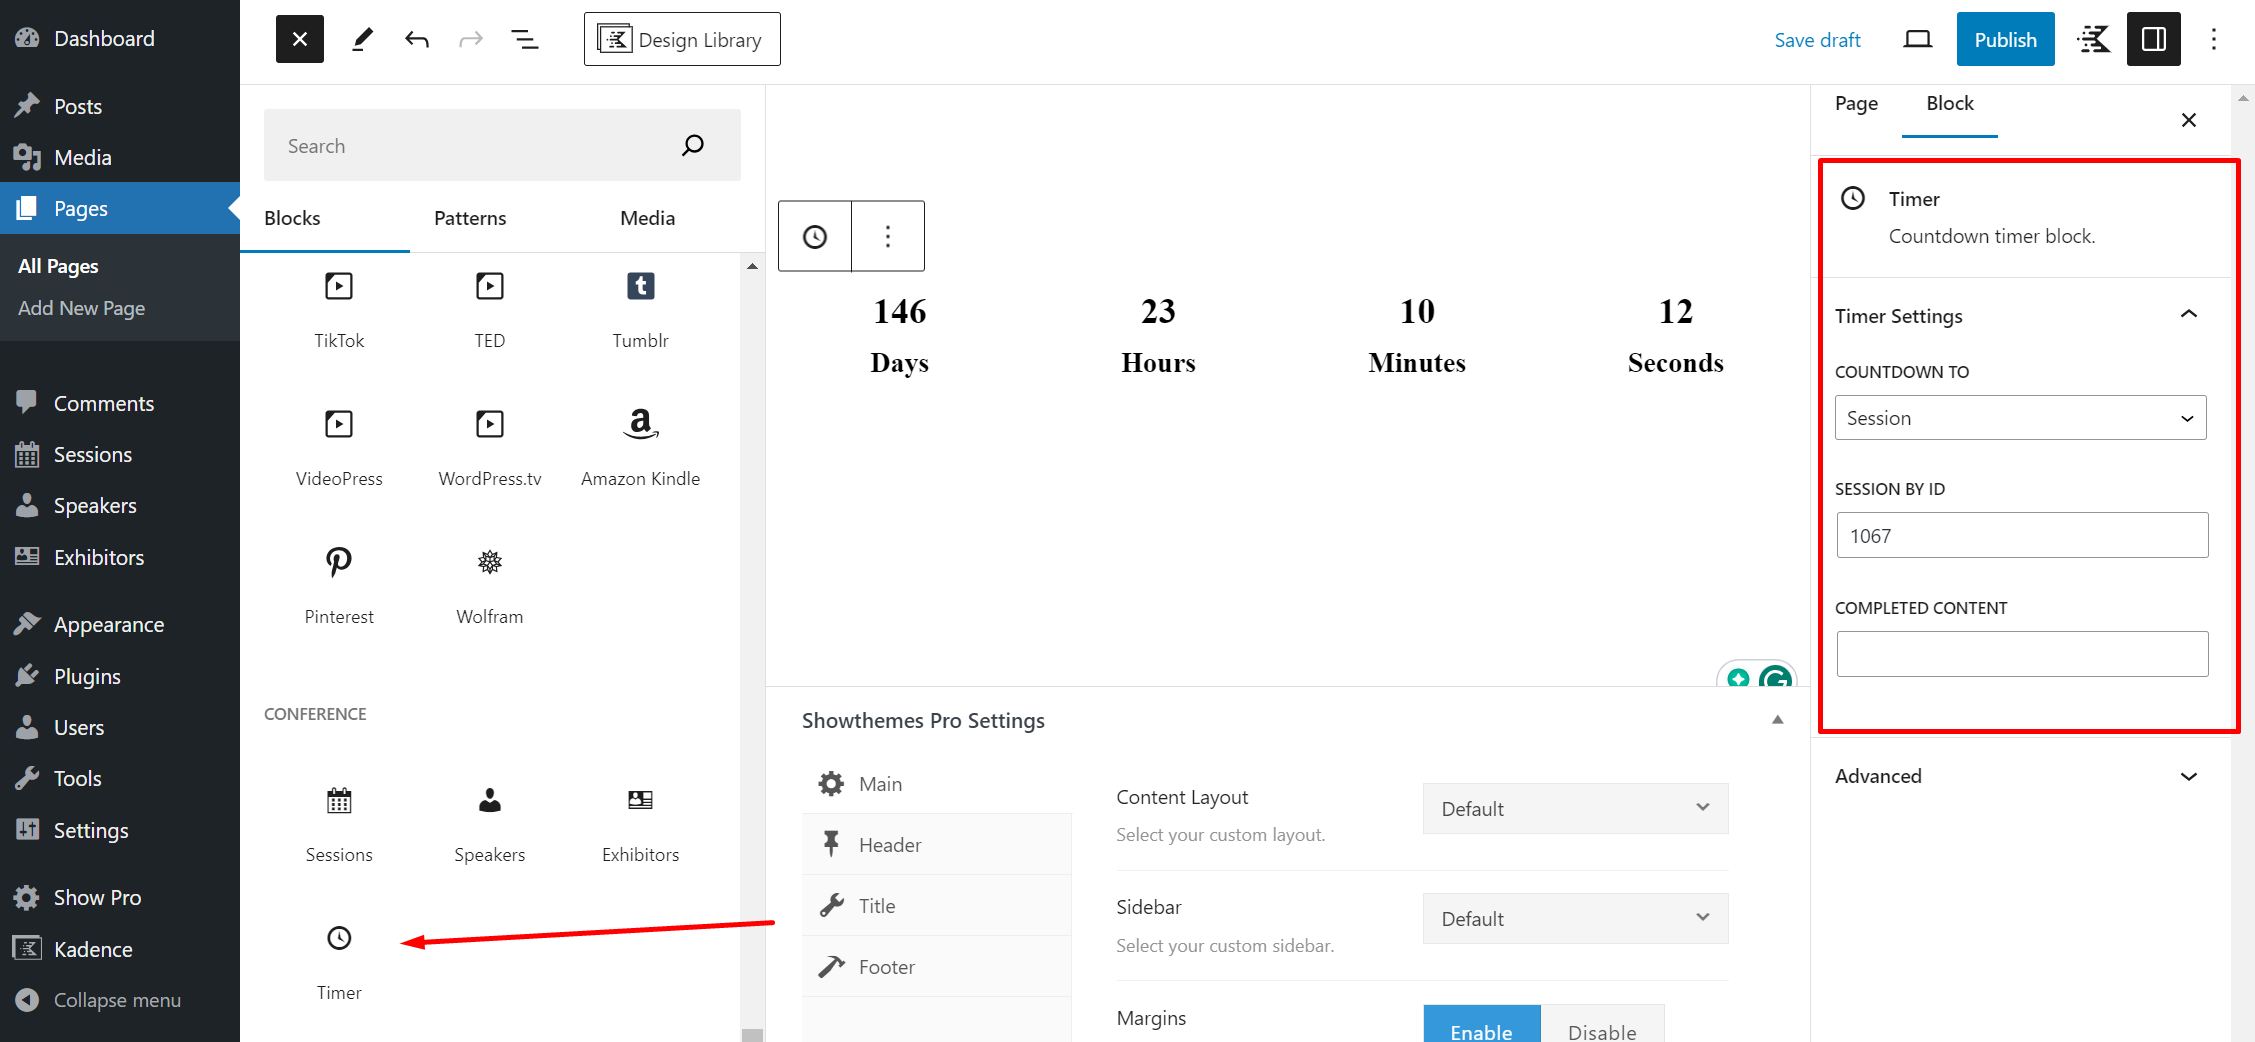
COUNTDOWN TIMER BLOCK
This will add a countdown timer. You can set this timer to end on a specific custom date, or set it to end at the time of a specific session by entering the page ID of that session.
The Conference Plugin is designed to integrate with EventBrite.
Set up a free Eventbrite account, create your event and tickets, and then follow Eventbrite’s instructions for embedding the ticket sales interface on your website.
Here’s a video that walks through the entire process in real-time, from creating an Eventbrite account to a working checkout on a website.