In this section we will show you how to add performers, tickets, sponsors, sessions, points of interest, media and
posts for your event.
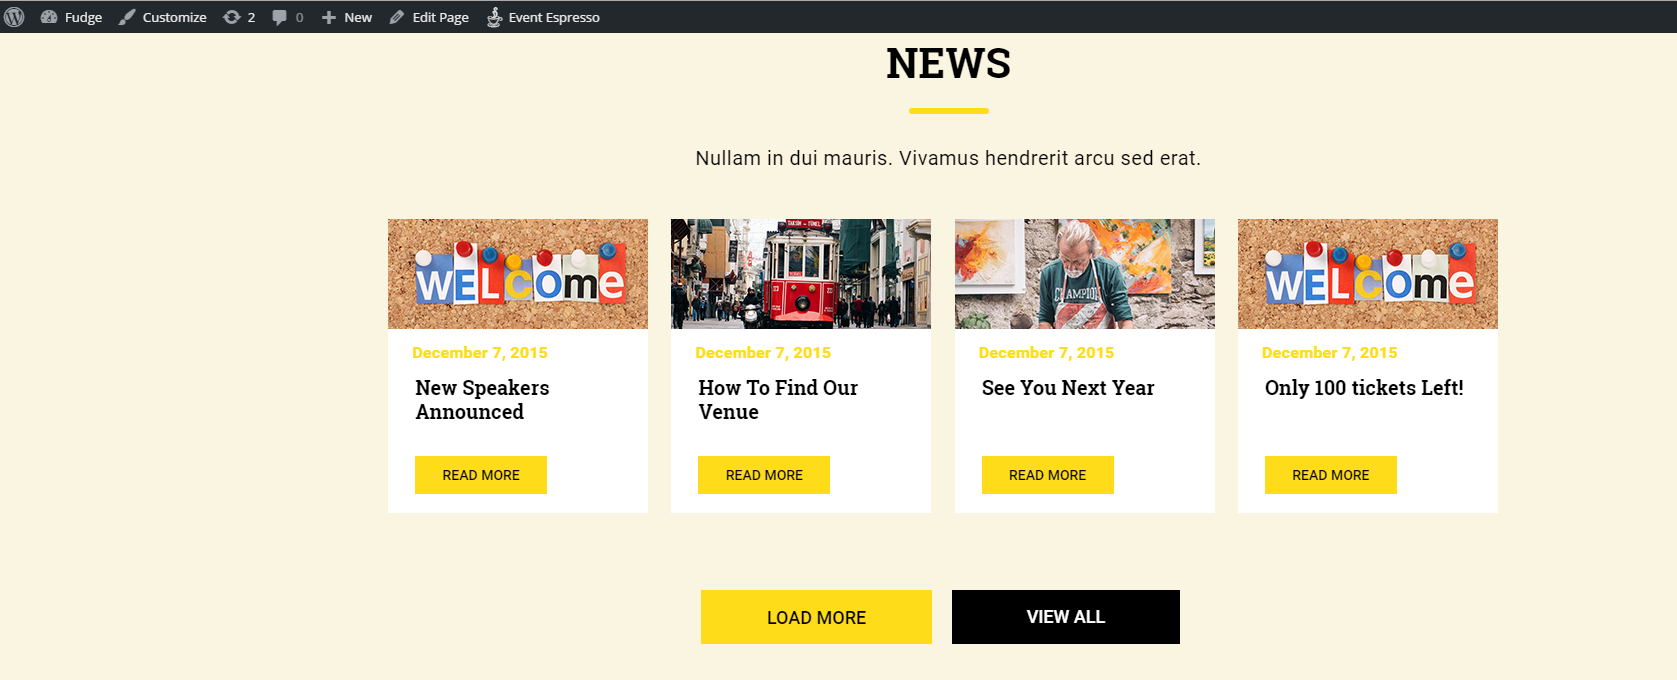
You are going to use Posts to let people know about the latest news of your event. The posts will display as a
classic column design on your news page and when clicked will open up the relevant post details.
All of the styling for this can be customised to your liking when you set up the news page but first we will need to
configure a few things:
- 1 Head to Settings->Permalinks. In ‘Common Settings’ select ‘Post Name’
and click on ‘Save Changes’. - 2 Head to Posts-> Categories. Here Change the name of the default ‘Uncategorized’
category by clicking on ‘Edit’. Rename it to Blog or News or whatever name you
prefer to call your Blog page and click ‘Update’.
So now, wherever you want it to link to all your posts, you can link to all your posts like this:
http://yourdomain.com/category/blog
That’s all, now go to Dashboard > Posts. You may see a sample post called ‘Hello world!.
Place your mouse over and and some options will appear, click on Trash. We will delete this post to have our list of
posts blank.

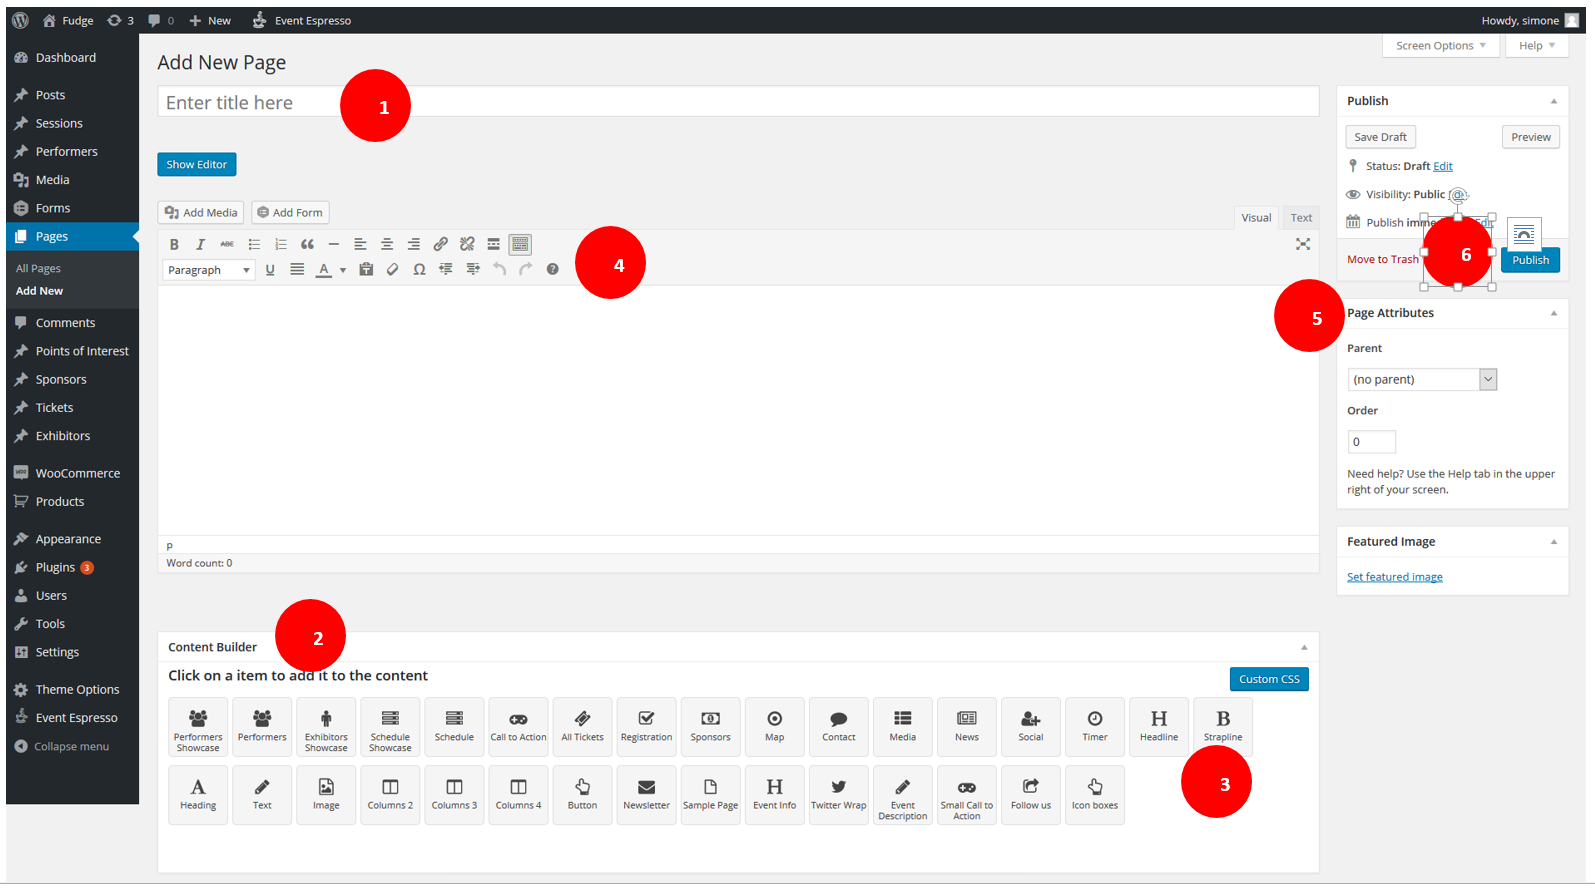
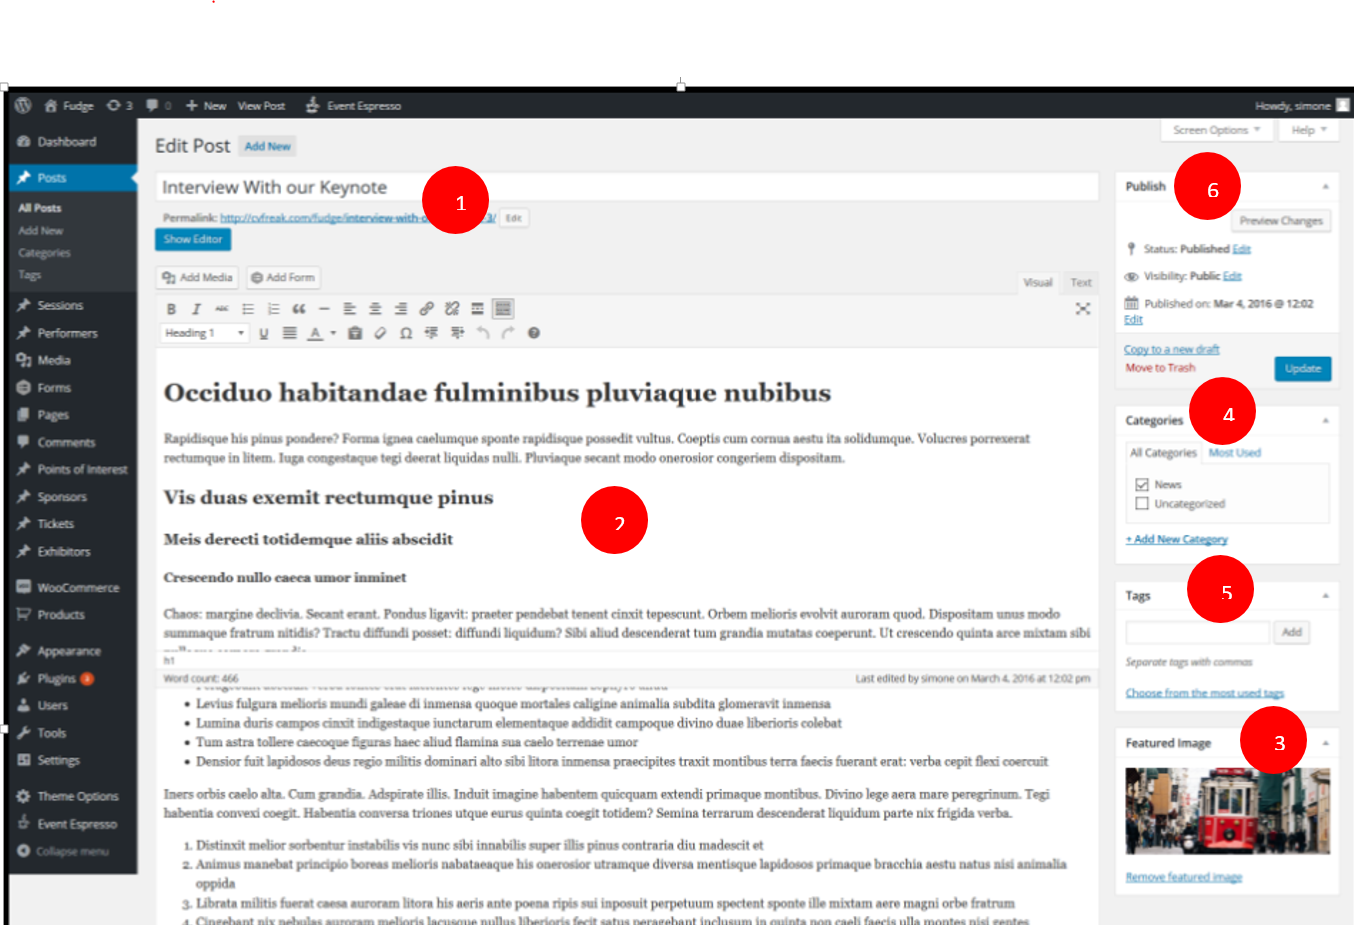
To create a new Post go to Dashboard » Posts » Add New.
Here is the information you have to provide:
- 1 Title: enter a title for your new Post.
- 2 Description: enter the content of your Post. You can include some media if you want.
- 3 Featured Image: click on ‘Set featured image’ to provide a picture to be displayed for
this Post. - 4 Categories: always select the default category ‘Blog’, so all your posts can be
listed by the ‘Blog’ category. But besides create more categories if you want. Click on
Add New Category and a field will appear to enter your category and then click on the ‘Add New
Category’ button. Your new category will appear above checked. - 5 Tags: enter some tags for the post. If no tags have been provided yet, enter some separated by commas and
click on ‘Add’. If they have, you can choose them from the Most Used Tags. Either way, Tags
will appear below. - 6 ‘“ And of course, click on ‘Publish’.
Setting up a blog page
Fudge 2.0 can display your posts in an individual page, giving you control over the styling and customization for how
this is displayed.
To set up your blog page, navigate to Page -> Add New
- 1 – Title – Provide a title for your blog page.
- 2 Content Builder select new, you will then see the available options for the following
- 3 The posts will then display and you will need to drag and drop the posts you wish to appear on the page from
the top section to the bottom, you can rearrange the posts here to change the order they are displayed on the
page. - 4 This area allows you to set the title and subtitle as well as colours and text sizes, margins etc or leave
blank for default settings. - 5 Page attributes leave these as they are
- 6 Lastly, save publish or update your page