Index
Getting Started With WordPress
2. Getting Started With Mondree
3. Installing Mondree
3.1 Mondree Customize Options
3.2 New Mondree Dashboard Sections
4. Customizing Mondree
4.1 General Site Settings Logo & Font
4.2 General Site Settings Colors
4.2.1 Primary Color
4.2.2 Secondary Color
4.2.3 Tertiary Color
4.2.4 Primary Background Color
4.2.5 Secondary Background Color
4.3 Theme Settings – Performers & Footer
4.4 Theme Settings – Social Networks
4.5 Theme Settings – Social API
4.6 Theme Settings Contact
4.7 Theme Settings Tools
5. Setting up the data
5.1 Sessions
5.1.1 Setting up a full schedule page
5.2 Speakers
5.2.1 Setting up an All Speakers Page
5.3 Points of interest
5.3.1 Setting up a points of interest page ‘Map’
5.4 Sponsors
5.4.1 Setting up a sponsors page
5.5 Tickets
5.5.1 Setting up the ticket page
5.6 Posts Setting up the blog
5.6.1 Setting up a blog page
6 Content Builder Creating page layouts
6.1 Content Builder Speakers
6.2 Content Builder – Schedule
6.3 Content Builder Schedule Slider
6.4 Content Builder – All tickets
6.5 Content Builder Registration
6.6 Content Builder – Sponsors
6.7 Content Builder Map
6.8 Content Builder Contact
6.9 Content Builder – Instagram
6.10 Content Builder – Media
6.11 Content Builder News
6.12 Content Builder Full News
6.13 Content Builder Social
6.14 Content Builder Timer
6.15 Content Builder Twitter
6.16 Content Builder – Strapline
6.17 Content Builder Heading
6.18 Content Builder Text
6.19 Content Builder – Image
6.20 Content Builder Call to action
6.21 Content Builder Columns 2
6.22 Content Builder Columns 3
6.23 Content Builder Columns 4
6.24 Content Builder Button
6.25 Content Builder Newsletter
6.26 Content Builder Sample Page
6.27 Content Builder Event Info
6.28 Content Builder Speakers Slider
6.29 Content Builder Instagram Wrap
6.30 Content Builder Twitter Wrap
7 Editing the style and the CSS
8 Registration Services
8.1 Eventbrite
8.2 Event Espresso
8.3 – Woocommerce
8.4 Xing Events
8.5 Ticket Tailor
8.6 Tickera
9 Best practices and Tips
10 Language Integration
—————
1. Getting Started with WordPress
Mondree is a WordPress Theme (Tip: What is WordPress?) designed to enhance your techhnology conference, meeting, or event.
If you are planning a conference, meeting, seminar, workshop or similar event, congratulations you have made the right choice. Using Mondree requires an intermediate knowledge of WordPress.
This means that you should have basic knowledge of using WordPress. Our theme is made for WordPress.org (as opposed to WordPress.com) this means that you need a hosting provider where you can install WordPress and activate Mondree. If you don’t have a hosting provider, we suggest WPEngine.
If you are not confident with WordPress, we suggest 3 actions:
- 1. Watch the following Videos: What is WordPress? – How to Install WordPress – The Dashboard and read the handy guides at WPBeginner. Everything you need to know about running a WordPress site is on the web. WordPress is an open-source software with a huge and helpful community of users. You will find answer to any concerns you may have.
- 2. Run a test installation with the default theme and give it a whirl. Play with it and get confident with different sections of the Dashboard.
- 3. Use WordPress Forums and Docs. Search the forums for your question, there will probably be an answer. If there isn’t don’t be afraid to ask, you will find WordPress community eager to help and friendly.
2. Getting Started With Mondree
We developed Mondree utilizing the core WordPress functionality as the basic foundation. It is designed to showcase your event with great functionality and beautiful design.
Using Mondree you will be able to: – Provide your event information and details. – Define and display all the data necessary for your event: sessions, speakers, sponsors, points of interest and media.
- Show your event schedule. – Let your attendees buy their tickets using Woocommerce, Eventbrite, EventEspresso or Xing Events services.
- Show all your social media links: Email, RSS, Facebook, Twitter, Flickr, Linkedin, Pinterest.
- Integrate with Facebook and Twitter.
- Include an awesome countdown timer.
- And so much more…
You will be able to do all this and more but first things first. Let’s install and activate Mondree.
3. Installing Mondree
To install and activate Mondree on your WordPress site, head over to Appearance -> Themes and click on Add New button.
On the next screen, click on Upload Theme button at the top.

Click on Choose File button, locate the Mondree zip file, and then click on Install Now button.

The theme will take some time to upload. When finished, click on the Activate link to activate Mondree on your site.
If you want more information on installing and activating themes in WordPress, read this article.
How to Update Mondree
- Create a full website backup: This step is crucial; it will allow you to recover the site in case the update couldn’t be completed.
- Save any custom CSS you have stored under Appearance > Customize > Additional CSS.
Note: If your custom CSS is inside a child theme, it shouldn’t be a problem.

- Choose a different WordPress standard theme in the meantime. You can choose one of the WordPress standard themes.

- Delete your parent theme (in this particular case, Mondree).
- Download the last version of your theme from your account member area.
- Install your parent theme again; the version number should change; you are free to check our changelog.
- Install the classic editor (if you don’t have that plugin already installed).
- Change the settings of your “Classic editor” >> Default editor for all users: Classic Editor.
- Activate your parent or child theme (that will depend on your initial setup)
Mondree Customize Options
Under Theme Options you will see different options to customize Mondree. We will show you how to use each of these options later in this guide.
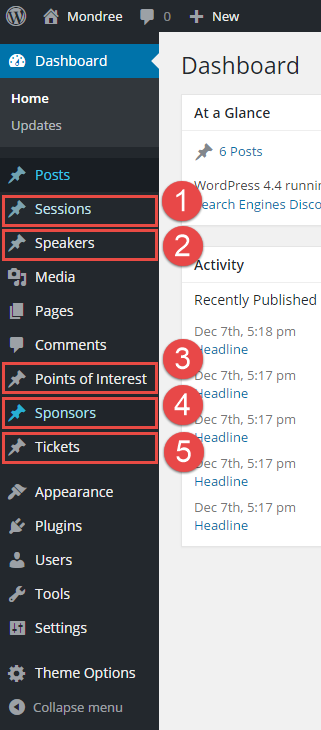
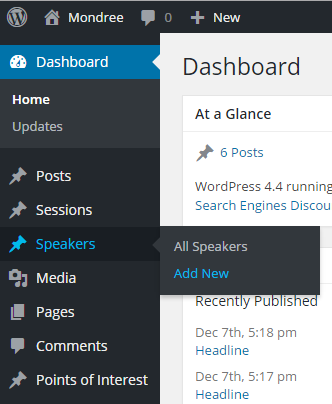
3.2 New Mondree Dashboard Sections
Apart from Theme Options, five new sections will appear in your WordPress admin sidebar.
These sections take care of the relevant data of your event. We will explain how to use each one of them later in this guide.
4. Customizing Mondree
Now that you have installed Mondree, it is time to set it up to meet your needs. We always suggest to activate the theme on a fresh WordPress installation with no plugins and no previously populated content.
Please head over to Theme Options.
Let’s have a look at the available options. Theme Options panel for the Mondree theme is divided into five sections.
- General settings
- Social Networks
- Social API
- Contact
- Tools
We will walk you through each of these options. Don’t forget to click on ‘Save Options’ as you make changes.
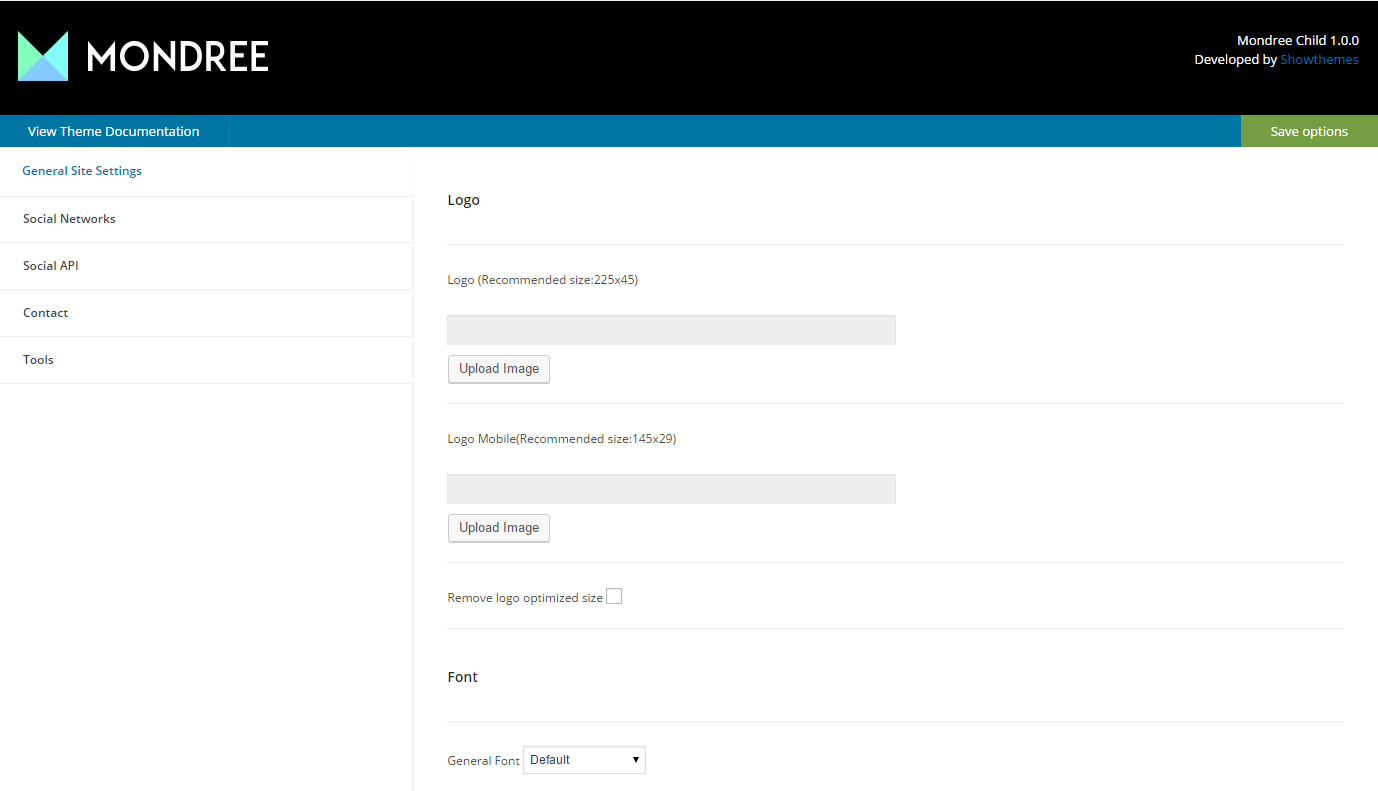
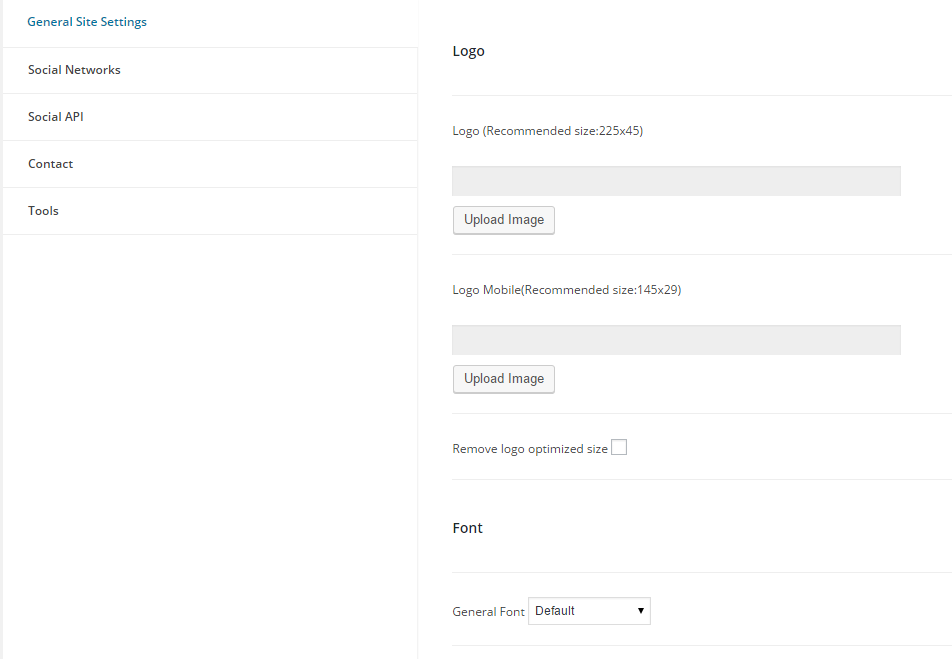
4.1 General Site Settings – Logo & Font
Logo: On the General Site Settings tab, the first option is to set the logo for your site with a recommended size of 225px x 45px. Simply click on the upload Image button to upload your logo and select it. Beneath this, is another logo option that enables you to upload a seperate and smaller version of your logo that will be displayed on mobile browsers. The receommended size for this image is 145px x 29px. Note: ticking the checkbox that says “remove logo optimised size” will remove disable the mobile logo from loading and will instead always show your main logo.
Font: You can choose the general font that will be displayed on your website, there are 20 fonts to choose from. Simply select the font of your choice from the dropdown list or leave the value at default.
4.2 General Site Settings – Colors
The next section on the general site settings tab is to choose colors for your site. Mondree gives you an unlimited choices of color combinations that you can create and use on your site.
4.2.1 Primary Color
This color is used in the main menu bar of your site, for links, and several other elements. This is the most prominently visible color throughout your theme. By default Mondree uses #83febf as the primary color of your site.

Here is how the primary color looks on the Mondree main menu.

4.2.2 Secondary Color
Secondary color is used for text in the site’s main menu, icons, and other elements. It should compliment the primary color.

This is how the default colours look on the website.

4.2.3 Highlight Color
Highlight color is used for headings and texts on different pages of your site.

4.2.4 Primary Background Color
As the name suggests, primary background color is the main background used throughout your site. The default value for primary background color is #000.

Here we have changed the background color to #e50b0b. This is how it would look like on your site:

4.2.5 Secondary Background Color
Secondary background color is used appears when users take their mouse to certain elements, like menu items and buttons. The default value for secondary background color is #2E2E2E.

In this example we have changed the secondary background color to #b8b405. This is how it looked on our test site.

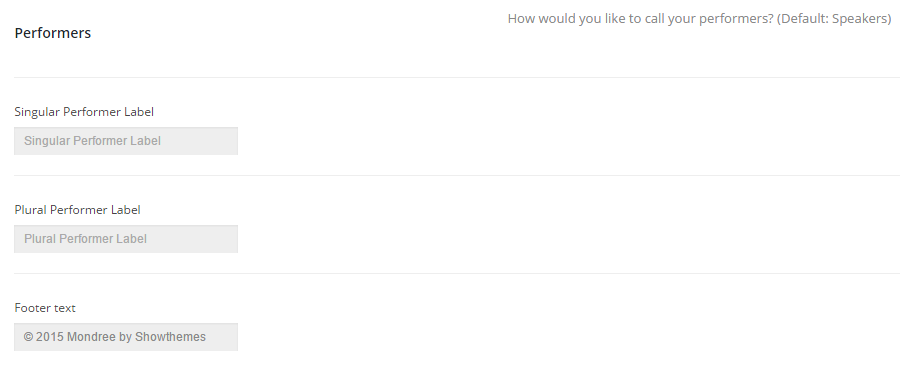
4.3 Theme Settings – Performers & Footer
The last option on the General site settings tab is labeled Performers. It allows you to choose what you want to call your speakers. The default value for this is Speakers, but you can change that if you need. Below that is a text block where you can enter the footer text for the website, change this as you require it.
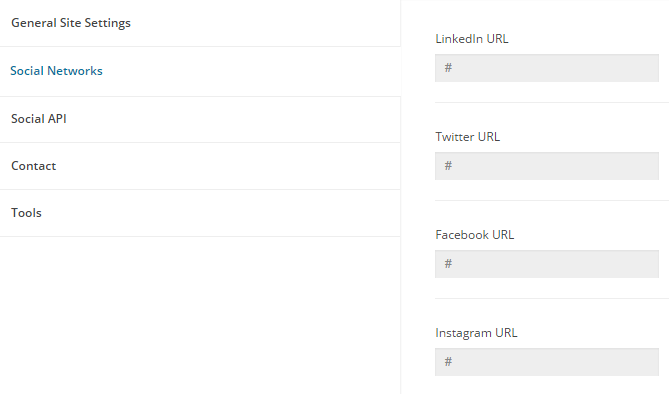
4.4 Theme Settings – Social Networks
The social networks area under theme settings allows you to enter the direct links to your social media pages and/or channels etc. There are options for 8 social media networks as well as an option to add your email address. There is also a check box that gives you the option to select whether you wish to show a feed from your RSS or not.
4.5 Theme settings Social API
This area allows you to enter the various social media credentials needed to correctly integrate your Twitter, Instagram and Facebook social media channels.
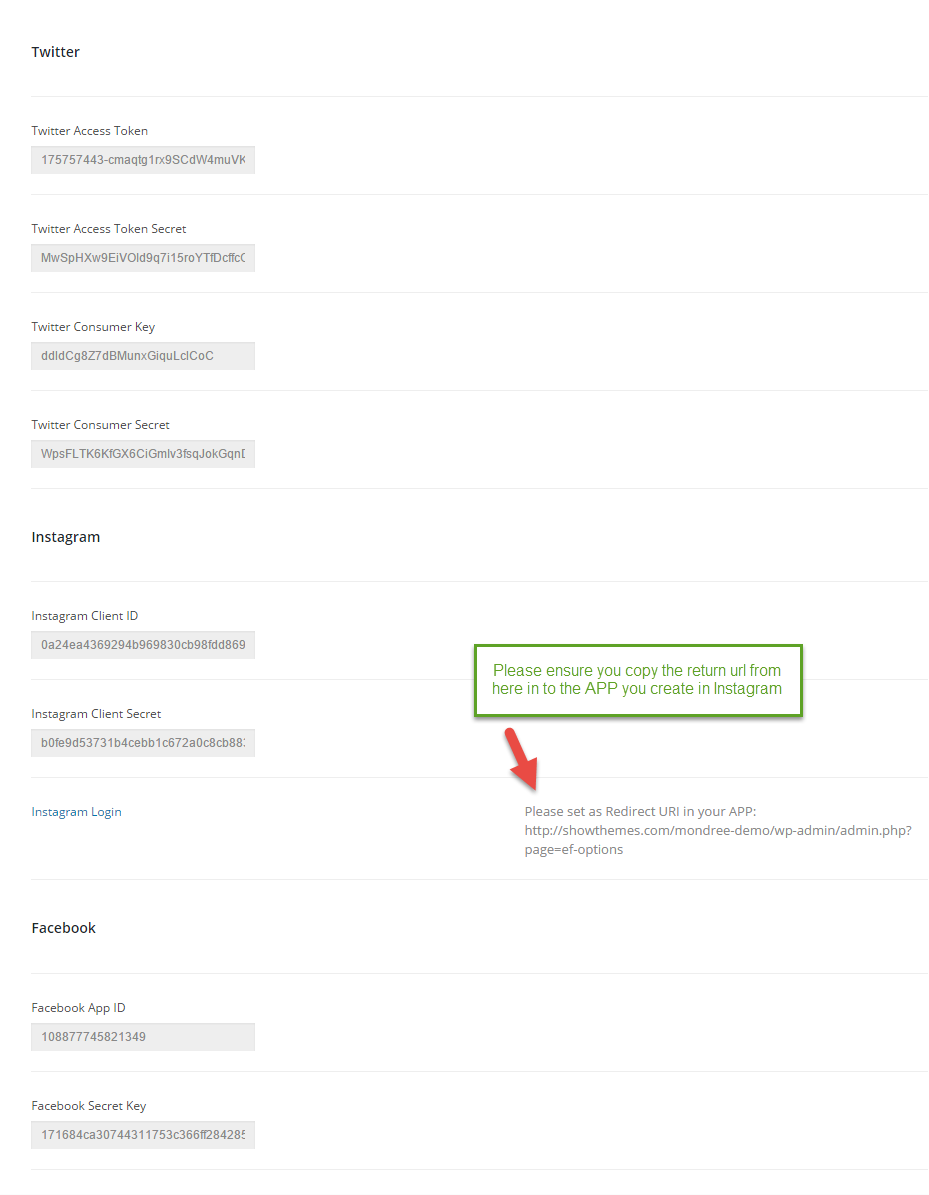
In order to get these social media channels working correctly in Mondree, you will need to create applications in those social media channels and then enter the details here.
Twitter – first we have to create a Twitter Application, go to the apps.twitter.com website.
Log in with your Twitter Account and then click on the create new app button.

Enter the following information: Name, Description and Website. Then Accept the Rules and click on the button ‘Create your Twitter application’.

The new application has been created. Click on the Keys and access tokens tab. On this tab you will see a section labelled ‘your access token’.

Click on the ‘Create my access token’ button, and an authorized access token and secret will be generated for your account and the current application. We are going to need to enter these values in the Mondree theme.

The values in the snapshots are just an example, you need your own generated values.
Instagram Visit //instagram.com/developer and login using your instagram username and password.
Once logged in, you will be asked to register as a developer. Simply enter your website address, a valid phone number where you can receive text messages, and a description of what you are building.

You will receive a security code on the number you entered. Verify this security code and you will be redirected to Register new client ID page.
Simply provide a name for your app and your website URL in both website and OAuth redirect_uri fields as shown in image below. Lastly enter the CAPTCHA code and click on register button.

On the next screen you will see your client ID and client secret keys. Now come back to your WordPress site and add those values in to the social api section on your Mondree theme options.
Facebook First we have to create a Facebook Application, start by going to https://developers.facebook.com/apps website.
Log in with your Facebook Account. Click on “Create New App’ button. Fill in the App Display Name and App Category.
Leave the App Namespace blank, Click on Create App to continue.

Now you should have been redirected to the Application page.
The fields we need, the App ID and the App Secret are already there. However, we need to move the application from development to live mode.
To do that click Settings link in the left hand menu. Enter a Valid Email in the Contact Email field and save your changes.

Now click on Status & Review link from the left hand menu.
On the next page, you will see ” Do you want to make this app and all its live features available to the general public?”, toggle the button next to it from no to YES.

Click on confirm to continue.
Click on the Dashboard link in your facebook app settings and on the app dashboard you will notice that your app is now live and publicly available.
You will also see your App Key and App Secret values which you will need to enter in Mondree.

Now come back to WordPress and to the social api section in your theme options for Mondree, you can now enter the values.
Don’t forget to click on save options once you are done!
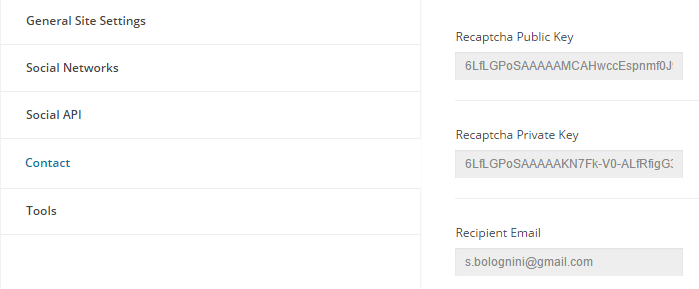
4.6 Theme settings Contact
This section controls the settings for the contact form.
Here is the information you need to provide
- 1 – Recaptcha Public Key: Enter recaptcha public key. Here is a tutorial on how to obtain recaptcha public and private keys.
- 2 – Recaptcha Private Key: Enter recaptcha private key here.
- 3 Recipient Email: enter the email address to send forms to.
4.7 Theme settings Tools
The last tab on Theme Options screen is Tools. Mondree provides a function to populate the site with dummy content.

Please read this carefully. By clicking on Import button; you will populate the whole site with dummy content. While this is great if you don’t know where to start, it is non revertible.
Therefore you will need to delete the unnecessary content generated. This can take quite some time. We suggest to populate with dummy content only if you are not sure about how WordPress works and want just to edit content and pictures. The dummy data generator only generates content such as sessions, speakers and media.
Note: Populating the site with dummy content does not exclude reading this guide as you may still need to refer to it to change the populated options.
5. Setting up the data
The homepage in Mondree is built up entirely from the features found within the page builder. If you have imported the demo data then you will already have a prepopulated page but if you did not then you will need to create this page from scratch. Before you can begin setting up the homepage to display all your data, you will need to add speakers, tickets, sponsors, sessions, points of interest, media and posts for your event. In this section we show you precisely how to do that.
5.1 Sessions
Your event can be divided into Sessions, and Mondree provides you an easy way to define them. Sessions can be assigned to ‘Tracks’, a visual way to group similar sessions according to a topic.
Your sessions may also have different locations i.e. the room or venue of a specific session. All these concepts are present in the Sessions Menu.
You can add all the Tracks and Locations at once, by clicking on Dashboard > Sessions > Tracks/Locations or you can create them as you need when creating a Session.
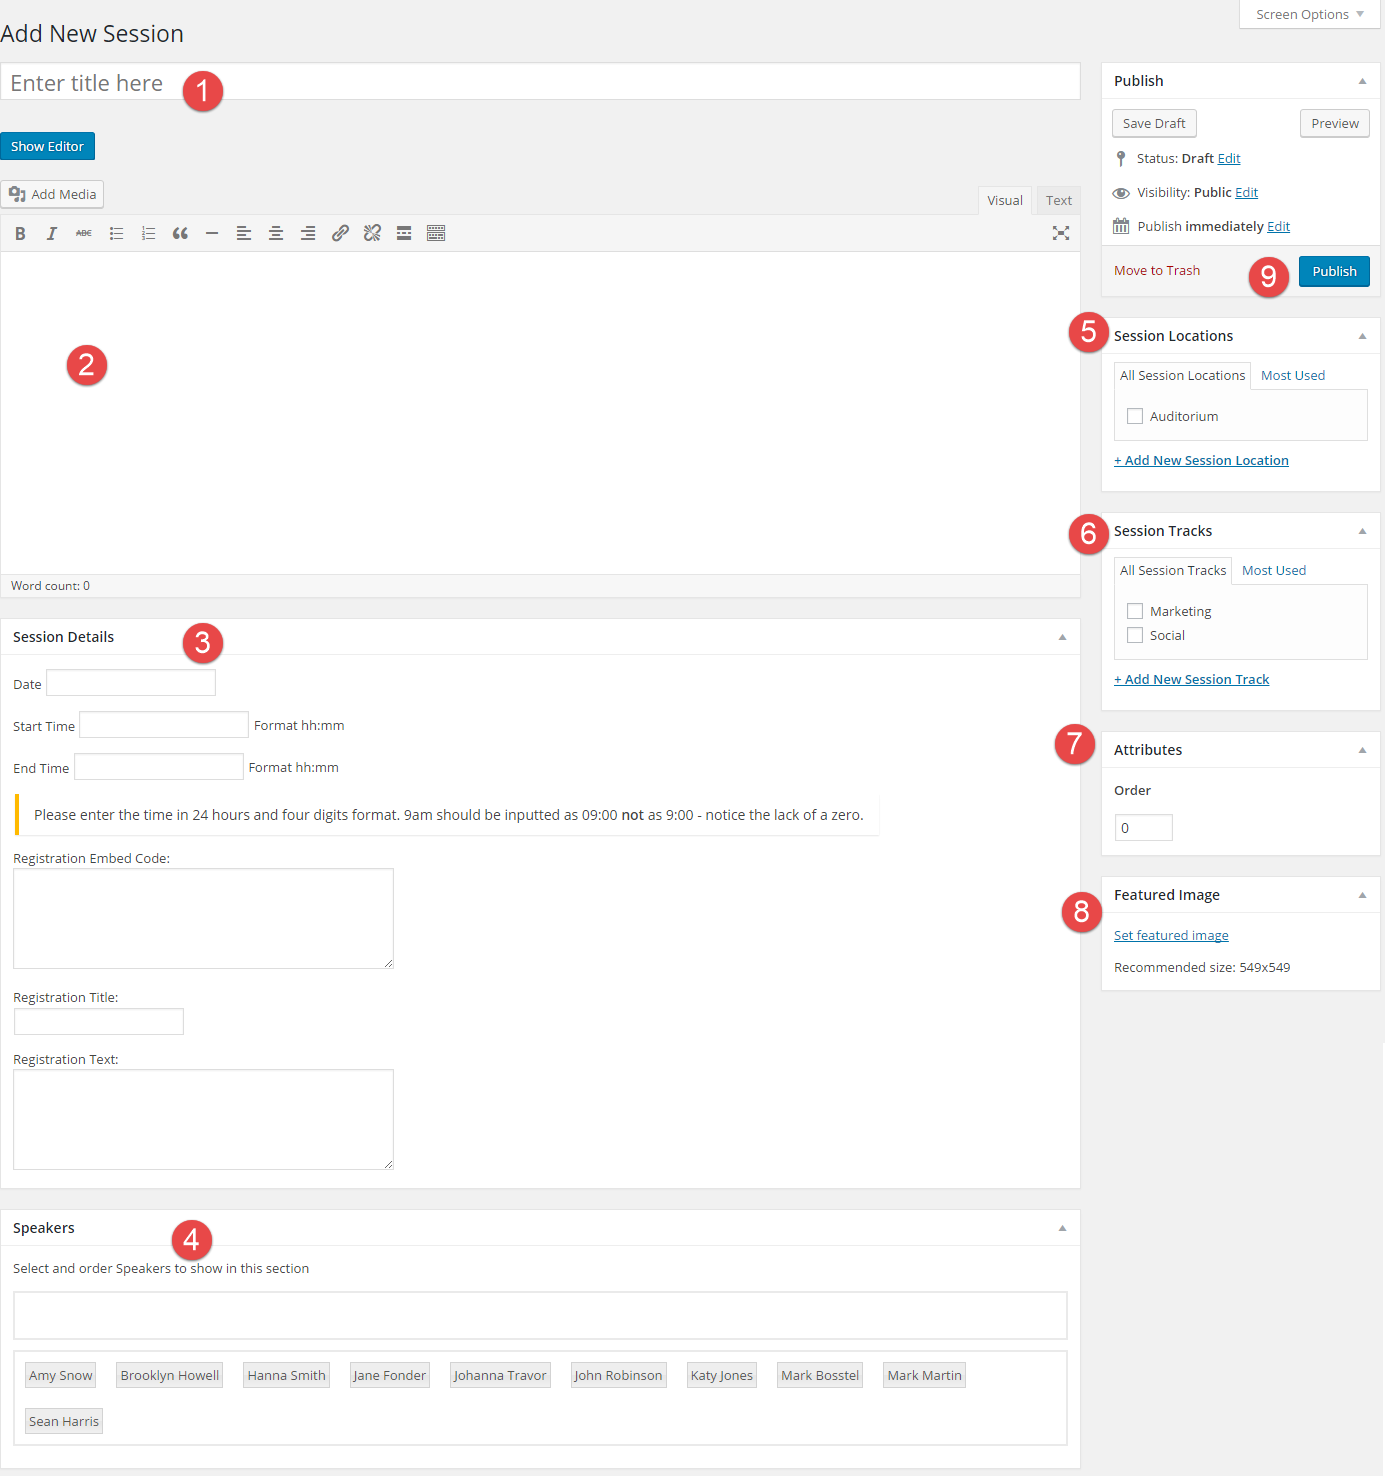
To create a Session, go to Dashboard » Sessions » Add New.

- 1 ‘“ Title: add the name of the Session.
- 2 Description: add a brief description about the Session.
- 3 Session Details: Add the date of the session and the start and end time (make sure to enter the time in 24:00 format where 9am is 09:00 instead of 9:00) . If you are using an event management service like Eventbrite or Xing or EventEspresso for registration of each session, then you can add the registration embed code here. In the registration text box, you may enter a call of action text for registration.
- 4 Speakers: select the Speaker or Speakers for this session. If you see an empty box here it means you haven’t added a Speaker yet. See how to add a Speaker in Speakers.
- 5 Session Locations: select or create a new Location. Here you can specify the room or venue of a specific session, so your attendees could quickly filter Sessions by location.
- 6 Session Tracks: select or create a new Track. Tracks identify a common topic area of different sessions. If you want your attendees to quickly skim through the schedule tracks are very useful.
- 7 – Session Order: here you need to place a number to arrange order of your sessions. For example, adding 4 here, will display this session at the 4th position on the homepage.
- 8 – Featured Image: Set a Featured Image for the session if you like.
- 9 And of course, once you are done click on ‘Publish’.
So now if you come back to Dashboard » Sessions » Sessions you will see your new Session in the list. Repeat this simple process for all the Sessions of your event.
Note: All sessions MUST have a date assigned to them. Not inputting a date may result in the schedule not being visible.
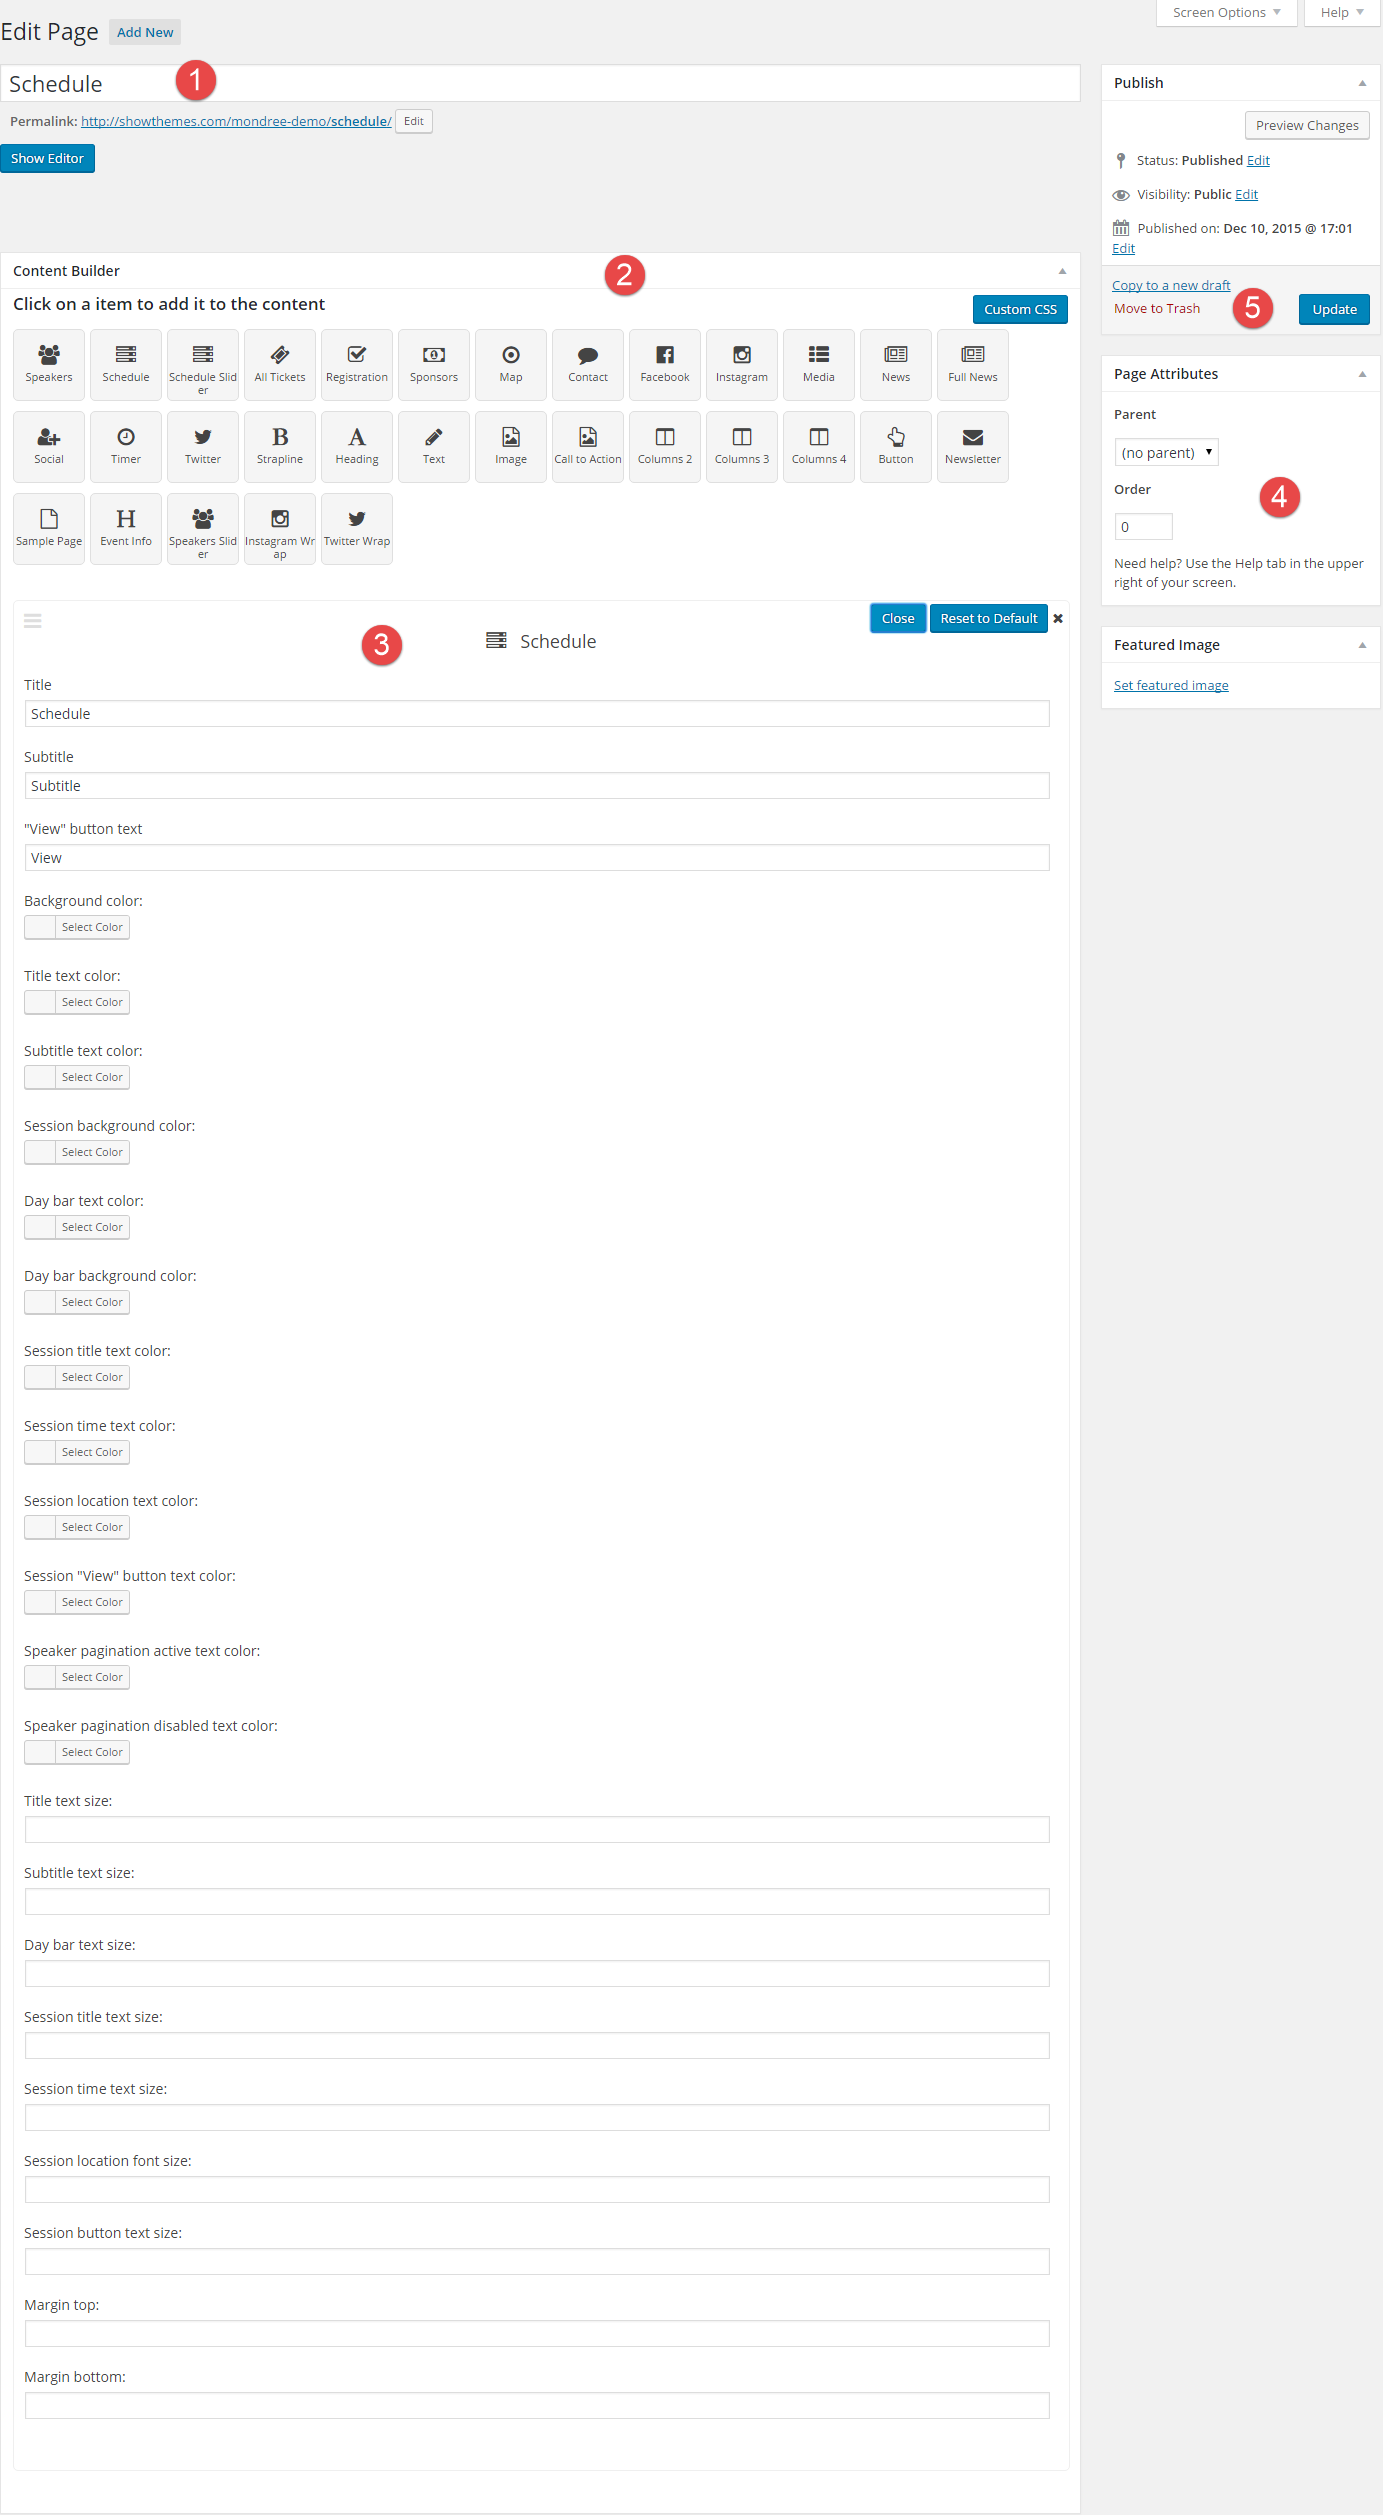
5.1.1 Setting up a full schedule page
Mondree has a fresh new look for the dedicated schedule page and setting up your full schedule page couldn’t be simpler.
Navigate to Page -> Add New.
- 1 – Title – Provide a title for your full page schedule.
- 2 Content Builder select schedule, you will then be able to edit the element and begin customising it for your needs..
- 3 The schedule settings will then display and allow you to set the title and subtitle as well as colours and text sizes, margins etc or leave blank for default settings.
- 4 Page attributes leave these as they are unless you want the schedule page to be a child page of another item.
- 5 Lastly, save publish or update your page
 Back to top
5.2 Speakers
Creating Speakers is very easy. Head to Dashboard » Speakers » Add New.
Here you will have to provide some information about the Speaker:
- 1 Title: enter the name of the Speaker.
- 2 Description: add a catchy description about the Speaker.
- 3 Speaker Details: You can check the box next to the keynote to mark a speaker for the keynote speaker of the event. You can also provide a title for the speakers page such as “my sessions”. You then have the options to enter the social network urls for the speaker, as well as an email address. Finally, you can add an excerpt or short description to the speaker details.
- 4 Featured Image: This is where you set the Featured Image that will be displayed whenever a Speaker is shown on the website. Note the image has a recommended size of 531px x 424px in order to display correctly.
- 5 ‘“ And of course, click on ‘Publish’.

5.2.1 Setting up an All Speakers Page
Mondree offers a fresh new look for a dedicated page to display all your speakers. This page helps you to arrange the speakers in 3 different tiers, so if you want to highlight keynotes or give more prominence to other speaker groups you can do that easily.
- 1 – Title – Provide a title for your full page schedule.
- 2 Content Builder select speakers, you will then be able to edit the element and begin customising it for your needs..
- 3 The speakers will then display and you will need to drag and drop the speakers you wish to appear on the page from the top section to the bottom.
- 4 This area allows you to set the title and subtitle as well as colours and text sizes, margins etc or leave blank for default settings.
- 5 Page attributes leave these as they are.
- 6 Lastly, save publish or update your page

5.3 Points of interest
To add a Point of Interest for your event just go to Dashboard » Points of Interest » Add New.

Here you will have to provide some information:
- 1 Title: the name of the new Point of Interest.
- 2 Description: add a description for the Point of Interest.
- 3 POI Address Info: provide here the street, city, zip code and country of the Point of Interest. By ticking the check box for manual cooordinates, you can also enter the lattitude and longitude of the location in the relevant fields below to specify an exact location.
- 4 ‘“ And of course, click on ‘Publish’.

5.3.1 Setting up a points of interest page ‘Map’
Mondree offers a dedicated page to display all of your points of interest. This page displays a map with your points of interest conveniently located as markers which when clicked, display the information you entered for that point of interest. To set up your points of interest page, navigate to Page -> Add New
- 1 – Title – Provide a title for your points of interest page
- 2 Content Builder select map, you will then be able to edit the element and begin customising it for your needs.
- 3 The points of interest will initially not display unless you search for specific items and then you will need to drag and drop the points of interest you wish to appear on the page from the top section to the bottom. Alternatively you can click on the “Add all” button to add all points of interest to the bottom area.
- 4 Groups You can create groups by clicking the button for ‘Add a new group’ this will create a new group and you can then drag and drop points of interest in to that group. Don’t forget to give your group a name.
- 5 This area allows you to set preferences for map zoom, colours, font sizes and margins.
- 6 – Here you can set a featured image for the page
- 7 Page attributes leave these as they are
- 8 Lastly, save publish or update your page

5.4 Sponsors
To add a new Sponsor, go to Dashboard » Sponsors » Add New.

Here you will have to provide some information about the Sponsor of your event:
- 1 Title: the name of the Sponsor.
- 2 Description: add a brief description about the Sponsor.
Note: This description needs to be short to be visible on mobile devices. - 3 Sponsor Details: you can add here a link to the Sponsor. Please note: Ensure that any Browser extensions blocking ads (such as Adblocks) are switched off. These extension block the word ‘Sponsor’ and the browser will read as spam/ad.
- 4 Featured Image: this is where you set the Featured Image that will be displayed whenever a Sponsor is shown on the website. Recommended sizes are: Small: 213×143, Medium: 426×285, Large: 853×570
- 5 ‘“ And of course, click on ‘Publish’ or ‘Update’

5.4.1 Setting up a sponsors page
Mondree offers a dedicated page to display all of your sponsors with many different options for customisation. This page displays a grid of images for your sponsors which when clicked, spins around in an animated fashion to display your sponsor details. To set up your Sponsors page, navigate to Page -> Add New
- 1 – Title – Provide a title for your sponsors page.
- 2 Content Builder select sponsors, you will then be able to edit the element and begin customising it for your needs.
- 3 The sponsors will area will then display and you can search for sponsors and then drag and drop the sponsors you wish to appear on the page from the top section to the bottom. Alternatively you can click on the “Add all” button to add all sponsors to the bottom area, where you can then re-order or delete as necessary.
- 4 This area allows you to set the title and description, decide whether you wish to show the sponsors in large, medium or small size. You have a variety of options for customising colours and text sizes, margins etc or leave blank for default settings.
- 5 By repeating from step 2 you can then add more sponsor types to the page. For example, if you chose to select large sponsors the first time, you can now make the next set of sponsors medium and customise the options for the display of those. Repeat again for small.
- 6 Set a featured image for the page if you like
- 7 Page attributes leave these as they are
- 8 Lastly, save publish or update your page

5.5 Tickets
Mondree comes complete with a ticket option that allows you to display tickets in three different types, featured, sold out or on sale. These tickets can then link to other pages on your site or to external links.

To add a new ticket, go to Dashboard >> Tickets >> Add new
Here you will have to provide some information about your ticket:
- 1 Title: the title of the ticket.
- 2 Description: add a description about the ticket.. Note: This description needs to be short to be visible on mobile devices.
- 3 Ticket Details: Here you can add the price, the button text, the button link and choose the status Featured, On Sale or Sold Out
- 4 Excerpt: Here you can an optional short summary about your ticket
- 5 Attributes: Here you can set the order that the tickets will be displayed in. The order works numerically from 1, 2, 3, 4 etc
- 6 ‘“ And of course, click on ‘Publish’ or ‘Update’ Repeat this process for all the tickets you are selling on your website.

5.5.1 Setting up the ticket page
Mondree can display your tickets in an individual page, giving visitors to your website a great way to purchase the tickets you are selling. To set up your Ticket page, navigate to Page -> Add New
- 1 – Title – Provide a title for your ticket page.
- 2 Content Builder select tickets, you will then be able to edit the element and begin customising it for your needs.
- 3 The tickets will then display and you can search for tickets and then drag and drop the tickets you wish to appear on the page from the top section to the bottom. Alternatively you can click on the “Add all” button and all the tickets will be added to the bottom section, you can rearrange the tickets here to change the order they are displayed on the page or delete as necessary.
- 4 This area allows you to set the title and subtitle as well as colours and text sizes, margins etc or leave blank for default settings.
- 5 Featured Image Here you can set the featured image for the page if you like
- 6 Page attributes leave these as they are unless you wish the tickets page to be a child page of another
- 7 Lastly, save publish or update your page

5.6 Posts Setting up the blog
You are going to use Posts to let people know about the latest news of your event. The posts will display as square blocks on your page and when clicked will open up the relevant post details.

All of the styling for this can be customised to your liking when you set up the news page but first we will need to configure a few things:
- 1 Head to Settings->Permalinks. In ‘Common Settings’ select ‘Post Name’ and click on ‘Save Changes’.
- 2 Head to Posts-> Categories. Here Change the name of the default ‘Uncategorized’ category by clicking on ‘Edit’. Rename it to Blog or News or whatever name you prefer to call your Blog page and click ‘Update’.
So now, wherever you want it to link to all your posts, you can link to all your posts like this: http://yourdomain.com/category/blog
That’s all, now go to Dashboard > Posts. You may see a sample post called ‘Hello world!. Place your mouse over and and some options will appear, click on Trash. We will delete this post to have our list of posts blank.

To create a new Post go to Dashboard » Posts » Add New.
Here is the information you have to provide:
- 1 Title: enter a title for your new Post.
- 2 Description: enter the content of your Post. You can include some media if you want.
- 3 Featured Image: click on ‘Set featured image’ to provide a picture to be displayed for this Post.
- 4 Tags: enter some tags for the post. If no tags have been provided yet, enter some separated by commas and click on ‘Add’. If they have, you can choose them from the Most Used Tags. Either way, Tags will appear below.
- 5 Categories: always select the default category ‘Blog’, so all your posts can be listed by the ‘Blog’ category. But you may create more categories if you want. Click on Add New Category and a field will appear to enter your category and then click on the ‘Add New Category’ button. Your new category will appear above checked.
- 6 ‘“ And of course, click on ‘Publish’.

5.6.1 Setting up a blog page
Mondree can display your posts in an individual page, giving you control over the styling and customization for how this is displayed.
To set up your blog page, navigate to Page -> Add New
- 1 – Title – Provide a title for your blog page.
- 2 Content Builder select Full News, you will then be able to edit the element and begin customising it for your needs.
- 3 Full News options – You will be able to set the title and subtitle as well as colours and text sizes, margins etc or leave blank for default settings.
- 4 Featured Image – Set a featured image for the News page if you like.
- 5 Page attributes leave these as they are unless you wish the news page to be a child of another page.
- 6 Lastly, save publish or update your page

6 Content Builder Creating page layouts
Mondree has been developed with a custom content builder to enable you to easily create page layouts using the powerful features of the theme such as speakers, schedules, tickets etc
The content builder is available for use on pages. To use the content builder, you must first create a new page by navigating to Page -> Add New
The content builder gives you easy access to the customizable options available for each specific element.

When you click on any of the content builder elements, they are instantly added below the content builder icons and become part of the page.
To edit the section, you click on the blue ‘edit’ button to the left hand side of the new element to begin editing. Please note: clicking on the ‘reset to default’ button next to the ‘edit’ button will reset the contents of that element to default and you will lose any customisations you have made. You can add as many elements to the page as you like, giving you great flexibility in the way you can create your website.
6.1 Content Builder Speakers
The Speakers element allows you to display speakers on your page. This will only work if you have setup speakers in accordance with the instructions in section 5.2 Speakers
- 1 Content Builder select speakers, you will then be able to edit the element and begin customising it for your needs.
- 2 The speakers area will then display and you will be able to search for speakers and then drag and drop the speakers you wish to appear on the page from the top section to the bottom.< Alternatively you can click on the “Add all” button to add all the speakers to the bottom area, where you can then rearrange and/or delete as necessary.
- 3 This area allows you to set the title and subtitle, view profile text, choose whether or not to show pagination, as well as many other options for colours and text sizes, margins etc or leave blank for default settings.

6.2 Content Builder – Schedule
The schedule element allows you to display an element containing your schedule, showing information of the session date and times, speaker’s pictures and more.

Please note that in order for your schedule element to work correctly, it is important that you have setup sessions and speakers in accordance with the instructions in 5.1 and 5.2
- 1 Content Builder select schedule, you will then be able to edit the element and begin customising it for your needs.
- 2 The schedule element will then display and you will need to set the title and subtitle as well as colours and text sizes, margins etc or leave blank for default settings.

6.3 Content Builder Schedule Slider
The schedule element allows you to display a carousel type slider element containing your schedule, showing information of the session date and times, with a link to the full schedule.

- 1 Content Builder select the Schedule Slider element, you will then be able to edit the element and begin customising it for your needs.
- 2 The Schedule Slider element will then display and initially you will see a search box and buttons for ‘Add all’ and ‘Remove all’. You can search for Schedules you have created, the search results will appear in the first grey box. You can then drag those Schedules and drop them in to the second grey box and repeat this process if necessary. By clicking on the ‘Add all’ button you will add all available tickets to the second grey box. Once they are here, you can then rearrange them by dragging and dropping to determine the order they will display on your page. If you wish to remove tickets, you must click on the black cross to the right hand side of the ticket as it appears in the grey box. You can click on the ‘Remove all’ button and then start the above process again.
- 3 You can then set options for “full schedule” button text, customize colours, font sizes and margins.

6.4 Content Builder All Tickets
The All Tickets element allows you to display one or more tickets on your website. In order for this to display your tickets, you must have already setup tickets in accordance with the instructions in section 5.5
- 1 Content Builder select All Tickets element, you will then be able to edit the element and begin customising it for your needs.
- 2 The All Tickets element will then display and initially you will see a search box and buttons for ‘Add all’ and ‘Remove all’ You can search for tickets you have created, the search results will appear in the first grey box. You can then drag those tickets and drop them in to the second grey box and repeat this process if necessary. By clicking on the ‘Add all’ button you will add all available tickets to the second grey box. Once they are here, you can then rearrange them by dragging and dropping to determine the order they will display on your page. If you wish to remove tickets, you must click on the black cross to the right hand side of the ticket as it appears in the grey box. You can click on the ‘Remove all’ button and then start the above process again.
- 3 You can then set options for title, subtitle and customize colours, font sizes and margins.

6.5 Content Builder – Registration
The registration element allows you to display the available ticket information embedded from Eventbrite, woocommerce or event espresso as shown here – http://www.showthemes.com/mondree-demo/registration/
In order to use the registration element, you will need an embed code for the relevant service. Details on how to obtain an embed code can be found in 8 Registration Services
- Content Builder select Registration element, you will then be able to edit the element and begin customising it for your needs.

- The registration element will then display and you will need to set the title and as well as enter your main text.
- Paste in your embed code for the registration
- Customise colours, text sizes and margins or leave blank for default settings.
6.6 Content Builder Sponsors
The Sponsors element allows you to display one or more sponsors on your website.
In order for this to display your sponsors, you must have already setup sponsors in accordance with the instructions in 5.4 Sponsors
- 1 Content Builder select Sponsors element, you will then be able to edit the element and begin customising it for your needs.
- 2 The Sponsors element will then display and initially you will see a search box and buttons for ‘Add all’ and ‘Remove all’

- 3 You can search for sponsors you have created, the search results will appear in the first grey box. You can then drag those sponsors and drop them in to the second grey box and repeat this process if necessary.
- 4 By clicking on the ‘Add all’ button you will add all available sponsors to the second grey box. Once they are here, you can then rearrange them by dragging and dropping to determine the order they will display on your page.
- 5 If you wish to remove sponsors, you must click on black cross to the right hand side of the sponsor as it appears in the grey box. You can click on the ‘Remove all’ button and then start the above process again from 3.
- 6 This area allows you to set the title and description, decide whether you wish to show the sponsors in large, medium or small size. You have a variety of options for customising colours and text sizes, margins etc or leave blank for default settings.
- 7 By repeating from step 1 you can then add more sponsor types to the page. For example, if you chose to select large sponsors the first time, you can now make the next set of sponsors medium and customise the options for the display of those. Repeat again for small.
- 8 – You can then fill in the rest of the data such as Title, sponsor type, link text, colour customisations, font sizes and margins.

6.7 Content Builder – Map
The map element allows you to display a map on your page that displays your points of interest. These points of interest can be conveniently grouped together to give you greater control of the display. In order to use this element, you will need to ensure that you have some points of interest added as per the instructions in 5.3 Points of interest
- 1 Content Builder select map, you will then be able to edit the element and begin customising it for your needs.
- 2 The Map element will then display and initially you will see a search box and buttons for ‘Add all’ and ‘Remove all’
- 3 You can search for points of interest you have created, the search results will appear in the first grey box. You can then drag those points of interest and drop them in to the second grey box and repeat this process if necessary.
- 4 By clicking on the ‘Add all’ button you will add all available points of interest to the second grey box. Once they are here, you can then rearrange them by dragging and dropping to determine the order they will display on your page.
- 5 If you wish to remove points of interest, you must click on black cross to the right hand side of the point of interest as it appears in the grey box. You can click on the ‘Remove all’ button and then start the above process again from 3.
- 6 Groups You can create groups by clicking the button for ‘Add a new group’ this will create a new group and you can then drag and drop points of interest in to that group. Don’t forget to give your group a name.
- 7 This area allows you to set preferences for map zoom, colours, font sizes and margins

6.8 Content Builder Contact
The contact element allows you to display a contact form on your page so that people can get in touch with you. The contact element relies on the information you have provided in the theme settings as per the instructions in 4.18 Homepage Settings – Contact
- 1 Content Builder select contact, you will then be able to edit the element and begin customising it for your needs.
- 2 The contact element will then display and initially you will options to set the title, subtitle, ‘send message’ text as well as customisation options for colours, text size and margins.

6.9 Content Builder – Instagram
The Instagram element allows you to display your Instagram photos directly on a page. In order for this content builder element to work correctly you must have entered in the Instagram App details as described in the instructions in 4.17 Homepage Settings – Social API
- 1 Content Builder select Instagram you will then be able to edit the element and begin customising it for your needs.
- 2 You can now enter the information for title, subtitle, tags, picture count, colour customisations, text sizes and margins.

6.10 Content Builder – Media
The media element allows you to add pictures or videos to your pages and set customisation options for their appearance.
- 1 Content Builder select Media you will then be able to edit the element and begin customising it for your needs.
- 2 The first thing you will see is a button labelled ‘Add pictures (press Ctlr or Cmd to select multiple pictures)’ clicking this button will open the WordPress media library and allow you to add pictures. Once pictures are added they appear in the grey box beneath the buttons. You can then re-arrange the pictures in to the order of your choice by dragging and dropping them. If you wish to remove a picture, click the black cross to the top right hand side of the picture.
- 3 You will also be able to add a video from YouTube or Vimeo by pasting the url in to the box next to the ‘Add Video’ button and then clicking the button. Once the button is clicked, the video is added to the grey box below and will appear next to any pictures you have added. You can re=arrange the order by dragging and dropping.
- 4 Here you can set title, subtitle, colour customisations, text size and margin size.

6.11 Content Builder News
The news element allows you to display posts from your blog on your page.
- 1 Content Builder select News element, you will then be able to edit the element and begin customising it for your needs.
- 2 The News element will then display and initially you will see a search box and buttons for ‘Add all’ and ‘Remove all’
- 3 You can search for posts you have created, the search results will appear in the first grey box. You can then drag those posts and drop them in to the second grey box and repeat this process if necessary.
- 4 By clicking on the ‘Add all’ button you will add all available posts to the second grey box. Once they are here, you can then rearrange them by dragging and dropping to determine the order they will display on your page.
- 5 If you wish to remove posts, you must click on black cross to the top right hand side of the post as it appears in the grey box. You can click on the ‘Remove all’ button and then start the above process again from 3.
- 6 This area allows you to set the title and subtitle as well as colours and text sizes, margins etc or leave blank for default settings.

6.12 Content Builder Full News
The Full News element allows you to create a full blog page displaying all posts on your website.
- 1 Content Builder select Full News element and you will then be able to edit the element and begin customising it for your needs.
- 2 You can then set the title and subtitle as well as set colour customisation options, text size and margins.

6.13 Content Builder Social
The social element allows you to display Icons and links to your social media accounts, as defined in the theme settings. In order for this element to display correctly, you must have already entered social media links in to your theme settings as described in the instructions in 4.4 Theme Settings – Social Networks
- 1 Content Builder select Social you will then be able to edit the element and begin customising it for your needs.
- 2 Your available social media accounts will be shown in the top grey box, simply drag and drop the accounts you want to display on your page to the second grey box below.
- 3 You can set colour customisation options, icon size and margins.

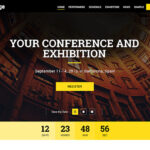
6.14 Content Builder Timer
The Timer element allows you to display a timer that will countdown to a time and date you specify.
- 1 Content Builder select Timer you will then be able to edit the element and begin customising it for your needs.
- 2 You can set the title and text of the timer and choose the date and time by clicking in the fields, a calander will popup and you can choose your date and time. Addtionally you can choose colour customisations, text size and margins for the element.

6.15 Content Builder Twitter
The Twitter element allows you to show tweets on your pages and refine the results further by hashtag keywords and tweet counts. In order for this element to display, you must have already entered your twitter API details in to the theme options as detailed in the instructions in 4.5 Theme Settings – Social API
- 1 Content Builder select Twitter you will then be able to edit the element and begin customising it for your needs.
- 2 Enter your title, subtitle, event hashtag keyword (leave out the #) and how many tweets you would like to display. Other options are available for colour customisation, icon and text size and margins

6.16 Content Builder Strapline
The Strapline element displays a strapline of text, which is similar to a headline but not as large..
- 1 Content Builder select Strapline you will then be able to edit the element and begin customising it for your needs.
- 2 Enter your text, text alignment, text colour, text size and margins

6.17 Content Builder Heading
The Heading element works by displaying a heading in either small or large size.
- 1 Content Builder select Header you will then be able to edit the element and begin customising it for your needs.
- 2 Select the size of your heading, enter your title, subtitle, text alignment, text colour and margins

6.18 Content Builder Text
The Text element allows you to add text and images to your page.
- 1 Content Builder select Text you will then be able to edit the element and begin customising it for your needs.
- 2 You can add text and images in much the same way as the standard wordpress text editor. You will also find options below for setting the text alignment, line spacing, text colour and margins.

6.19 Content Builder – Image
The Image element will allow you to add an image to your page.
- 1 Content Builder select Image you will then be able to edit the element and begin customising it for your needs.
- 2 Picture you can add a picture by clicking the add button and selecting the image from your media library. If you click on remove button then the image will be removed.
- 3 You can add alt text (a brief description of the image) and specify the exact image width and height if you wish. You can also set the alignment for the image and any margins you may like.

6.20 Content Builder – Call to action
The Call to action element will allow you to add a professional looking call to action to your page which can include a background image.
- 1 Content Builder select Call to action you will then be able to edit the element and begin customising it for your needs.
- 2 Enter a title and a subtitle text, you can add a picture by clicking the add button and selecting the image from your media library. If you click on remove button then the image will be removed.
- 3 You can specify a section url that the call to action will link to, so if you are using a one page layout and wish to link to the speakers area then you would use #speakers as your url
- 4 You can also specify arrow and margin sizes

6.21 Content Builder Columns 2
The Columns 2 element allows you to display content on your page in two columns.
- 1 Content Builder select Columns 2 you will then be able to edit the element and begin customising it for your needs.
- 2 – Content 1 Here you can add your text and/or pictures that will appear in the left side column
- 3 Content 2 Here you can add your text and/or pictures that will appear in the right side column
- 4 – You then have options for text alignment, colour customisations, text size and margins

6.22 Content Builder Columns 3
The Columns 3 element allows you to display content on your page in three columns.
- 1 Content Builder select Columns 3 you will then be able to edit the element and begin customising it for your needs.
- 2 – Content 1 Here you can add your text and/or pictures that will appear in the left side column
- 3 Content 2 Here you can add your text and/or pictures that will appear in the middle column
- 4 Content 3 Here you can add your text and/or pictures that will appear in the right side column
- 5 – You then have options for text alignment, colour customisations, text size and margins

6.23 Content Builder ‘“Columns 4
The Columns 4 element allows you to display content on your page in four columns.
- 1 Content Builder select Columns 4 you will then be able to edit the element and begin customising it for your needs.
- 2 – Content 1 Here you can add your text and/or pictures that will appear in the first column
- 3 Content 2 Here you can add your text and/or pictures that will appear in the second column
- 4 Content 3 Here you can add your text and/or pictures that will appear in the third column
- 5 Content 4 Here you can add your text and/or pictures that will appear in the fourth column
- 6 – You then have options for text alignment, colour customisations, text size and margins

6.24 Content Builder Button
The Button element allows you to place a highly customisable button on your page.
- 1 Content Builder select Button you will then be able to edit the element and begin customising it for your needs.
- 2 Text for the button, url link for the button, text alignment, width and height options, colour customisation options, text size and margins

6.25 Content Builder Newsletter
The Newsletter element allows you to add a newsletter signup to your page and link it to a mailchimp form to collect the data.
- 1 Content Builder select Newsletter you will then be able to edit the element and begin customising it for your needs.
- 2 Enter the details for the title, subtitle, textbook text, button text and mailchimp url You can then set colour customisations, text sizes and margins

6.26 Content Builder Sample Page
The content builder comes complete with a sample page that allows you to easily create a page type layout with header hero image, title, subtitle and content. It is a great way to quickly and easily add page content to any page.
- 1 Content Builder select Sample Page you will then be able to edit the element and begin customising it for your needs.
- 2 Add hero image, title, subtitle and content for your page.
- 3 Customisation options for colours, text size and margins

6.27 Content Builder Event Info
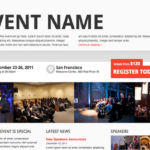
New for the Mondree theme is the Event Info element, a fantastic content builder component that allows you to display the information for your event in a highly professional and fully customisable way.
- 1 Content Builder select Event Info you will then be able to edit the element and begin customising it for your needs.
- 2 Add title, subtitle, register button and url, location text and date.
- 3 You can set a video image and video url, as well as being able to set seperate bacground images for desktop, tablet and mobile devices.
- 4 Customisation options for colours, text size and margins give you many options to display your event just the way you want it.

6.28 Content Builder Speakers Slider
The Speakers Slider allows you to display a selection of speakers in an attractive layout with a multitude of customisation options.
- 1 Content Builder select Speakers Slider element, you will then be able to edit the element and begin customising it for your needs.
- 2 The Speakers Slider element will then display and initially you will see a search box and buttons for ‘Add all’ and ‘Remove all’
- 3 You can search for Speakers you have created, the search results will appear in the first grey box. You can then drag those Speakers and drop them in to the second grey box and repeat this process if necessary.
- 4 By clicking on the ‘Add all’ button you will add all available Speakers to the second grey box. Once they are here, you can then rearrange them by dragging and dropping to determine the order they will display on your page.
- 5 If you wish to remove Speakers, you must click on the black cross to the right hand side of the Speaker as it appears in the grey box. You can click on the ‘Remove all’ button and then start the above process again from 3.
- 6 The next area allows you to set the Biography title and the text for the all speakers button, as well as a variety of options for customising colours and text sizes, margins etc or leave blank for default settings.

6.29 Content Builder Instagram Wrap
The Instagram Wrap element allows you to display your instagram pictures in an attractive layout on any page of your website.
- 1 Content Builder select Instagram Wrap, you will then be able to edit the element and begin customising it for your needs.
- 2 Add text, choose any hashtag you might have, select the number of pictures you would like to display.
- 3 There are also customisation options for colours, text size and margins

6.30 Content Builder Twitter Wrap
The Twitter Wrap element allows you to display your latest tweets in an attractive layout on any page of your website.
- 1 Content Builder select Twitter Wrap and you will then be able to edit the element and begin customising it for your needs.
- 2 Add text, choose any hashtag you might have (remember to leave out the #), select the number of tweets you would like to display.
- 3 There are also customisation options for colours, text size and margins

7 Editing the style and the CSS
You may make some changes in the theme styles. The stylesheets are located in the /wp-content/themes/mondree/css/schemes/ folder of your wordpress installation. You will need to select the CSS of your chosen palette. Also some of the styles can be found on /wp-content/themes/mondree/css/layout.css Back to top
8 Registration Services
This section will give you some information on setting up the registration services and integrating them with your Mondree theme. Learn how to setup tickets in Eventbrite, EventEspresso, Woocommerce, Xing Events and Ticket Tailor. Back to top
8.1 Eventbrite
You can obtain the embed code from Eventbrite by creating an event and tickets at www.eventbrite.com. If you don’t have an account, click on ‘Sign Up’.

You will be redirected to this ‘Create an Event’ page. This page has three sections: Event Details, Create Tickets and Additional settings. In the first section, fill in the required fields: Event Title, and Date & Time. Fill in optional fields if you want.

You create the tickets in the second section, choose a type to start, for example a Paid ticket.

Fill in the name of the ticket, the quantity and the price. Select an option about the fees: absorb, pass on to the buyer or customize them. If you need another Paid ticket, click on Paid again.

The third section is about the promotion and additional settings of our event. Select Public Page and enter a category and sub-category for your event if you like. Lastly, click on Make Event Live button at the bottom.

Once your event is live you will be redirected to the event dashboard. There you need to click on the manage and click on the widgets in the right hand sidebar as shown in the screenshot below.

On the next screen choose Ticket form:

Finally, select and copy the ticket form embed code and paste it in the content builder registration element on your page as outlined in 6.4 Content Builder – Registration.
Complete the configuration of your event in Eventbrite, click on the link ‘Select Payment Options’. By default the Credit Card Processing option is selected. If you need more help visit the Eventbrite Help Center.
8.2 Event Espresso
Mondree works great with EventEspresso. EventEspresso is a WordPress plugin which allows you to handle event registration and ticketing on your own site.
To use EventEspresso with Mondree you will need to purchase it from EventEspresso.com. Please note that Mondree only supports version 4.0 Beta and above. Also note that the above integration will only include the display of the ticket selector shortcode.
More advanced integration will require custom development. Once you have purchased and downloaded EventEspresso, you will need to install and activate it. Here is quick guide on how to install and activate EventEspresso.
After installing Event Espresso, the first thing you need to do is to choose a payment method. EventEspresso comes with Invoice, Authorize.net AIM, Bank Draft, Check, PayPal Pro, and PayPal Standard payment methods.
To choose a payment method go to Dashboard and then click on Event Espresso > Settings > Payment Methods. Activate the payment method you want to use, and then provide the details required to use that payment method.

Once you have configured a payment method, the next step is to create your event in the EventEspresso. Go to the Dashboard and then click on EventEspresso > Events.
Click on the Add New Event button to create your event.

Provide your event title, and add the description. Make sure that the event title and description and similar to your event details in Mondree.

After that scroll down to Event Tickets & Datetime section. There you need to select your event date and time and then enter ticket information. You can create different types of tickets here by clicking on create ticket button.

Once you are satisfied with the event, you can hit the publish button to make it live. EventEspresso will publish your event. On the Event page you will now see shortcode button below the Event Title.

Click on the shortcode button, this will bring up a popup containing a shortcode. This shortcode will look something like this: [ESPRESSO_TICKET_SELECTOR event_id=’316′] .
Copy this shortcode, as you will need it in the next step. To display the ticket registration on your page, enter your shortcut code in the content builder registration element on your page as outlined in 6.4 Content Builder – Registration.
8.3 – Woocommerce
This tutorial is to set up Woocommerce with Mondree. Woocommerce is a powerful plugin to turn your site into an eCommerce platform.
While Woocommerce is not a platform to sell event tickets, we have tweaked it to make it’s product selector a ticket selector.
Bear in mind that if you use Woocommerce as your ticketing option in one of our themes, you won’t get specific event functionality. ‘Products’ will become ‘Tickets’ and everything will be geared towards selling tickets, not products. The add to basket functionality will be dedicated only to selling tickets and selling other products than tickets may be compromised.
Once you set up Woocommerce, you can go ahead and create your ‘Products’. These will be effectively your tickets. To do this, go to Dashboard >> Products >> Add Product
- 1 – Give your ticket a title
- 2 Add the price for your ticket, if you wish to offer a sale price then enter it in sale price field.
- 3 Add a short description about the ticket
- 4 Add an image for your ticket if you like
- 5 Update to save the ticket

Repeat this same process for as many tickets as you like. You can view all the tickets you have created by going to Dashboard >> Products

To display the ticket registration on your page, enter the shortcut
All Themes Subscription
From: $159.00 / year
Select options
This product has multiple variants. The options may be chosen on the product page
Conference Pro Subscription
From: $89.00 / year
Select options
This product has multiple variants. The options may be chosen on the product page
Event Manager Subscription
From: $39.00 / year
Select options
This product has multiple variants. The options may be chosen on the product page
Fudge 2.0 Subscription
From: $89.00 / year
Select options
This product has multiple variants. The options may be chosen on the product page

Fudge Subscription
From: $59.00 / year
Select options
This product has multiple variants. The options may be chosen on the product page
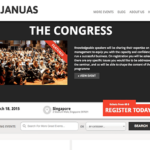
Januas Subscription
From: $79.00 / year
Select options
This product has multiple variants. The options may be chosen on the product page
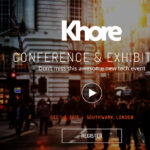
Khore Subscription
From: $79.00 / year
Select options
This product has multiple variants. The options may be chosen on the product page

OpenEvent Subscription
From: $89.00 / year
Select options
This product has multiple variants. The options may be chosen on the product page

Speakersumo Subscription
From: $89.00 / year
Select options
This product has multiple variants. The options may be chosen on the product page

Tyler Subscription
From: $89.00 / year
Select options
This product has multiple variants. The options may be chosen on the product page

Vertoh Subscription
From: $79.00 / year
Select options
This product has multiple variants. The options may be chosen on the product page
8.4 Xing Events
Xing Events is an online event registration and ticketing service. You can obtain the embed code from Xing Events by creating an event and tickets at www.amiando.com. Enter your email address to create a free account.

Fill in the sign up form, and click on ‘Start Now!’

Your dashboard will appear. Click on ‘Create your Event!’

Fill in your event information and then click on the Next button.

Your event is now in a draft mode. You can do all kind of tests, enter your banking information, and choose payment options. While in the draft mode, you need to click on Ticket Sale presentation in the left hand sidebar and switch from Registration Form to Ticket Sale Presentation form.
It is important to do this as you can only do that while your event is in the draft mode. When you are ready click on ‘Activate event’.

If you haven’t already provided your banking information, then you will be asked to provide it now. After that your event will be activated.
Now you need to click on the Integration tab under Edit Event from sidebar on your left. Make sure that the module dropdown shows “Order tickets (Ticket sales)” and copy the HTML code.

Copy this shortcode, as you will need it in the next step. To display the ticket registration on your page, enter your shortcut code in the content builder registration element on your page as outlined in 6.4 Content Builder – Registration.
8.5 – Ticket Tailor
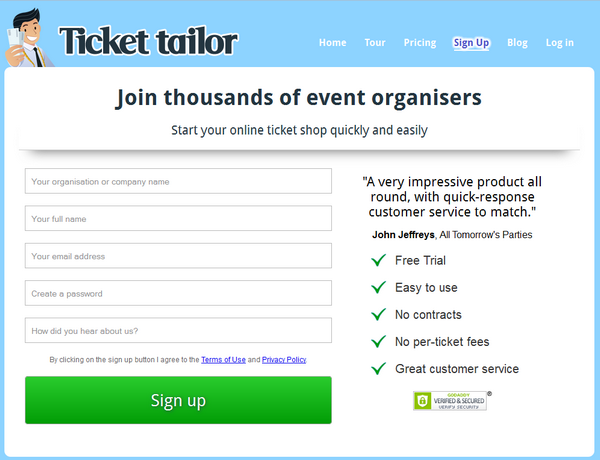
Ticket Tailor is a reliable and user friendly ticketing system with no per-ticket costs or commission fees.
Embed codes will painlessly add our ticketing widget to your WordPress site. They can be accessed as soon as you’ve created an event and listed some tickets at www.tickettailor.com.
To open your free account, click ‘Sign Up’ and enter your details.
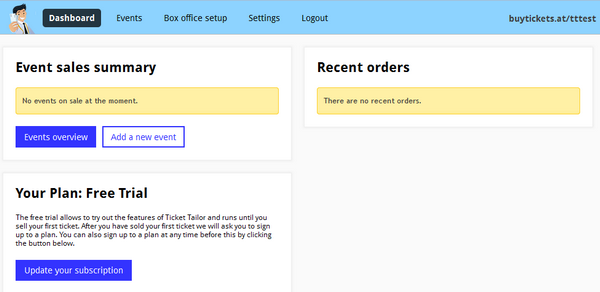
After signing up, you can click ‘Add a new event‘ on the dashboard to start creating your first event.
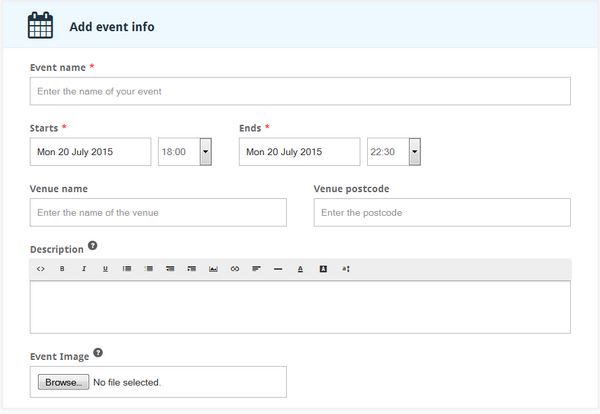
On this page you will be able to add your event details, including start and finish times, an event description and postcode.
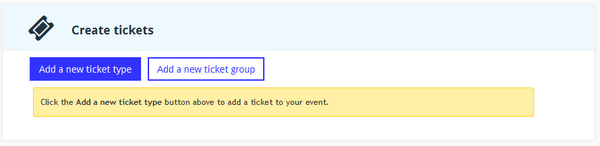
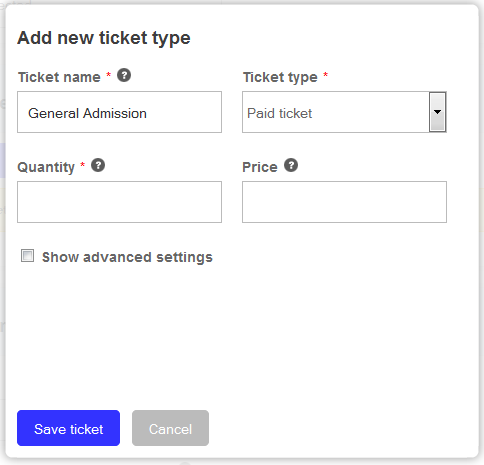
Further down you’re able to create ticket types and customise them.
Ticket groups can also be used to separate types by time or date. Click ‘Add a new ticket type‘ to get started.
Several advanced settings are available for tickets, including ticket descriptions, the ability to add additional fees and to allocate minimum purchase amounts. Make sure to allocate a quantity of tickets for sale!
Click ‘Save ticket‘ when you’re done.
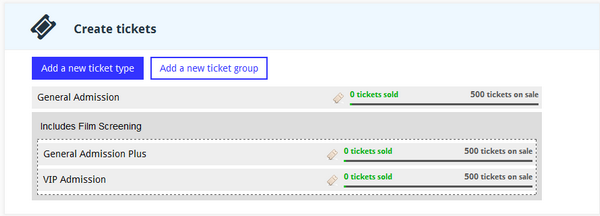
In this example there are three ticket types, two of which have been put into a ticket group. This way customers will know that the optional film screening is only available on some tickets.
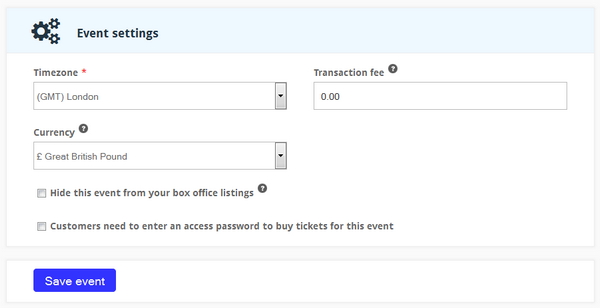
The last section of this page allows organisers to change which currency they wish to use for ticket sales, in addition to other options. Save your event to continue.
After saving your changes, you will be taken to the summary page for your new event. Here you can access a variety of other options. Documentation for these can be found here.

From here you can click ‘Website embed codes‘ on the left bar and click the ‘Directions’ drop-down to access the responsive WordPress widget.
First, install the WordPress plugin. The short-code can then be added to the ‘Registration Embed Code’ field of the theme’s registration widget, or placed (by itself) anywhere on your site.
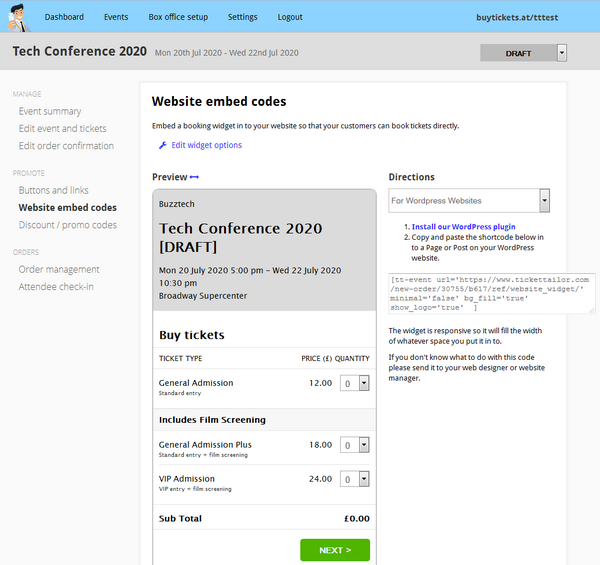
If there are paid ticket types listed for your event, you will need to set up a payment system before the event can be made live. The ‘[DRAFT]’ notice will automatically disappear when you open sales.
To set up a payment system, navigate back to the ‘Event summary‘ page and click ‘Add a new payment system‘.
You can pick between Stripe and PayPal, or use both as you please. A comparison of each is available here.
Once you have set up an account and selected a payment system, you can put the event on sale, or close it later, from the same page.
Remember that this is only a quick start guide to the Ticket Tailor WordPress widget. For a more thorough description of the other customisation features offered by Ticket Tailor, please refer to the help documentation here.
8.6 – Tickera
9 Best practices and Tips
We suggest to follow our directions and use the sections as instructed. Using the sections in different ways may result in compromising the layout. We won’t be able to help in that case. Install as few Plugins as possible.
Mondree is a very flexible theme that should fulfill all your needs. We custom developed all the different functions. There are no plugins requirements. The performance of your theme is strictly linked to installing as few plugins as possible and to respecting the section purposes.
We remind you we do not offer support or fixes when external plugins are installed. If you install them you do at your own risk. Do backup always. Before making any changes do run a backup. We have a long history of customers losing their work because they did not back up.
10 Language Integration
Here is a tutorial on how to change the language of your WordPress site.
If you want to edit the language files we provided, we suggest to use a free software called Poedit. Here is a comprehensive tutorial on how to do it.
The language files are located in /languages You will need to save the files here once edited.