This tutorial is to set up Tickera. Tickera is a powerful plugin to sell event tickets on your site.
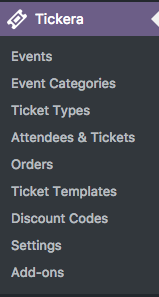
After installing the Tickera plugin, a new menu item will be available in your dashboard:
You can go ahead and create your ‘Events’, clicking on the related menu item.
After clicking you’ll be redirected to the Events section that lists all your events:

To add a new Event, please click on “Create New”. The following page will appear:
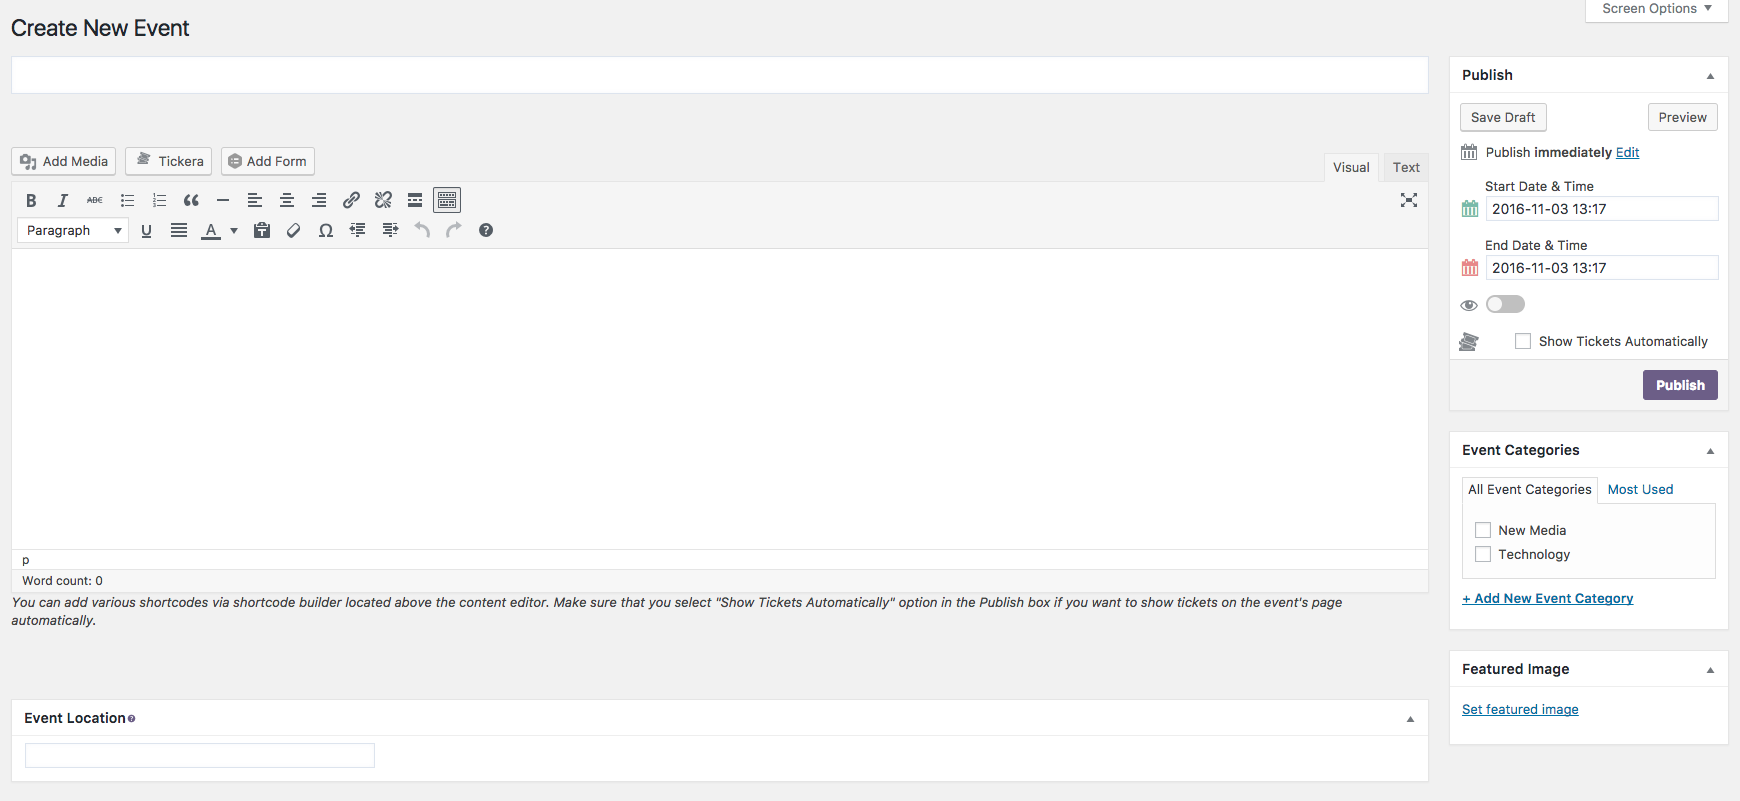
- 1 – Give your event a title.
- 2 – Add the start and end date/times, in the right column of the page.
- 3 – Add a short description about the event.
- 4 – Make the event visible by swiping the “eye” icon in the right column
- 5 – Add the location of the event.
- 6 – Clik on Publish.
Now it’s time to create your tickets.
Click on “Ticket Types” in the Tickera menu. After that click on “Create New” in the page you’re redirected to:
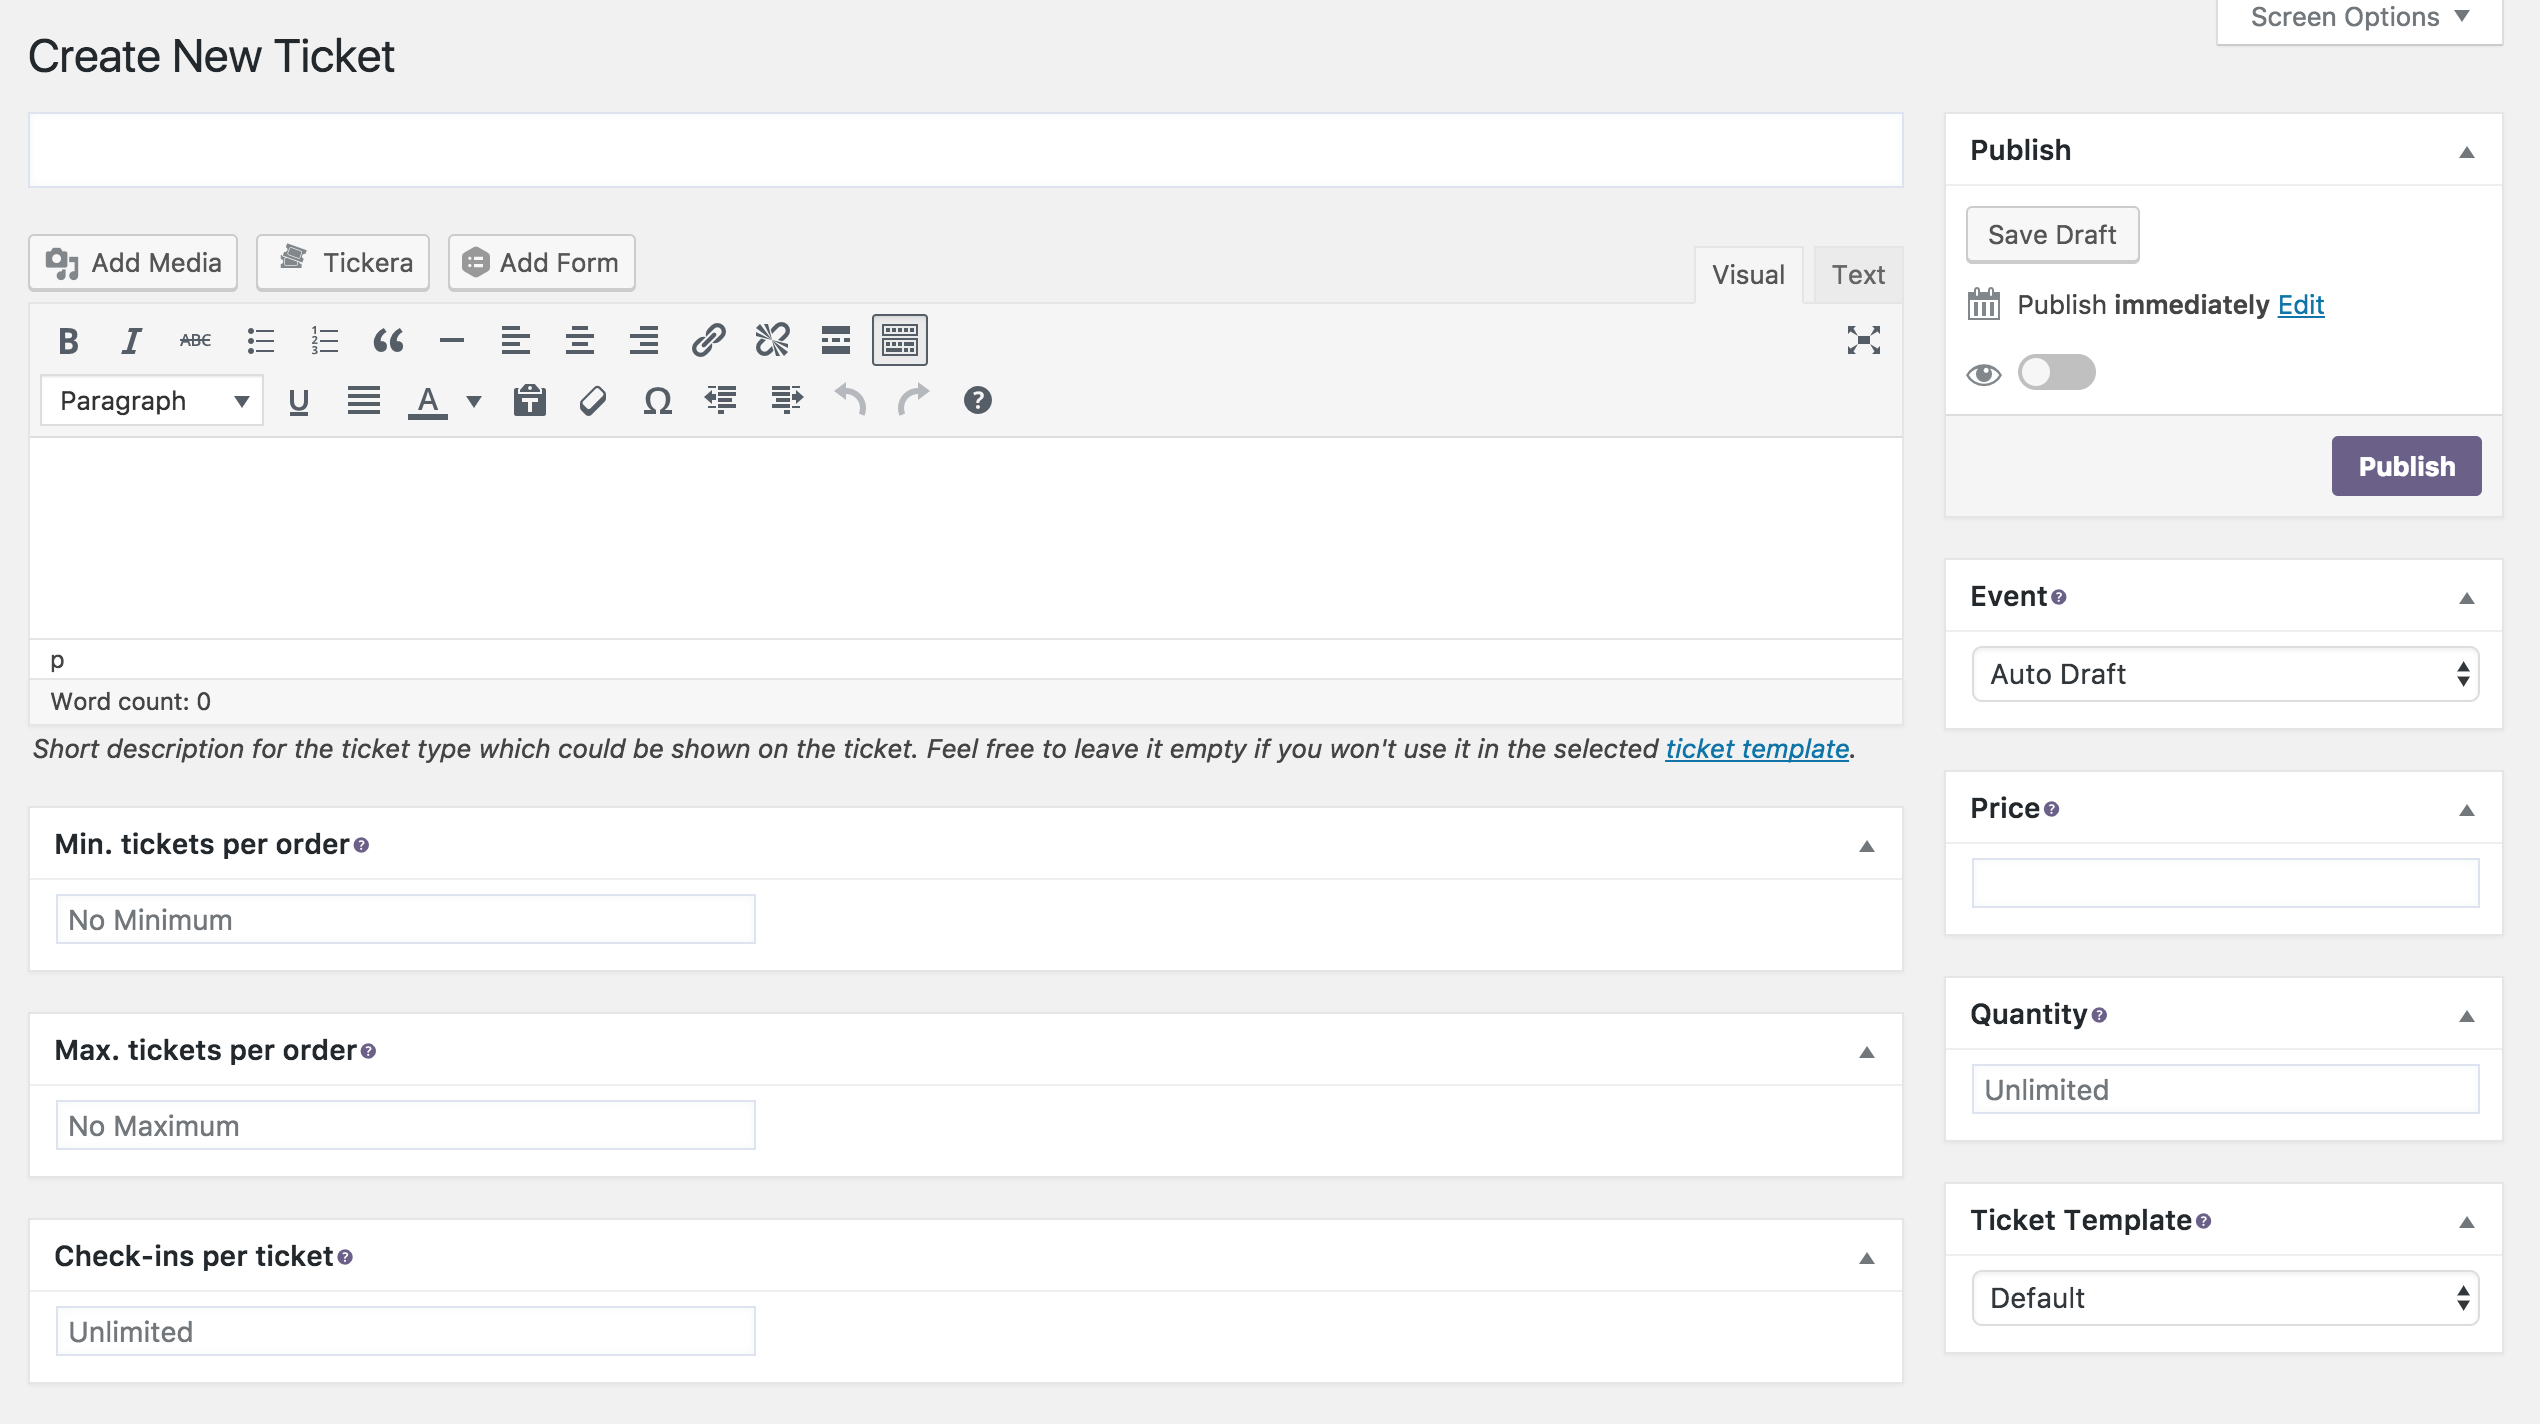
- 1 – Give your ticket a title.
- 2 – Add a short description about the event.
- 4 – Associate the ticket to your previously created event selecting it in the Event dropdownlist in the right column of the page.
- 5 – Add a price and quantity for your event.
- 6 – Swipe the “eye” icon in the right box to make the ticket visible.
- 7 – Click on Publish.
That’s all.
To display the ticket registration on your page, enter the shortcode [tc_event id=”ticket_id” quantity=”true”] in your Registration component. Please be sure to replace ticket_id with the actual id of your event.